Purpose: Learn how to install the Sendcloud Print Client App so you can automatically print labels and other shipping documents, such as packing slips or combined packing slip + shipping label documents, using your label printer or standard laser printer.
What (label) printer can I use to print labels?
- You can use a normal (laser)printer or a dedicated label printer. For a regular (laser)printer, you can use A4 sticker sheets, which you will find, for example, at Rajapack.
- The label printer that we recommend is the Euro-Label EL-1180. You can install multiple drivers for this to print labels properly. With the code "SendCloud-494107" you get a 5% discount on Euro label.
For help setting up your Euro-label printer, continue reading.
Connect your printer to Sendcloud
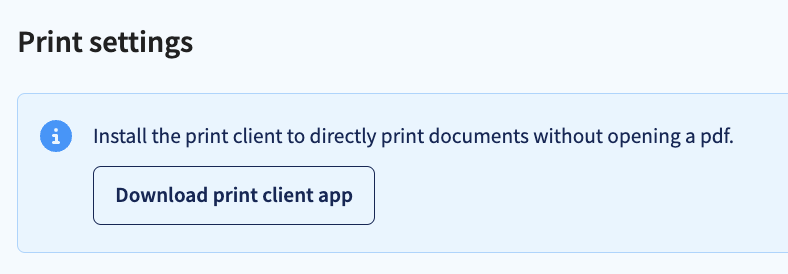
You can connect your printer to Sendcloud by downloading our dedicated print client app.
Once the app is installed, as soon as you click "create labels" while processing your orders, they will be printed automatically without you having to download and save the labels on a PDF document first.
The Print Client App does three things:
Connects your computer directly to Sendcloud, enabling seamless communication between your system and the platform
Controls how labels and documents are printed, including printer selection and print settings
Automatically prints labels and other shipping documents as soon as they are created, without requiring you to download or open PDF files
Our app is easy to install and compatible with Chrome and Firefox. Follow the instructions below to configure your printer settings.
How to download and install the print client app
Step 1: Download the print client app
Navigate to Shipping > Printing options and click "Download the print client" to begin downloading and installing the app.
Step 2: Follow the installation wizard
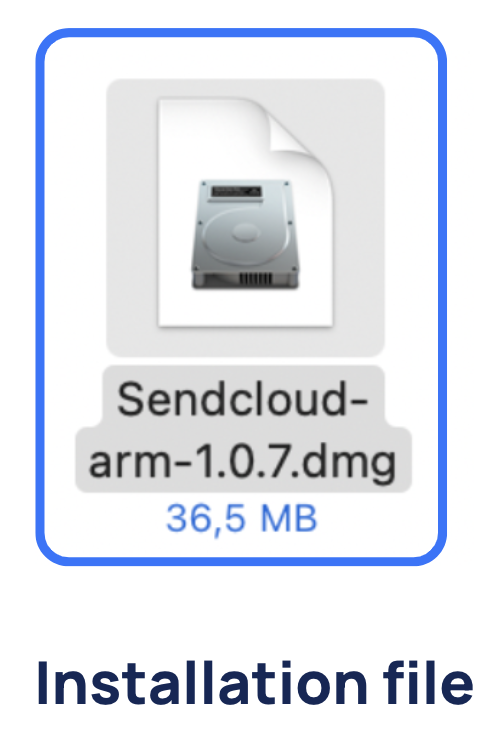
On MacOS: Click on the installation file, and then drag and drop the Sendcloud icon in the Applications folder as shown below.
On Windows: Install the Sendcloud app by opening the downloaded file. The installation wizard will guide you through the process.
The app will open and run in the background of your laptop or computer. Its purpose is to connect your device and your Sendcloud account. It's safe to use and discreet; there's no need to open the application after installation, or before printing, and it will automatically start when you turn on your computer.
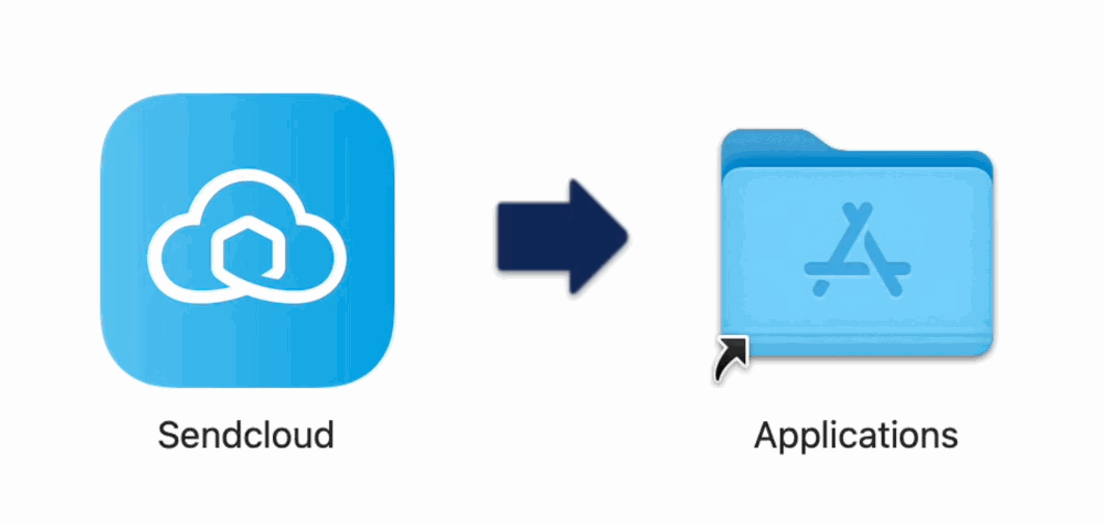
After installing the client, make sure it's running correctly in the background. You can do this on Windows computers by clicking the arrow to show hidden icons in your desktop tray. The Sendcloud logo should be visible as shown below. On macOS, you will see the Sendcloud logo in the upper-right corner.
Update or Remove the print client app
Need to remove or update the print client?
If you see a message indicating that the app is out of date, you need to remove the print app and reinstall it. Follow the steps here (Windows). Click here for the Apple instructions for how to delete an app for OS.
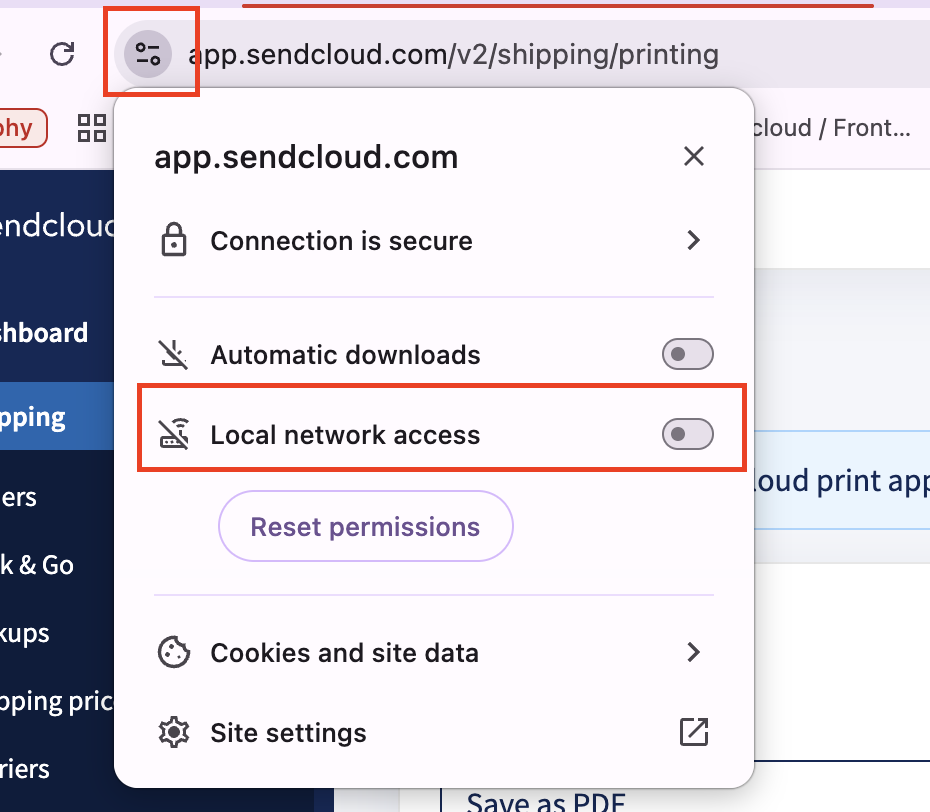
Print App not recognized in the Sendcloud Panel: enable Local network access
If your Sendcloud Print App is installed and running, but the Sendcloud Panel still shows it as “Not connected”, the issue may be caused by your browser blocking communication with the app.
This happens when the browser does not allow access to the localhost network, which is required for the Sendcloud Panel to communicate with the Print App.
Solution: Enable Local network access
To fix this issue, you need to allow Local network access for the Sendcloud website in your browser’s site permissions. This will allow the panel to detect the Print App installed on your computer.
Follow these steps:
- Click the Site controls icon next to the address bar (as shown in the screenshot below).
- Find the option Local network access and toggle it ON.
- If prompted, click Reset permissions to re-enable access.
- Refresh the page.
After enabling Local network access
- Refresh the Sendcloud Panel: the Print App should now appear as Connected.
- If it still shows as disconnected, quit and restart the Print App, then refresh the page again.
Printer settings
In Sendcloud
Once the print client app is installed, navigate back to Shipping > Printing options in your Sendcloud account.
Label printer settings
- Select a printer for your labels
- Choose your label format: A4 (where should the label start printing) or A6 (full page)
-
If you want the printer options to show before printing, select
the
checkbox

Packing slip printer settings
- Select a printer for your packing slips
- Choose the paper format for your packing slips: A4 or A6
-
Optionally, choose whether print options should be shown before
printing
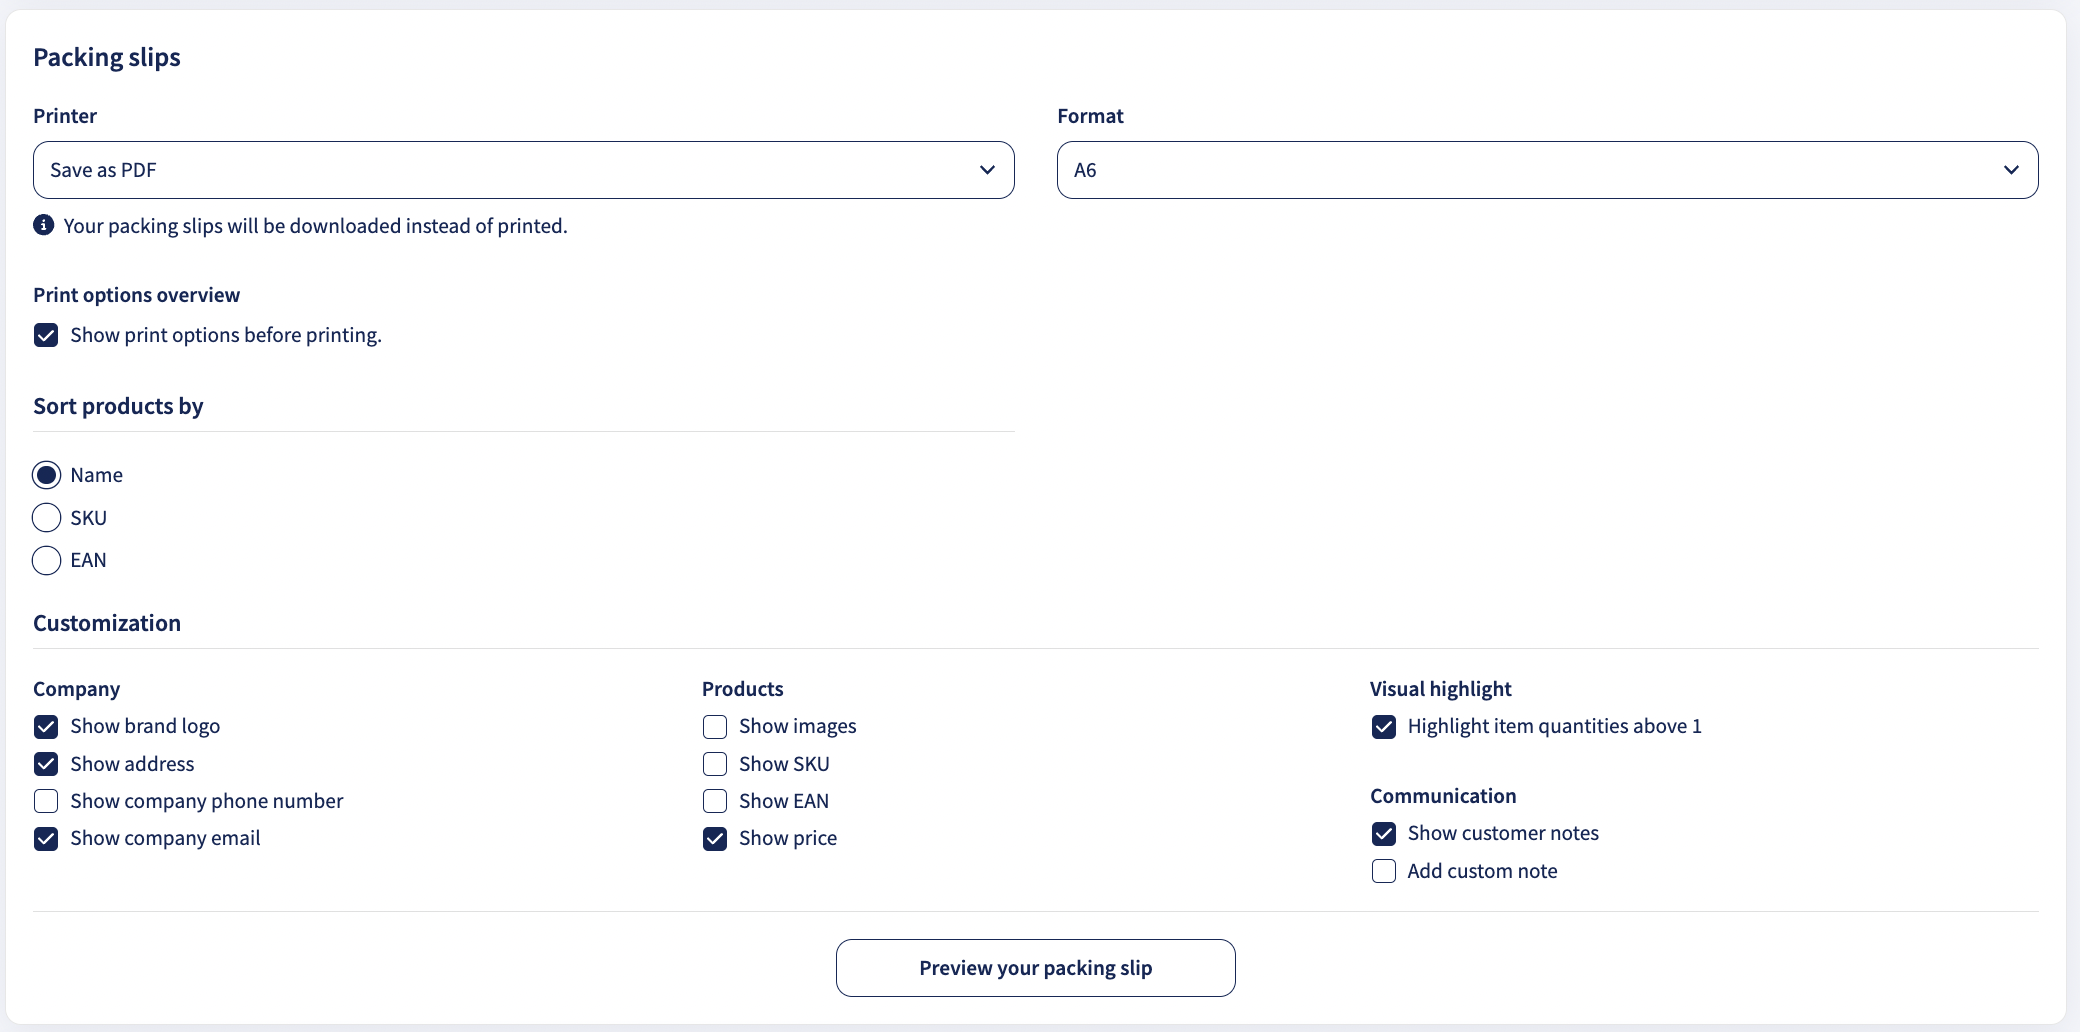
* These printer settings also apply when printing packing slips together with shipping labels.
Picking list printer settings
- Select a printer for your Picking lists
-
If you want the printer options to show before printing, select
the
checkbox

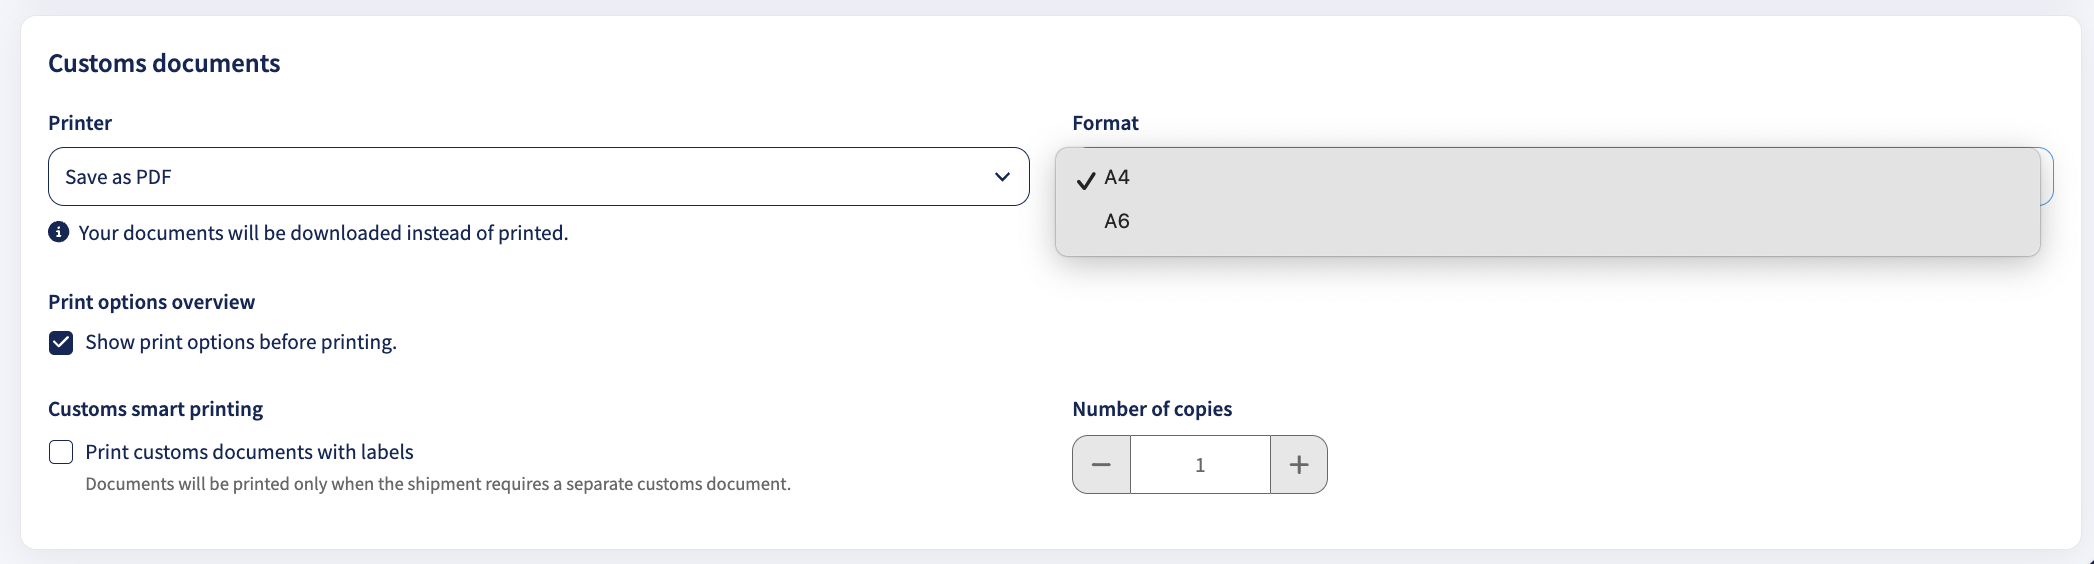
Customs document printer settings
- If you want the customs documents to be printed at the same time as your labels, select the check box
- Select a printer for your Customs documents
- Select the format of your customs documents: A4 or A6
-
If you want the printer options to show before printing, select
the
checkbox
From now on, your labels will automatically print when you hit the print button in your 'incoming order' overview. Easy!
In the Print Client App
The actual print layout, such as label size, margins, DPI, orientation, and barcode quality, is configured in the Print Client App.
If your labels are cut off, too small/large, misaligned, or blurry, adjust the printer configuration in the Print Client App.
A4 vs. A6 Print Formats
This section provides detailed guidance on A4 and A6 label printing to help you choose the best format for your needs.
When you print labels or shipping documents with Sendcloud, you must choose a print format: A4 or A6.
Choosing the wrong format is one of the most common reasons why labels print too small, too large, or incorrectly.
• Choose A4 if you print labels on a normal (laser) printer on sticker sheets.
• Choose A6 if you use a dedicated label printer (4x6 / 10x15 cm).
• This format selection also applies when printing packing slips together with shipping labels.
Which format should I use?
- A4 – for printing multiple labels on one sheet using a (laser) printer.
- A6 – for printing one full-page label (usually on a label printer).
A4 labels
A4 labels are ideal for standard laser printers and come in two formats: A4x8 (BRT only) and A4x4, allowing multiple labels to be printed on a single sheet.
Starting Point Selection:
You can specify the starting position for printing labels to optimize label usage and avoid waste.
For A4x4: Choose from 4 positions (1, 2, 3, or 4) for sheets with 4 labels. This helps avoid wasting unused sections of the sheet:
A4x8 (BRT labels only)
Select from 8 positions to decide where printing begins.
More info about BRT A4x8 here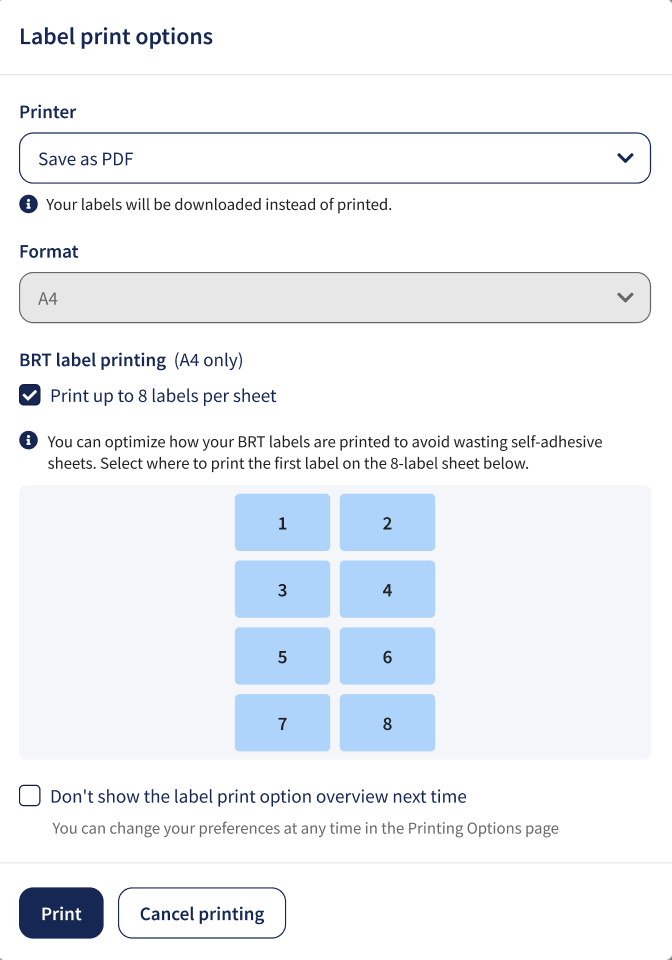
A6 labels
A6 prints one label per page.
- Full-page labels are typically used with label printers like the Euro-Label EL-1180.
- No starting point selection is necessary for this format, as it uses a single label per sheet.
A6 size reminder:
A6 labels are usually 105 × 148 mm, also called 4x6 inches.
If you select A6 and your label looks wrong:
- Check the DPI in the Print Client App
- Make sure scaling is disabled
- Use margins to move the label instead of resizing it
Creating Return Labels
With Sendcloud, you can easily create return labels and include them in your shipping process. There are multiple ways to generate and customize return labels, such as creating pre-printed labels, using the "Return label in box" feature, or printing them directly from the Incoming Order/Returns Overview.
Ways to create and customize return labels
- Pre-printed Return Labels: Create return labels along with your shipping labels. You can set a default return shipping method and print labels in bulk from your order overview. Learn more about creating pre-printed return labels.
- Return Label in Box: Generate return labels directly from the Pack & Go feature, allowing you to print both outbound and return labels in one step. Find out how to use Return label in box.
- Return Label Customization: You can adjust print settings for return labels, including choosing the printer and format (A4 or A6). See how to customize return label print settings.
- Shipping Rules for Return Labels: You can set up shipping rules to automatically assign a return shipping method for your "Return label in box" feature, streamlining the return process even further. Learn how to assign return label shipping methods via shipping rules.
- QR Code on Packing Slips: Enhance the return process by adding a QR code or custom URL link to your packing slip. Customers can easily initiate the return process by scanning the QR code, or you can provide a custom link for return instructions or labels. Find out how to add a QR code or custom link to your packing slips.
For more detailed instructions on creating and customizing your return labels, check out the full article.
How do I install my label printer?
Install Euro-Label EL-1180 on Windows
- Disconnect your thermal printer
- Install driver at the official website. Make sure you select the right model to find the correct driver
- Connect back your Euro-Label EL-1180 printer via USB, and your computer will automatically match this printer to the downloaded driver
Configure the default settings of a Euro-Label EL-1180 Printer on Windows
- Go to your computer's Control Panel > View Devices & Printers > Right click your thermal printer > Click
Printing Preferences - Set orientation as Portrait on the Printing Preferences popup
- Click Advanced > Set Paper Size to 1744907 4 in x 6 and set Print Quality to Barcodes and Graphics > click OK.
- Click Apply and Ok