
Purpose: Learn the different ways to create a return label in Sendcloud: manually, from an outgoing shipment, or via the return portal.
You can create a return label for your customer yourself, or let your customer create one in your return portal. There are four ways to create a return in Sendcloud:
- Create a return manually
- Create a return for an outgoing shipment
- Create a return for an outgoing shipment via the return portal
- Let your customer create a return via the return portal
How to create a return manually
Use the return form when your return portal isn't activated, or when the original shipment wasn't created in Sendcloud. To open the form, go to Returns > Overview and click + New return.
Fill in the form from top to bottom. The Summary on the right side updates with your details and shows the indicative price of the label.
Step 1 Fill in your shipment details
In Your shipment, fill in:
- Return address: the address the parcel is sent back to. To add a return address, go to Settings > Addresses.
- Incoming order number (optional): the order number of the original order, so you can match the return to it later.
Step 2 Select a brand
If you use more than one brand, select the brand this return belongs to in Select a brand. To learn more about brands, see How to set up your brand.
Step 3 Enter the customer's details
In Customer information, under Sender (original receiver), enter the details of the customer who received the order and is sending it back.
If you saved this customer before, select them from the dropdown, or search by name or address. Their details are then filled in for you.
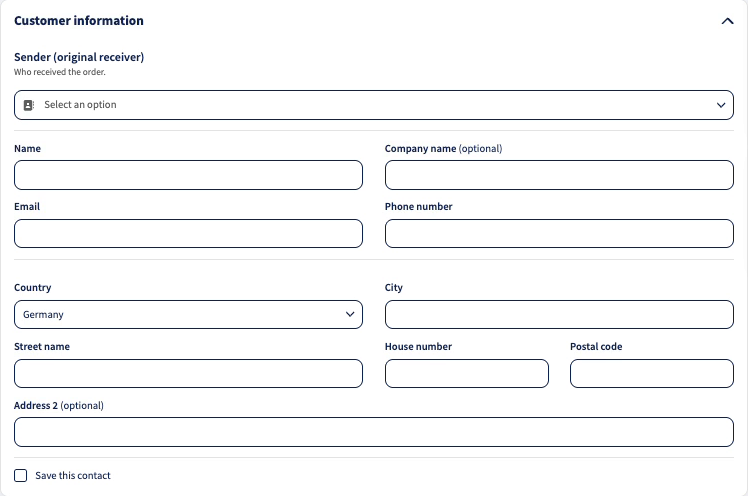
If the customer's country requires customs documents, extra customs fields appear in this section. See How to create an international (outside EU) return in Sendcloud.
Step 4 Add the parcel and the returned items
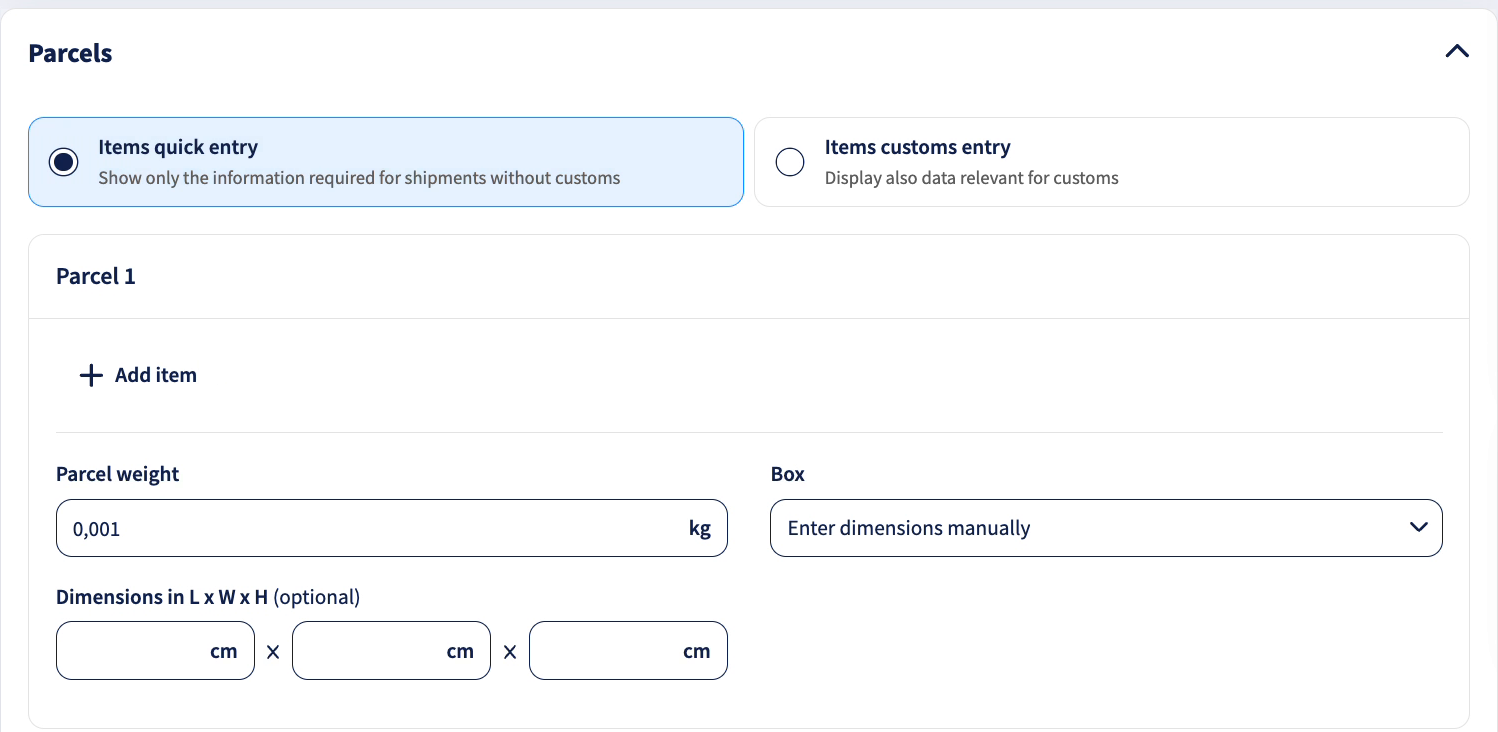
In Parcels, describe what the customer is sending back:
- Choose Items quick entry to fill in only the basic item details, or Items customs entry to also see the customs fields.
- Click + Add item for each returned product, and enter its description, quantity, value and weight. You can also add a return reason and the SKU. To fill in the details faster, select the product from Saved products.
- Enter the Parcel weight and, optionally, the dimensions. If you saved boxes in your settings, you can select a Box instead of entering the dimensions.
Step 5 Choose a shipping option
In Shipping options, select the shipping option for the return under Selected shipping option. The Shipping option information box shows the maximum dimensions the shipping option accepts.
If you ship with your own carrier contract, also select the contract under Select contract.
Step 6 Add shipment details (optional)
In Shipment details, you can add:
- Order currency and Total order value: the currency and value of the original order.
- Delivery notes: extra instructions for the carrier. Depending on the carrier, notes are printed on the label or sent digitally. Not every carrier supports them, and some limit their length.
Step 7 Choose shipment protection
In Sendcloud Shipment Protection, choose whether to protect the return parcel against theft, loss and damage:
- Select Add shipment protection and enter the amount to protect under Sendcloud protection. The form shows the total protection per parcel and the premium.
- Select No thanks, I'll risk it to create the return without extra protection.
You need to choose one of these options before you can create the label.
Step 8 Check the summary and create the label
The Summary on the right shows the addresses, the shipping option and the number of parcels. Under Indicative total prices, you can see the estimated price of the label. Click View price breakdown to see how the price is built up. Surcharges may be added after the carrier processes the parcel.
Before you create the label, tick any of these options:
- Send return label to the customer: emails the return label to your customer.
- Print return label: prints the label right after it's created.
- Create another return: opens an empty return form after this return is created.
Click Create label.
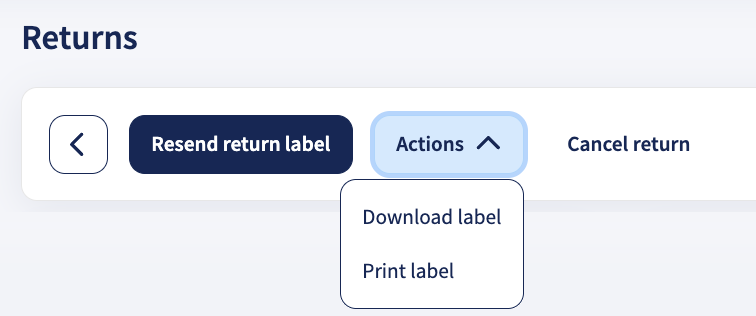
Once the label is created, go to Returns > Overview > In Transit and click the eye icon next to the return. In the return details, you can:
- Click Resend return label to email the label to your customer. Use this if you didn't tick Send return label to the customer when you created the label, or if your customer needs the label again.
- Click Actions to download or print the label.
How to create a return for an outgoing shipment
If the original shipment was created in Sendcloud, you can start the return from that shipment. The return form then opens with the customer's details and the shipped items filled in. Use this method when your return portal isn't activated, or when you want to adjust the return yourself, for example to add shipment protection.
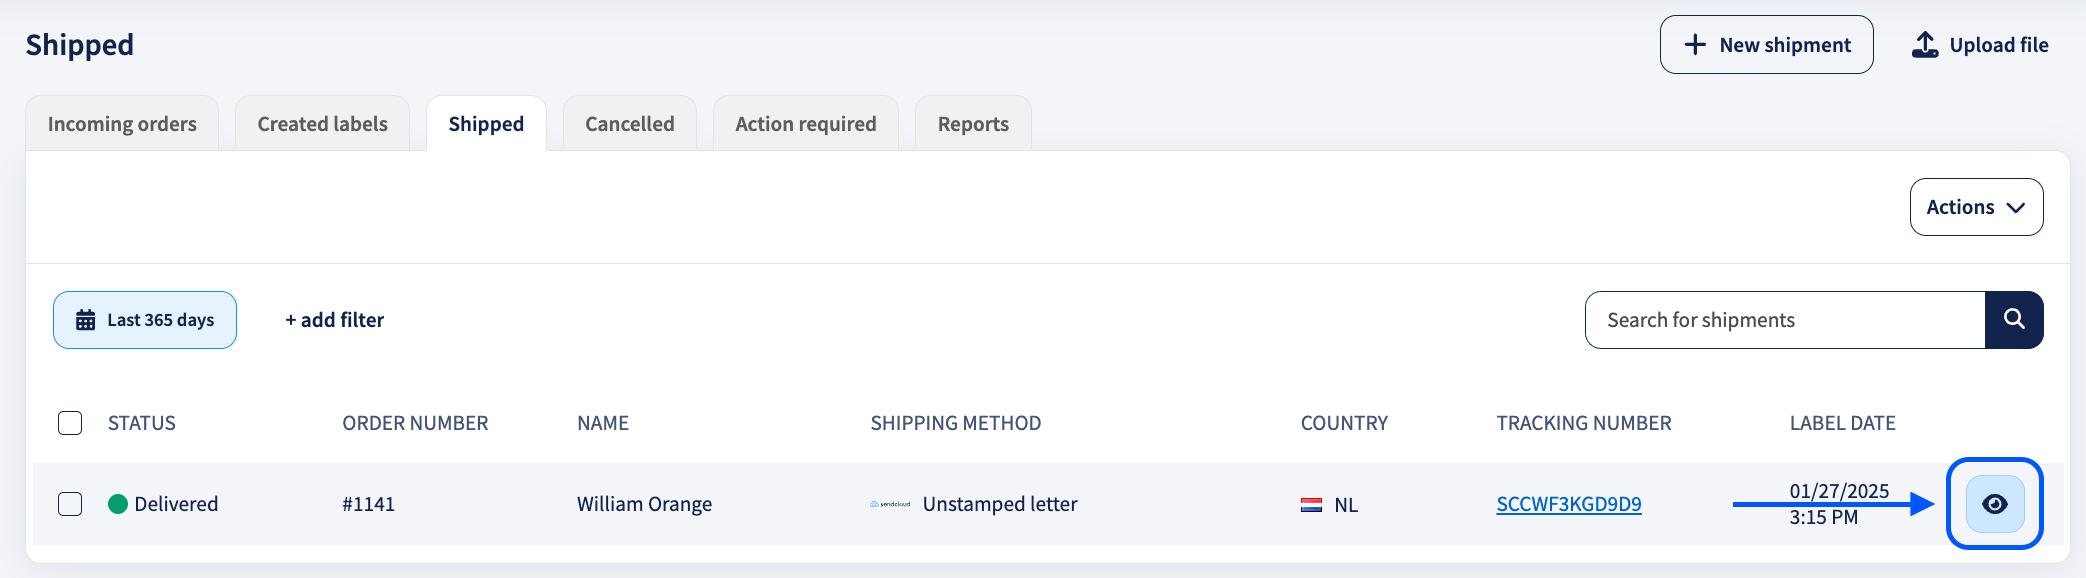
- Go to Shipping > Orders and click Shipped.
- Click the eye icon next to the order you want to create a return for.
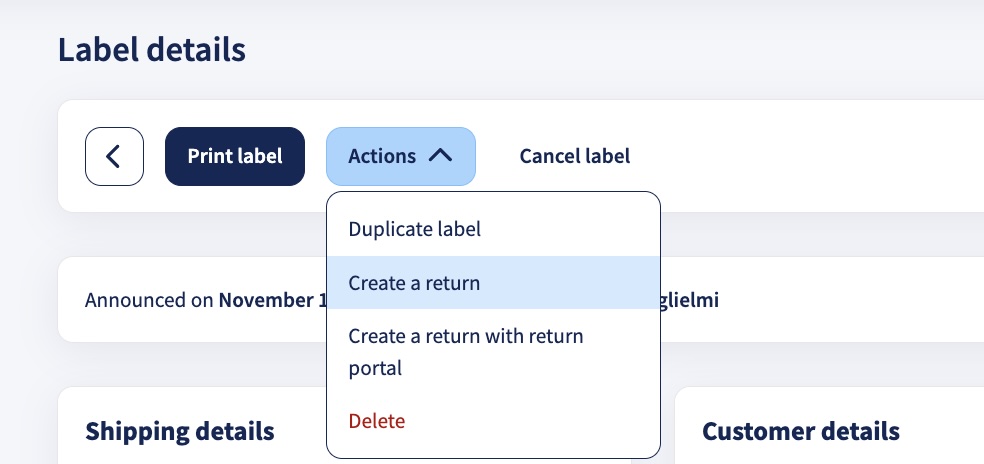
- Click Actions and select Create return.
- Check the details in the return form and change them where needed. For example, remove the items the customer is keeping.
- Choose a shipping option, as described in How to create a return manually (steps 5 to 7).
- Tick Send return label to the customer if you want your customer to receive the return label by email. Then click Create label.
How to create a return for an outgoing shipment via the return portal
If you prefer to use your return portal instead of the return form, you can start a return in the portal for your customer.
- Go to Shipping > Orders and click Shipped.
- Click the eye icon next to the order you want to create a return for.
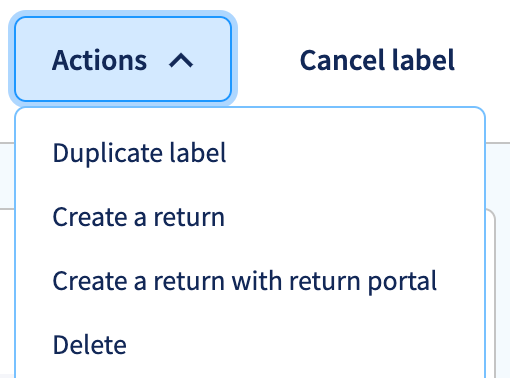
- Click Actions.
- Select Create a return with return portal from the dropdown menu.
- The return portal opens, and you can continue in the same way as your customers. See How customers can make a return via the return portal.
If you haven't activated your return portal yet, see How do I set up my return portal? To learn how to handle incoming returns, see Process your return shipments.
How customers can make a return via the return portal
When you've activated your return portal, your customers can find the link to it in their Tracking emails. You can also add the link to the terms and conditions on your webshop, or send it to customers who ask to start a return.
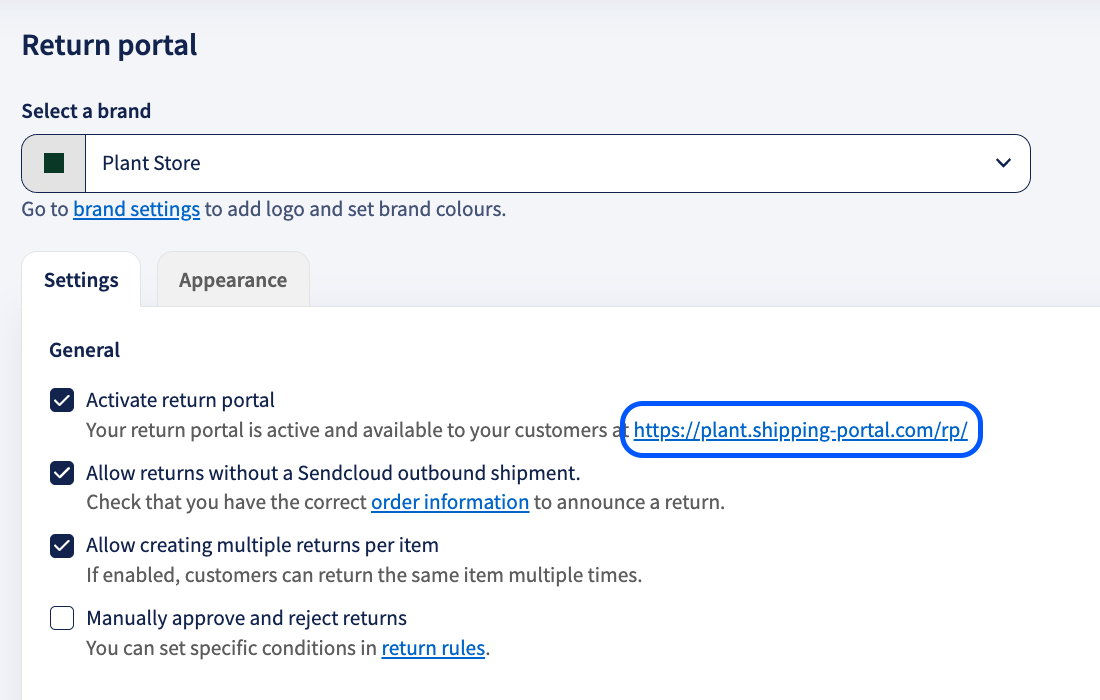
In the return portal settings, you can set how many days customers have to start a return. For example, if you select 14 days, customers can start a return up to 14 days after the parcel gets the delivery status Delivered.

Steps on how customers can make a return
Step 1: Start the return
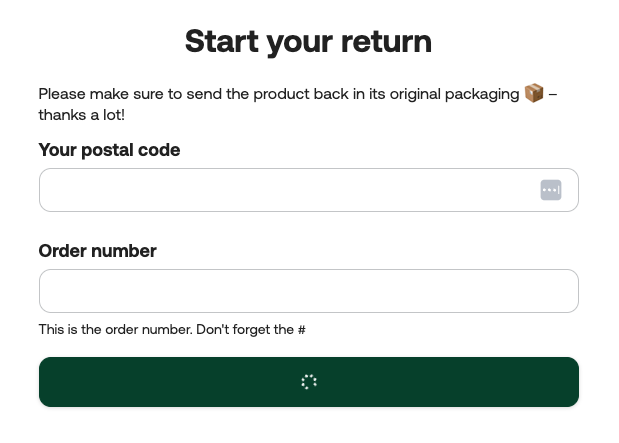
When customers open the return portal, they enter their postal code and the order number or tracking number. Once the order is found, they can start the return. Customers can find the order number and tracking number in the Tracking emails they receive after the label is created. To learn how to set these up, see how to set up your Tracking emails.
Step 2: Order details
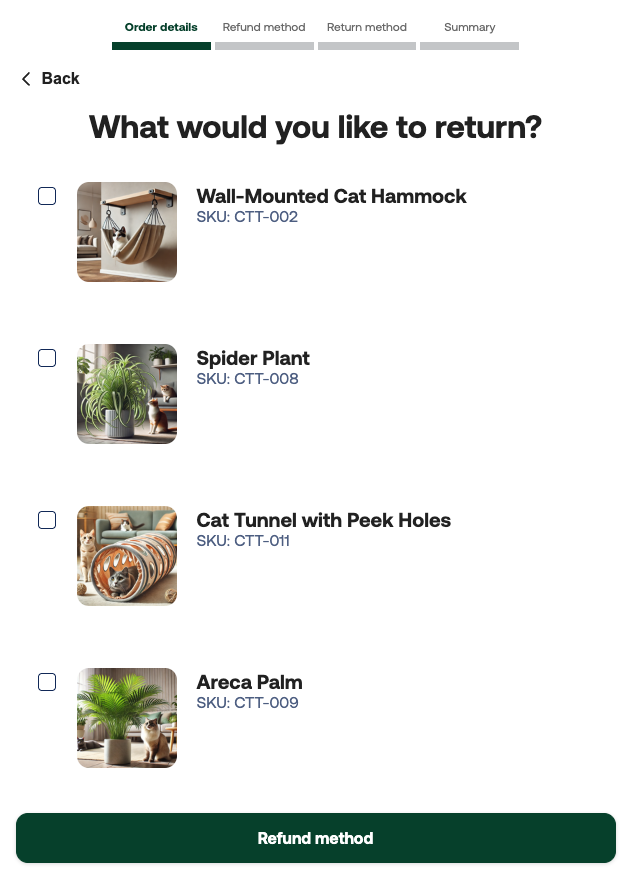
1. What would you like to return?
Customers select the products they want to return from their order. If they bought several units of the same product, they can enter how many they want to return. By default, the total number of units bought is selected.
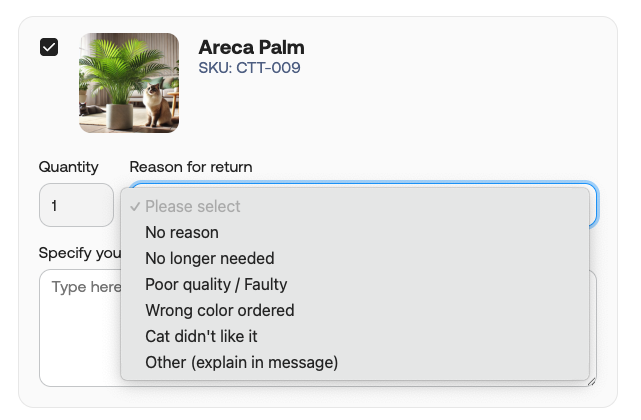
2. Why do you want to return it?
For each selected item, customers choose a return reason. If the order doesn't contain individual items, the question may appear once for the whole order instead of per item.
If none of the options apply, customers can select Other and type their own reason in the message field that appears.
You can manage which return reasons are available: use the default reasons or create your own in your return portal settings. To learn how, see How do I set up my return portal?
3. Upload an image
If your return portal is set to require manual approval, customers are asked to upload a photo of the item they're returning. This helps you assess the return reason, for example by checking visible damage.
Step 3: Choose refund method
After selecting the items, customers choose a refund method.
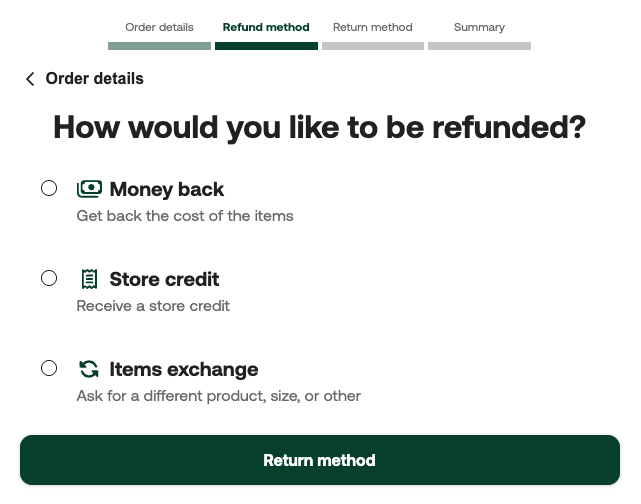
You can offer three refund methods:
- Money back: the customer is refunded the cost of the returned items. Under European law, if the whole order is returned, you also need to refund the shipping costs, if you charged them at the time of purchase.
- Store credit: the customer can order something else from your shop instead of getting their money back, so the return turns into a new sale. You can issue store credit as a discount code or a gift card.
- Exchange: the customer chooses a different product. A message field appears where they can describe what they'd like instead. You can see this in the return details in the Sendcloud panel. See Process your return shipments.
To learn how to set up refund methods, see How do I set up my return portal?
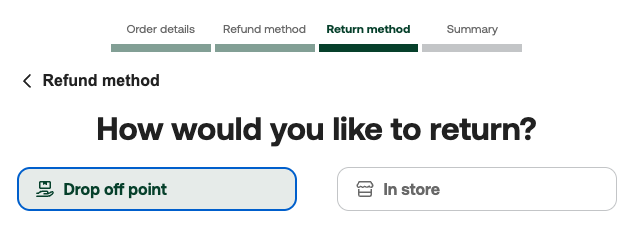
Step 4: Choose return method
Next, customers choose how to send the items back. There are two return methods: at a drop-off point, or in store.
-
At a drop-off point or at the closest postal office: customers print a return label, or use a QR code, and hand the parcel in at a drop-off point. Depending on the carriers and shipping options available, this can be a service point or a local postal office. This method creates a return label, which customers can download when they've completed the return.
The closest drop-off point is selected in the portal. To choose another one, customers click Change drop-off point and select one from the list of nearby drop-off points. You can charge a return fee for this method. To learn how, see How do I set up my return portal?
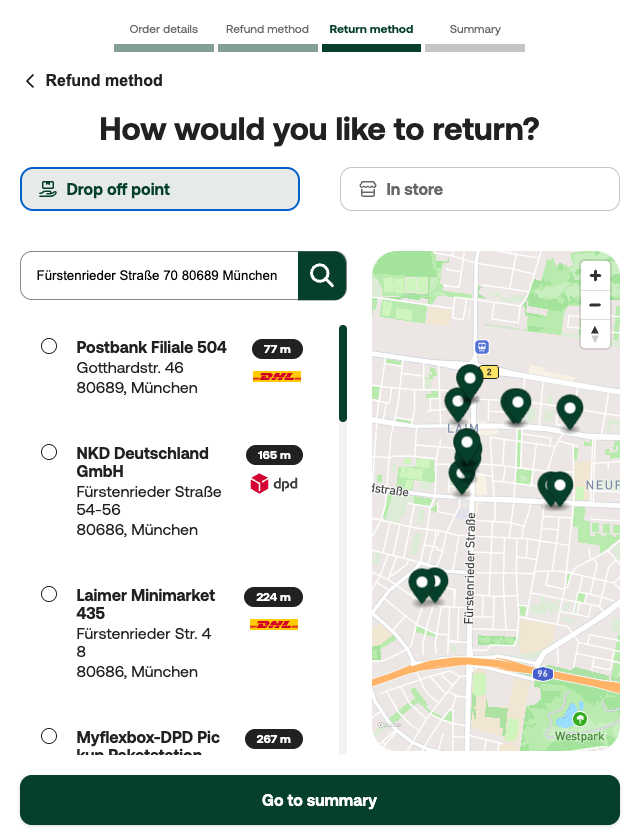
- Return in store: customers return the order in one of your stores. No return label is created, but you still see the return in the Sendcloud panel. To set up store locations, go to Settings > Addresses, open your return addresses and tick which return address is also a store location. If your store isn't one of your return addresses yet, add it as a return address first, as described in How do I set up my return portal?
Step 5: Return confirmation
In the last step, customers see a summary of their return. They can still change their choices and details here. When they confirm the summary, the return is created.
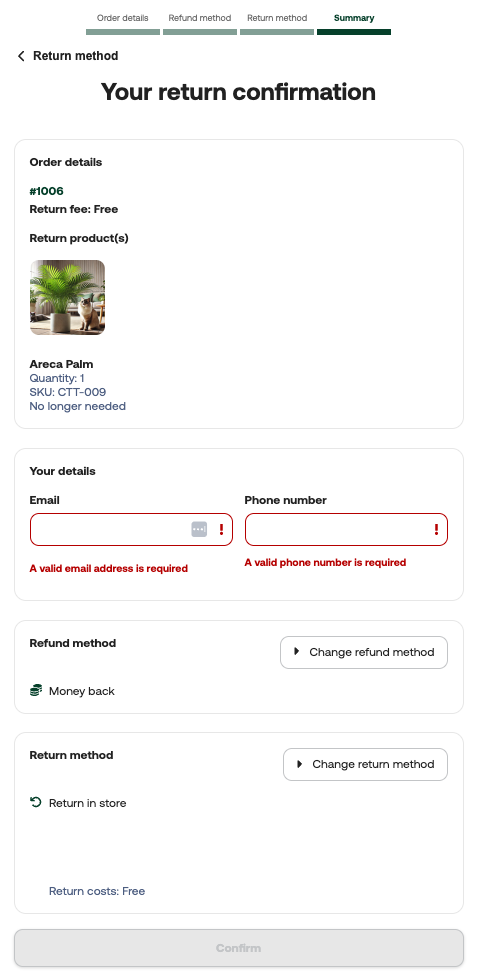
If customers chose to send the parcel back, they can download the return label. If they can't print or download it straight away, they also receive the label by email, as long as your return Tracking emails are activated. See how to activate your return Tracking emails.
Once the return is created, you can track and process it under Returns in the Sendcloud panel. See Process your return shipments.