Purpose: Learn how you can download packing slips or picking lists in Sendcloud. You can use these in combination with Pack & Go to easily process orders in your warehouse, either by hand or with a barcode scanner.
Important: Incoming orders overview update
We're currently rolling out a new version of the Incoming orders overview to a limited group of users. Because of this, your screen may look different from the screenshots or steps shown in this article. See what's changed.
How to print a picking list or a packing slip
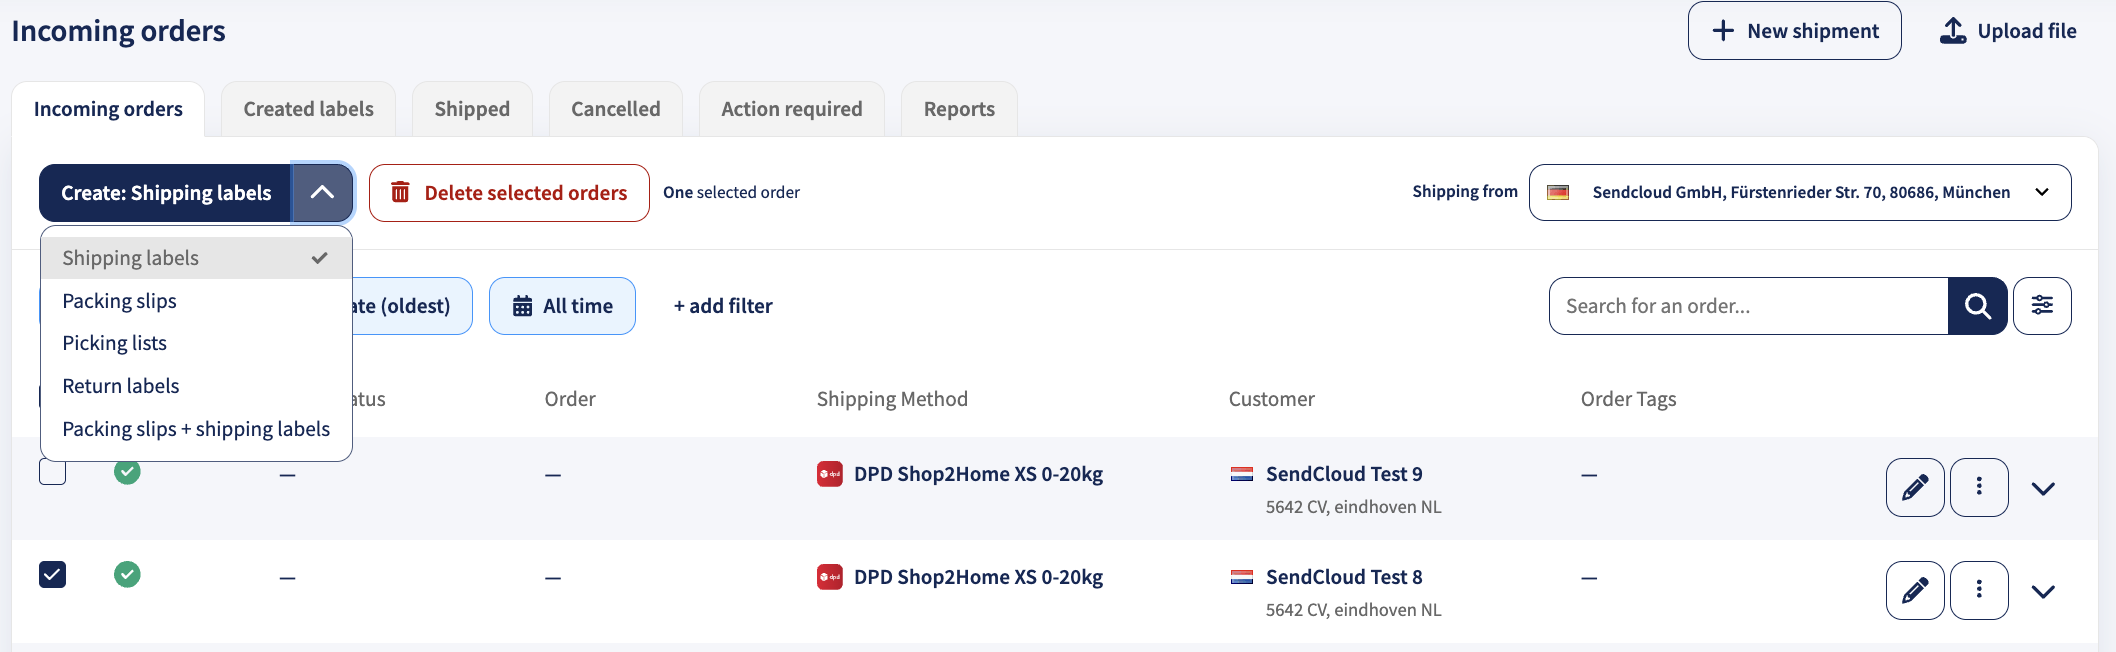
- Select your orders: To download a packing slip or picking list, select the order or multiple orders you want to create the document for using the tick boxes on the left hand-side of the Incoming orders view in Shipping > Orders.
- Print your document: Click on the blue dropdown menu Create labels and select either Packing slips, Picking lists or Packing slips + shipping labels.
How to generate a picking list or a packing slip when the order has already been processed
Even if you have already created the labels, you can still print the packing slips and picking lists. To do so, follow these steps:
- Go to Shipping > Created labels
- Select the order/s by checking the box next to them
- Click the arrow in the blue button to open a drop-down menu and select Packing slips, Picking lists or both
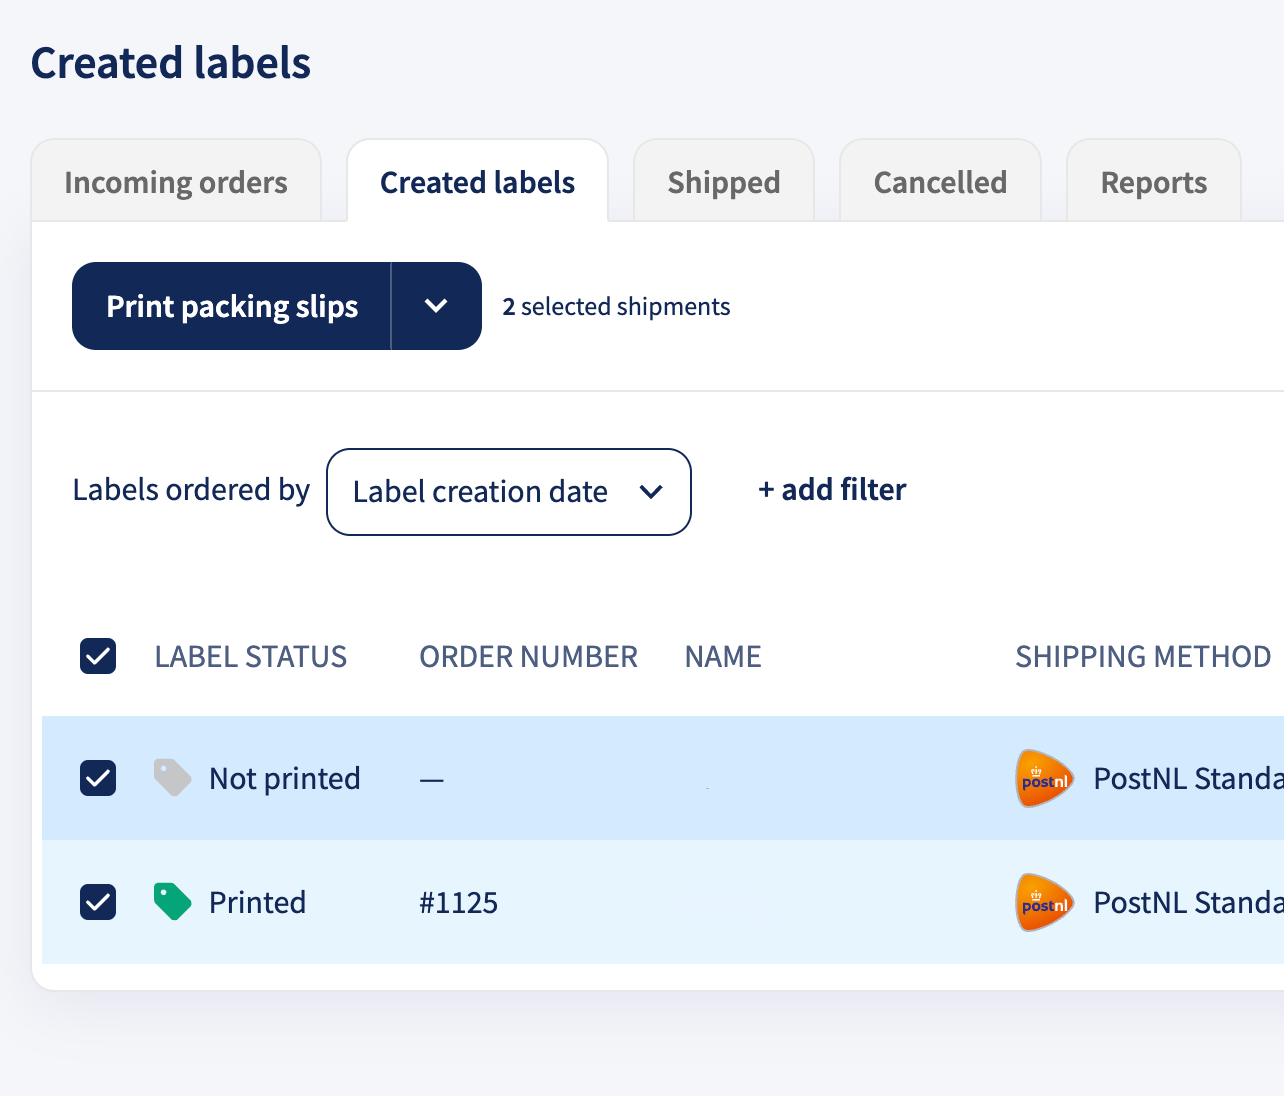
- Click Print
- Confirm that you want to proceed
Packing slips
A packing slip is a document you can include in the box when you pack an order that lists the products, SKUs (Stock Keeping Units) and quantities of a single order. Packing slips will also show your Brand logo if you have configured one, and the sender address.
When selecting one or multiple orders, packing slips are generated per order and combined into a single PDF. The paper format (A4 or A6) depends on the configuration selected in your packing slip settings (click here to see how to select your printing preferences) .
The example below shows a packing slip for a single order. Depending on your configuration, it can include your brand logo, barcode, sender and delivery addresses, the selected shipping method, as well as the product names, SKUs, and quantities.
Printing packing slips together with shipping labels
When selecting Packing slips + shipping labels, packing slips are generated together with the corresponding shipping labels in a single PDF. This allows you to print both documents in one print job, without having to manually match them afterwards.
The output format is determined by your packing slip settings:
-
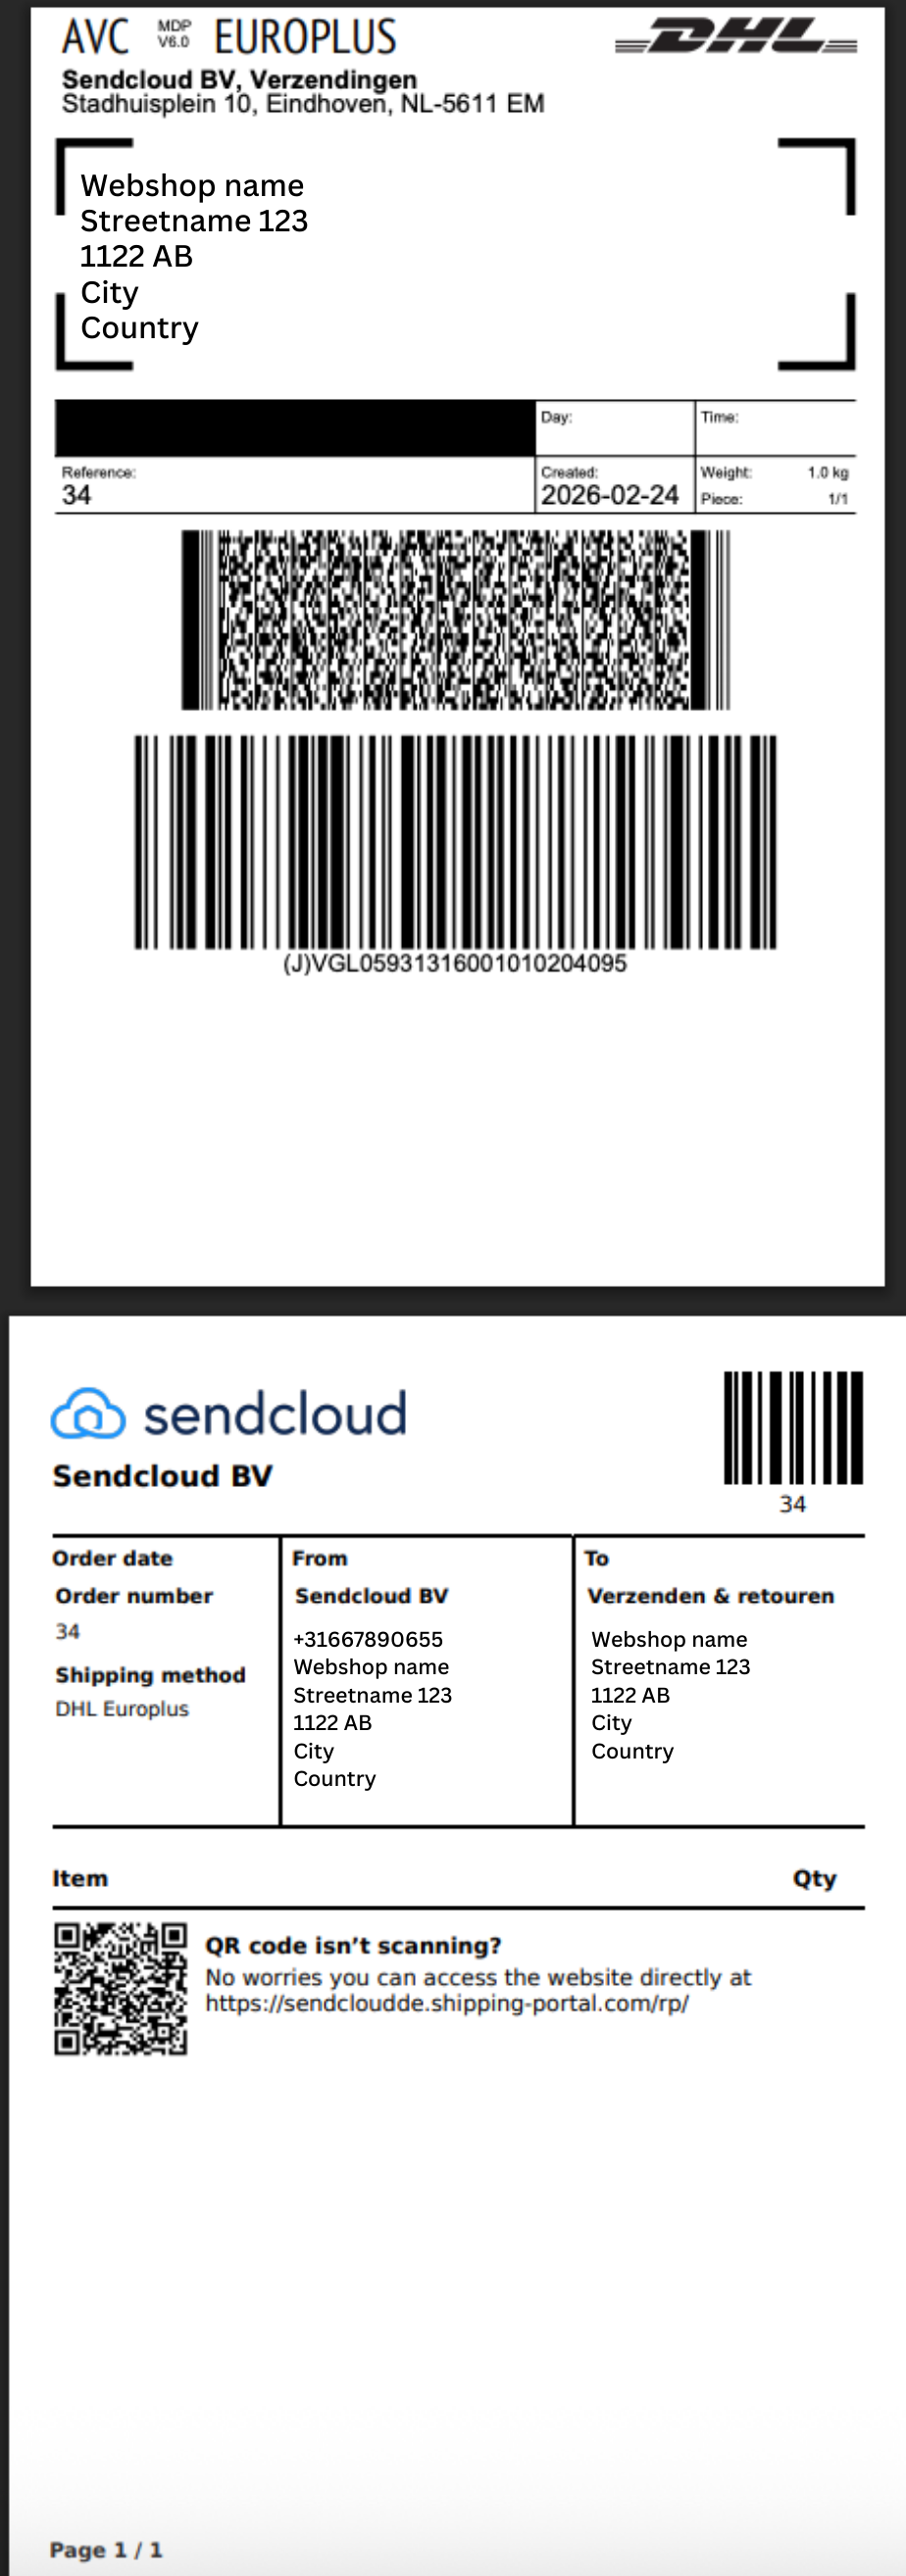
A6 format: the packing slip and shipping label are printed sequentially on separate A6 pages within the same PDF. This option is suitable for thermal label printers.
View an example of an A6 label
-
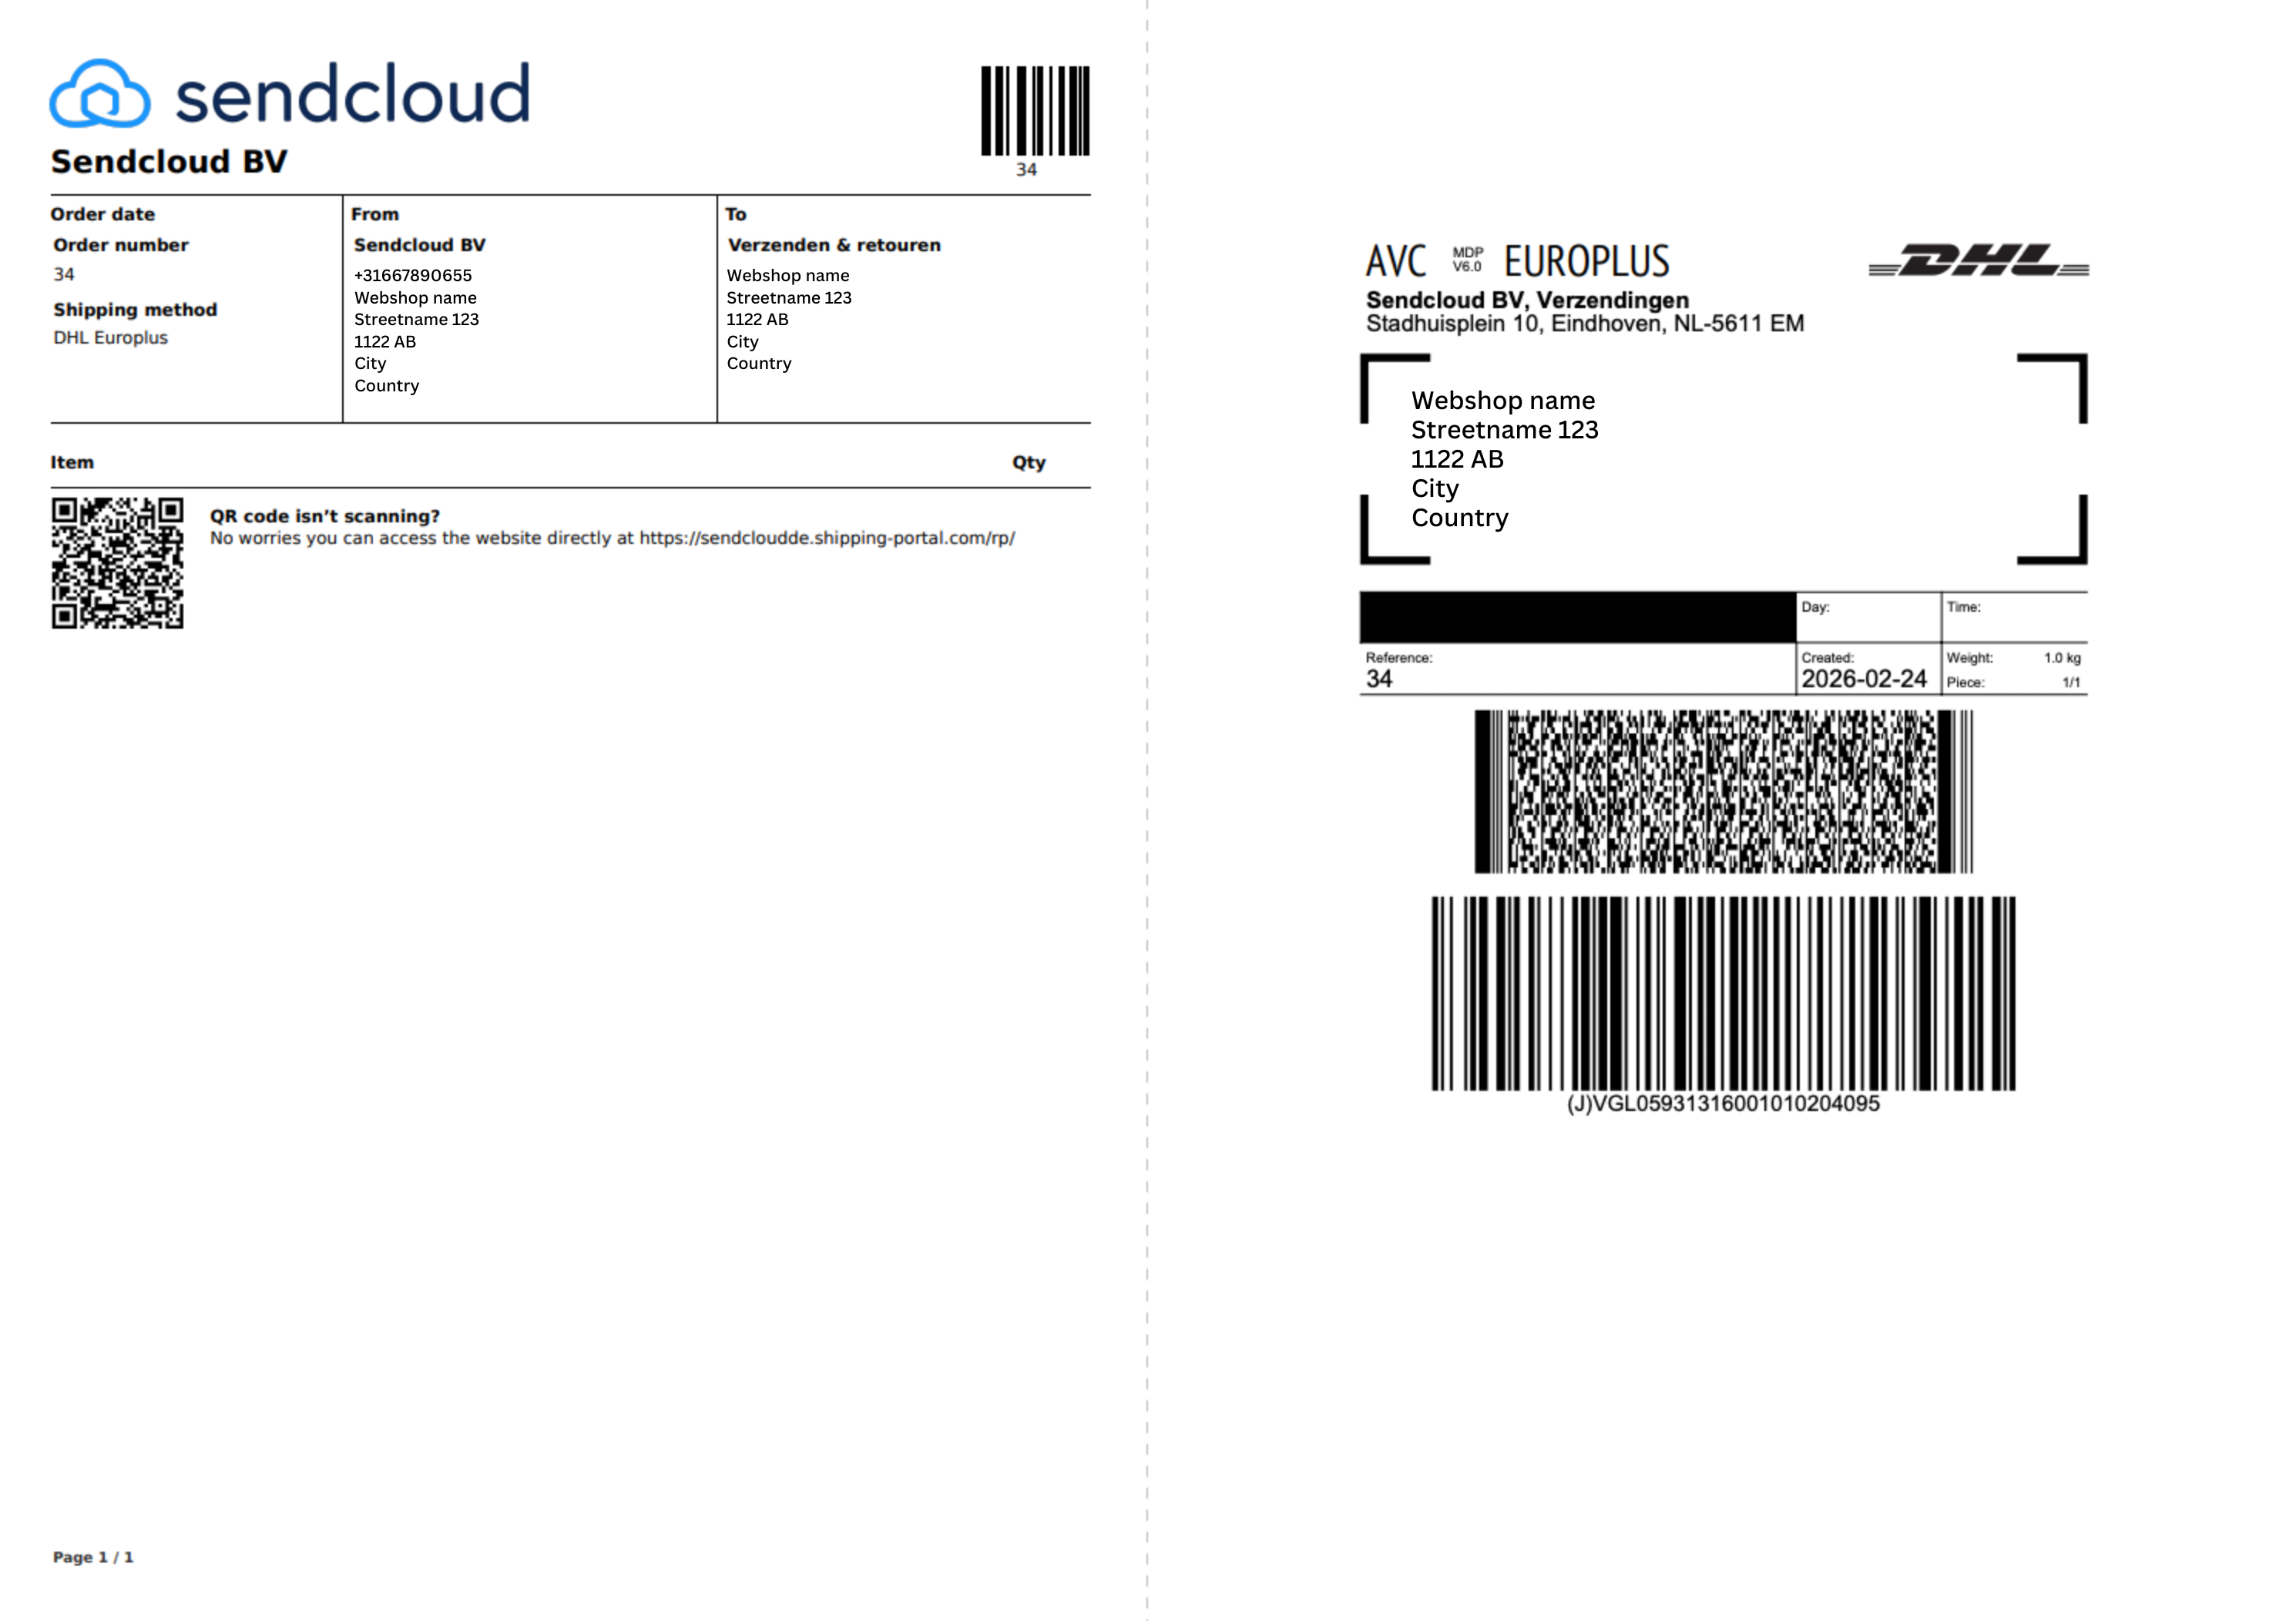
A4 format: the packing slip and shipping label are combined on the same A4 page. This option is intended for special A4 paper with an integrated label section.
View an example of an A4 label
All packing slip layout and customization settings also apply when using the Packing slips + shipping labels option.
Packing slip settings
You can customize how your packing slips are generated from Shipping > Printing options. This includes the layout, content, sorting, and paper format (A4 or A6).
When printing Packing slips + shipping labels, the combined document uses the same packing slip settings. If you select the A4 format, you can additionally configure how the shipping label is positioned on the page, such as its placement, and margins.
To learn more about how to customize your packing slips and combined packing slip + label layouts, read our article Customized packing slips.
- Sorting orders by EAN is not supported.
- When you print Packing slips + Shipping labels, the PDF orientation cannot be changed and is fixed to a single option.
Picking lists

A picking list is an internal document which shows the products, quantities and SKUs of items included in multiple orders. They are particularly useful if you have a large storage room or a warehouse, and one or more dedicated picker and packers who need to efficiently and time effectively process multiple orders a day.
If the SKU and the EAN number for a barcode are the same, only the EAN number will be shown, and the SKU number will be missing. This is intended in order to avoid repeating the same information twice, as the EAN number can take up a number of characters.
The picker/packer can print the picking list and use it to collect the required products and quantities for multiple orders at once. Once collected, the products can be taken to your packing area and divided into individual orders, ready for shipping.
View an example of a picking list with three selected orders
Whether you choose to pack individual orders based on packing slips, or process multiple orders at once with a picking list, both of these documents contain a barcode which can be used in conjunction with a barcode scanner.
Barcodes explained:
- Our packing and picking barcodes are unique and are automatically generated internally.
- For Pack & Go, you may create a barcode representing the order number, the system will recognize the order number and will find the matching order in your queue.
- We use numeric-only barcodes (also known as 128-type barcodes).
Picking list settings
You can change your picking list settings from Shipping > Printing options. Select the printer you want to dedicate to printing your picking lists, adjust the configuration of the picking list and choose how to sort the products.
To learn more about how to customize your picking lists, read our article How to configure your picking list settings (Pack & Go).
Related articles
→ Print Client settings and troubleshooting
→ How to configure your picking list settings (Pack & Go)