Topic: Learn how to easily connect your Squarespace website with Sendcloud.
Step 1. Connect Squarespace with your Sendcloud account
- Login to your Sendcloud account and go to Settings > Integrations
- Find Squarespace in the list of available integrations and click Connect
- Enter a name for the integration and click Save

- Once you click save, click on the Go to configuration button which has now appeared
- You will be redirected to the authorization page of Squarespace, where you can enter your credentials to confirm the connection.
Step 2. Configure your integration
Once you've logged into Squarespace, you will be redirected to the Sendcloud configuration page.
International Shipping
Sendcloud will automatically generate customs documentation for parcels with a shipping destination outside the EU. On the configuration page, you can select some options which will be used as input for generating customs documentation for international shipments.
Default shipment type
Select the default type of shipment which will apply to most of the items you ship. The most commonly used value is “Commercial goods”.
Product data
In order to generate accurate customs documentation, Sendcloud needs information about the following customer fields for every product you sell on your Squarespace website:
- HS Code
- Country of Origin
- MID Code
- Material Content
- Intended Use
There are two means of providing Sendcloud with this information:
-
CSV file upload
Use the Choose File button to upload a CSV file containing multiple comma-separated values (product_sku, hs_code, country of origin, mid_code, material_content, intended_use) for each of your products (as shown in the example below). Once the file is uploaded, the values per product_sku will be shown on screen, where you can manually edit or delete uploaded rows.
-
Manual product mapping
You can manually enter the Product SKU, HS Code, Country of origin, MID code, material content, and intended use for more items by entering the correct information and clicking the Add button. Unmapped SKUs will be set with the default customs field values.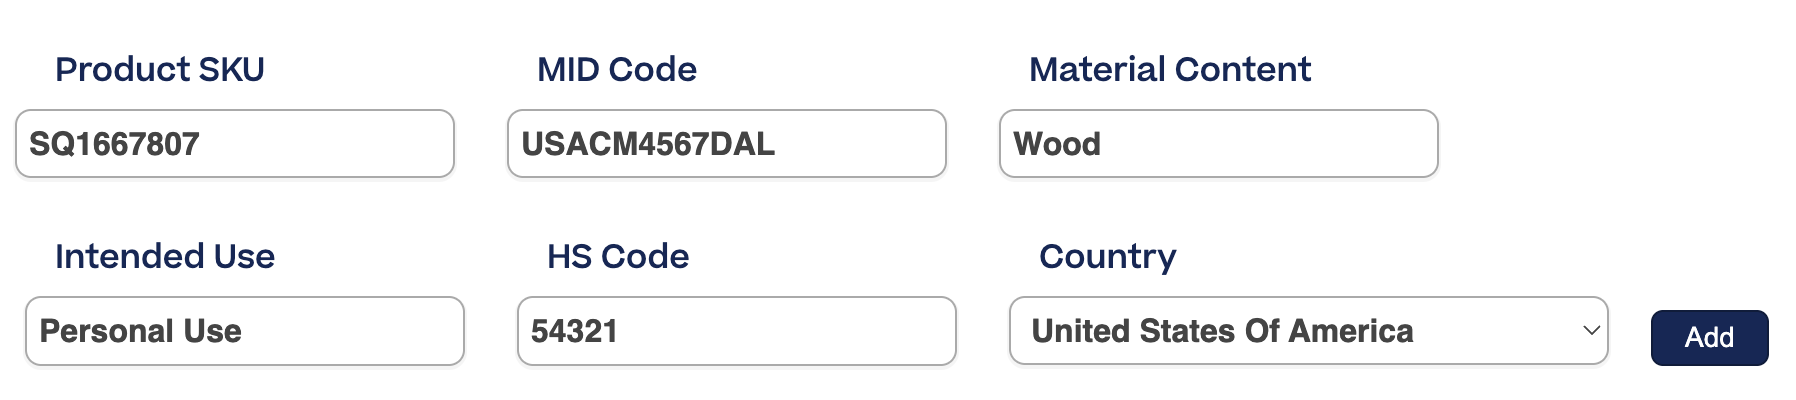
To edit a row, click the Edit button. To delete a row, click the X button.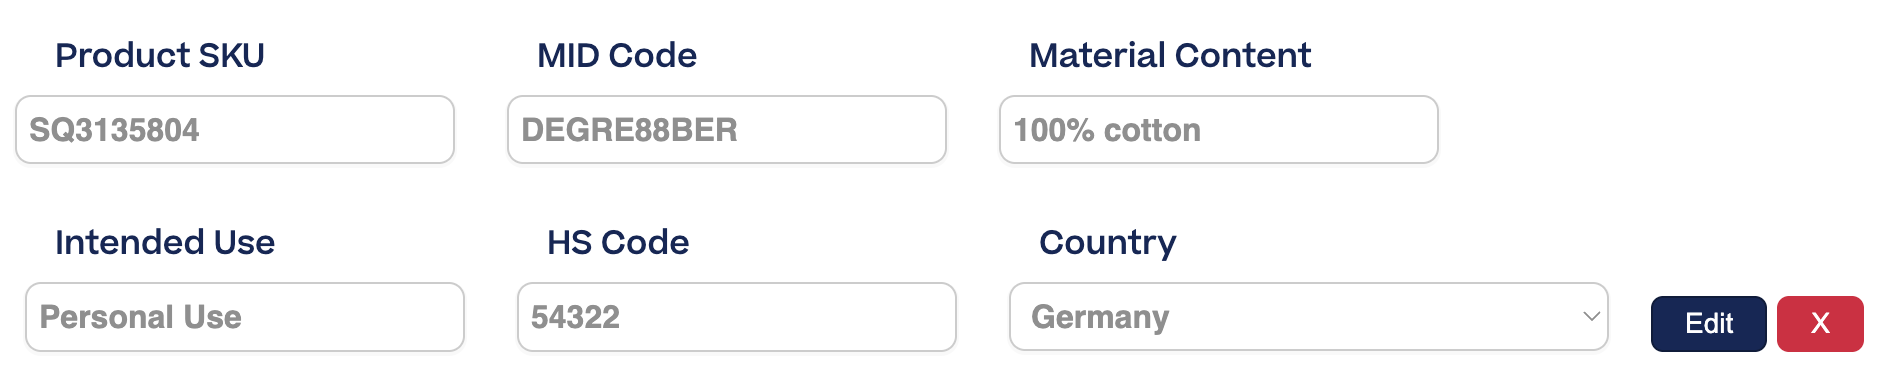
-
Set values for unmapped products
Finally, you can set a default custom field values that will automatically apply to any products that are not included in the CSV file or not yet mapped. This will prevent items from being entered onto the customs documentation with missing values.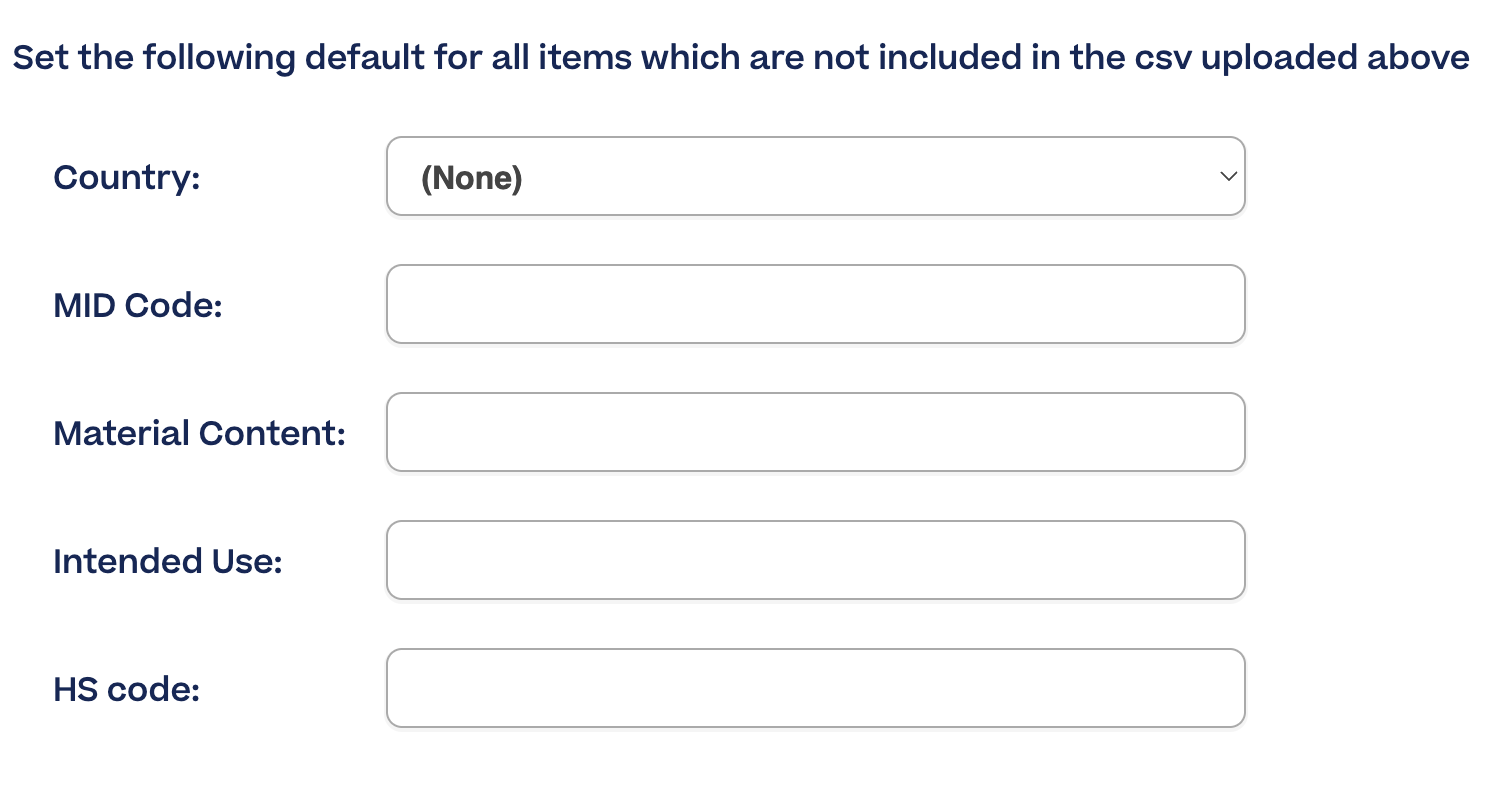
Shipment notifications
You can enable or disable the sending of email notifications from Squarespace. If you prefer to use your own branded tracking notification emails via Sendcloud, you may want to disable this feature.
Service point delivery
To learn how to configure service point delivery, read our detailed article Service points for Squarespace. Here you will find all the steps so that your customers can have their packages delivered at their local service point.
Label generation
When an order is created in Squarespace, the shipping label and tracking number will not be automatically generated in Sendcloud. Instead, the order will be automatically synced to your Sendcloud panel and appear under Shipping > Orders > Incoming orders overview. From here, you can edit individual order details (such as customer address data and shipping method) and print shipping labels.
If an order is imported into Sendcloud with invalid fields in the address or item details, it will appear as an error. You can edit the order by clicking the icon next to an order to update the missing or incorrect information, before proceeding to create the label.
Update the integration configuration
If you need to update the configuration for your Squarespace integration, you can do so any time via your Sendcloud account.
- In your Sendcloud account, go to Settings > Integrations
- Find Squarespace in the list of integrations and click Configure
- click on the button Go to configuration