
Purpose: Learn how to offer service point delivery in your Lightspeed checkout, in both the legacy checkout and the upgraded checkout.
Step 1: Activate service points in Sendcloud
After you connect Lightspeed to Sendcloud, activate service points in your Sendcloud panel:
- Go to Settings > Integrations.
- Find your Lightspeed integration in the list and click Configure.
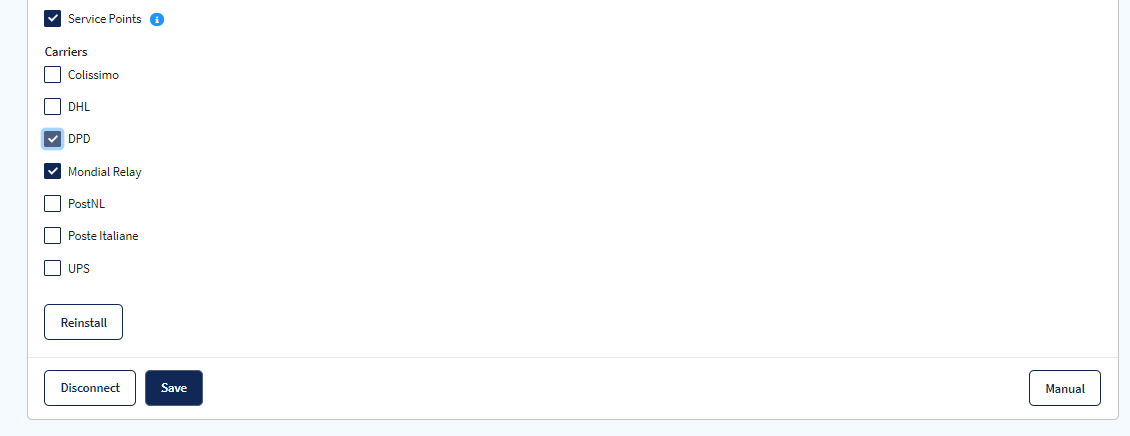
- Select the Service points checkbox to activate this type of delivery.
- Select the carriers you want to offer.
- Click Save.
Step 2: Enable service point delivery in Lightspeed
To set up service point delivery in your Lightspeed backend:
- From the home menu of your Lightspeed backend, go to Settings > Shipping Methods.
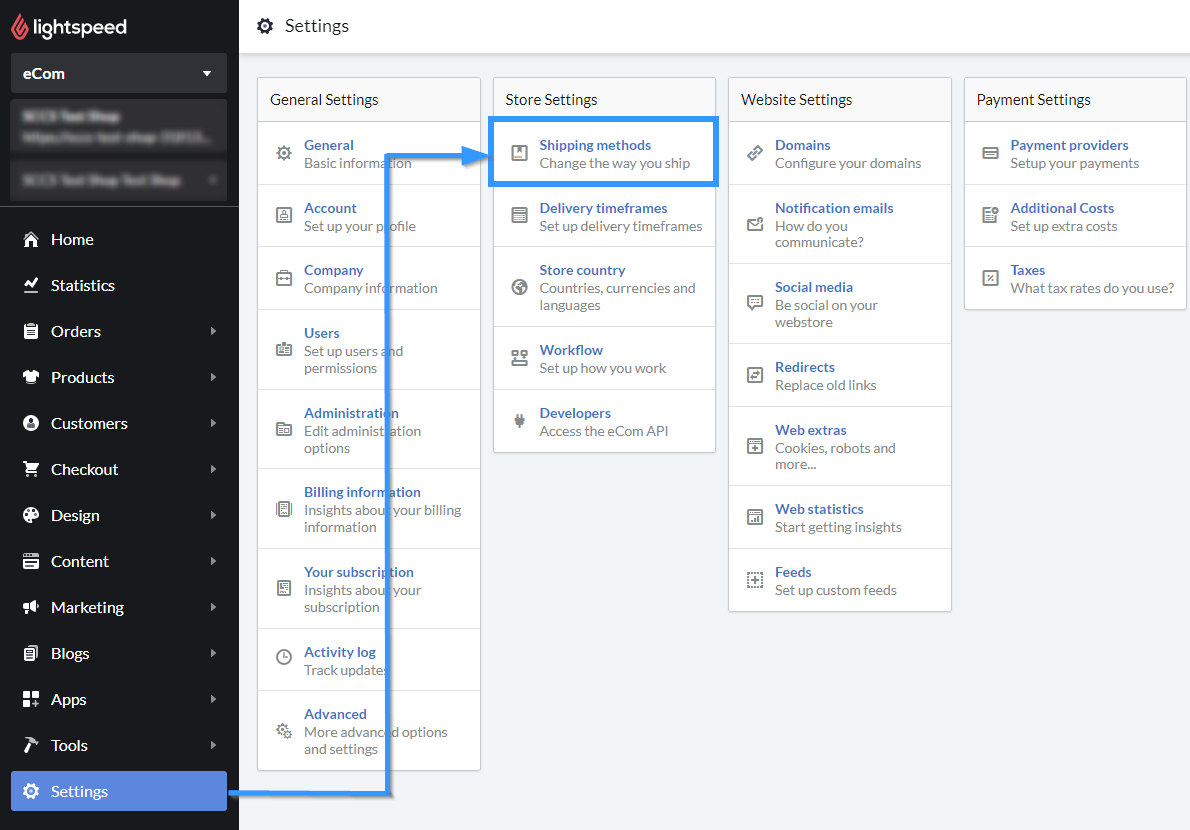
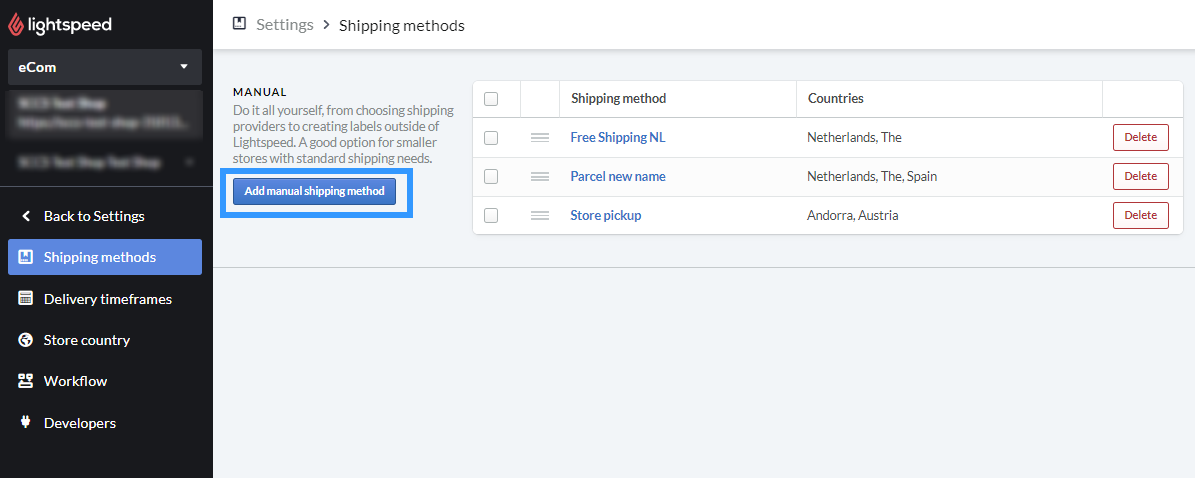
- Click Add manual shipping method.
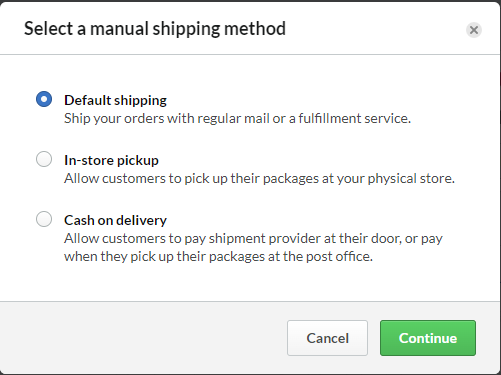
- Select Default shipping and click Continue.
- Enter a title for your shipping method. If you use the legacy checkout, the title must be one of the following, so that the service point map shows correctly in your checkout:
- English: "service point delivery"
- Dutch: "servicepunt levering"
- German: "paketshop zustellung"
- French: "livraison en point relais"
- Spanish: "recogida en un punto de servicio"
- Fill in the following details:
- A shipping rate
- The country or zone where this shipping method applies
- A tax rate
- The visibility of the shipping method
- Click Save.
Step 3: Set up the upgraded checkout (optional)
You can also offer service point delivery in the upgraded Lightspeed checkout. To enable it:
- Go to the homepage of your Lightspeed backend and click Checkout.
- If you haven't upgraded your checkout yet, you see the Upgrade checkout button.
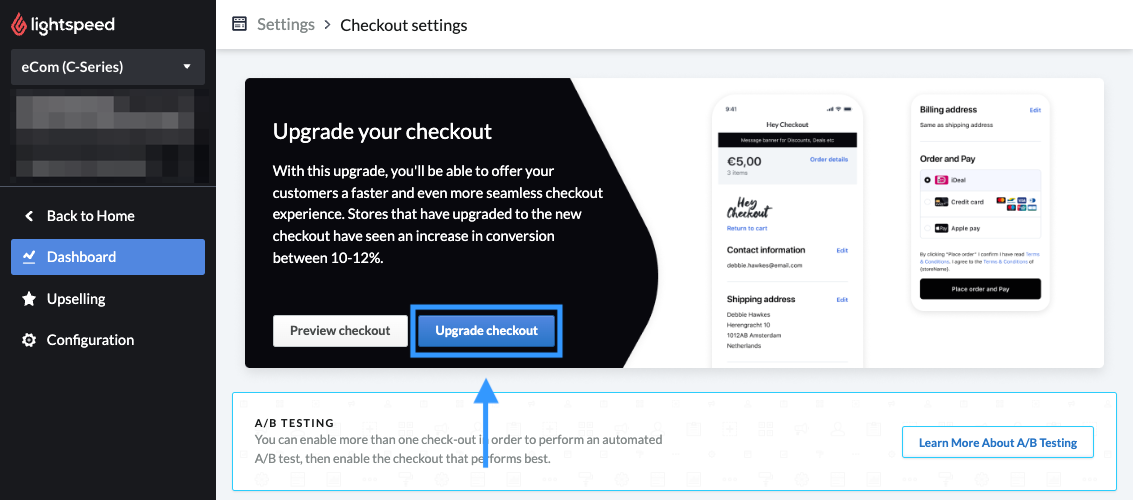
- Click Upgrade checkout.
- Go back to the homepage and go to Settings > Shipping Methods.
- Click the name of the shipping method you created in Step 2.
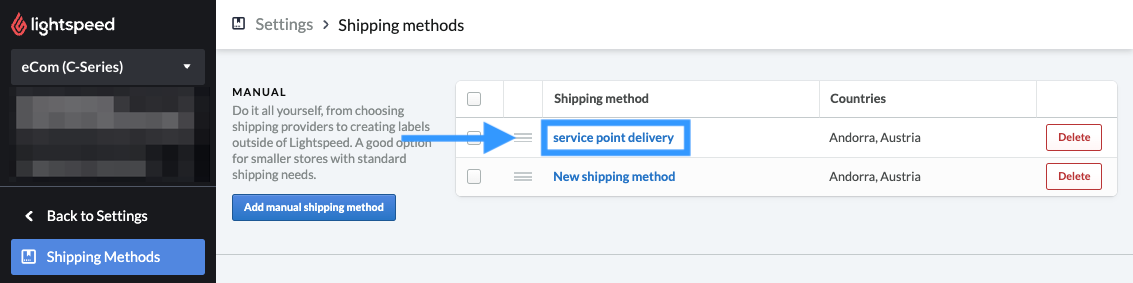
- Scroll to the bottom of the page. Under Visibility, enable Hide from customers at checkout. This prevents the shipping method from showing twice in your checkout.

Note: To make the shipping method completely inactive, also rename it so the title no longer contains the exact phrase "service point delivery" or one of its translations from Step 2. For example, rename it to "Service point express delivery". - Click Save.
What service point delivery looks like in your checkout
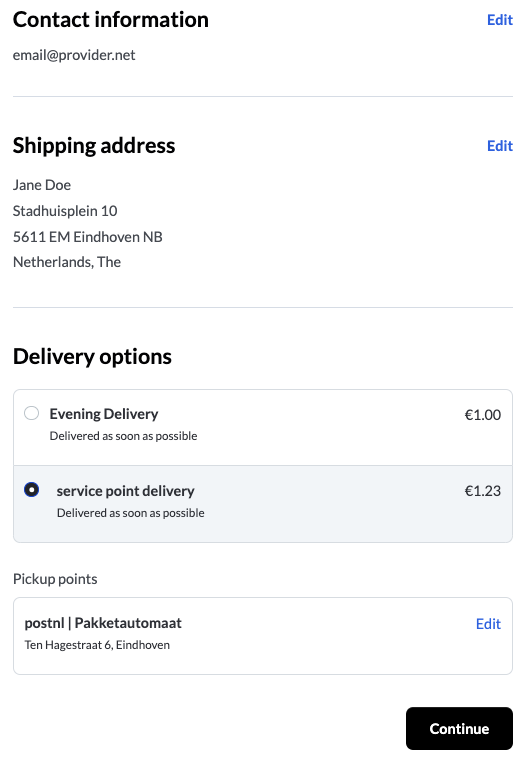
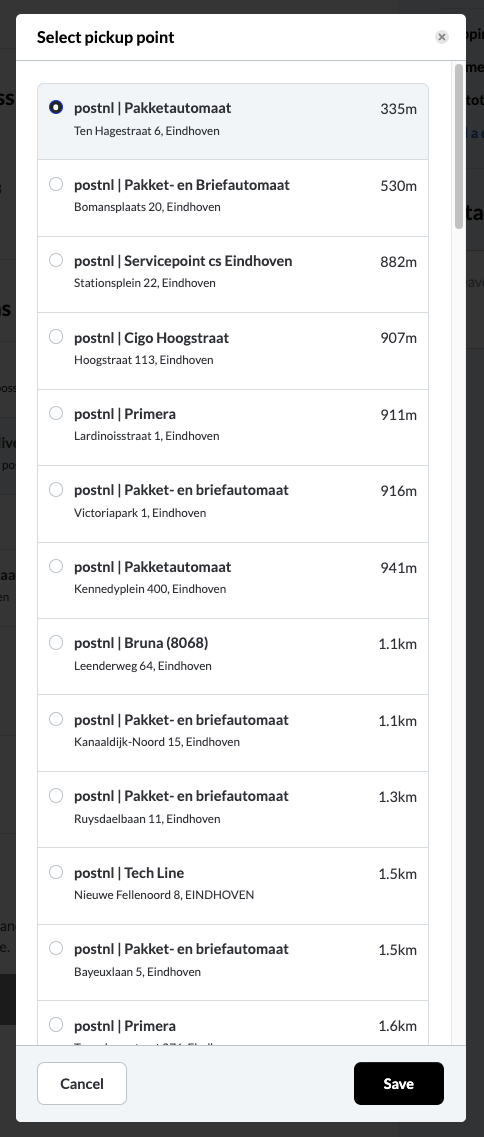
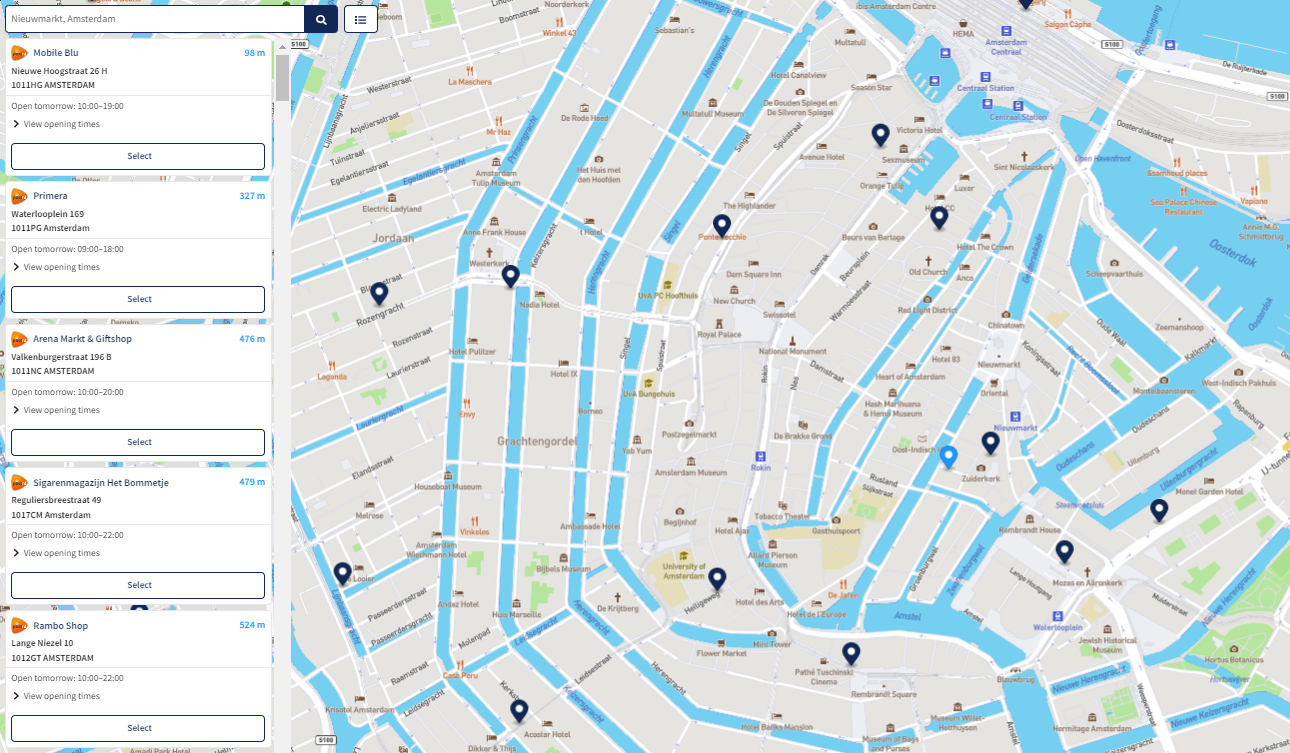
How your customers choose a service point depends on the checkout you use. In the upgraded checkout, your customers see a list of the service points closest to their delivery address. In the legacy checkout, they see a map with the closest service points.
Upgraded Lightspeed checkout: list of service points
Legacy Lightspeed checkout: service point map
DHL Postnummer for service points in Germany (upgraded checkout only)
DHL Packstations, parcel shops and post offices in Germany can need the customer's DHL Postnummer. The Lightspeed checkout has no separate field for it, so your customers enter it in the second address line of their shipping address (Adresszusatz).
Sendcloud adds it to the shipment automatically when it imports the order, as long as the line contains only digits and is at least 6 digits long.
- DHL Packstations: The Postnummer is required. In the list of service points, your customers see the note Postnummer im Adresszusatz erforderlich next to the location.
- DHL parcel shops and post offices: The Postnummer is optional. In the list of service points, your customers see the note Postnummer im Adresszusatz optional next to the location.