This guide explains how to import multiple orders into Sendcloud at once using a CSV file. You’ll learn how to prepare your CSV, upload it, map your fields, and process your orders efficiently.
Before you start
Make sure your CSV file meets the following requirements to avoid upload errors:
- File format: CSV (comma-delimited)
- Encoding: UTF-8 (required for special characters)
- Use a period (.) as the decimal separator for weight values
- Use lowercase units only (for example:
kg,cm) - Use valid ISO country codes for destination and origin countries
- HS codes must contain 6–15 characters
💡 Optional: Download the example CSV file
To get started, go to your Shipping overview and click Upload file.
From there, click Download template to download an empty CSV that’s already formatted correctly. This helps prevent upload errors and reduces the need for manual corrections.

Step 1: Choose or create a field mapping
Field mapping ensures that each column in your CSV is correctly linked to the corresponding order or item field in Sendcloud.
You can choose one of the following options:
- Use a saved mapping – Select an existing mapping and review which columns your CSV file needs to include.
- Create a new mapping – Upload a new CSV file and map the fields. You can save this setup as a preset for future uploads.
Step 2: Uploading your CSV file
Go to Shipping and click Upload file on the right side of the screen. Drag and drop your CSV file into the upload box, or click Browse to select it from your computer.

Upload limits
- Maximum 1,000 rows per upload
- Maximum file size: 3 MB
Address formats
Sendcloud supports two address formats. Choose one of the following:
-
Separated street and house number (minimum 7 columns):
Customer name, Country code, Postal code, Street name, House number, City, Order reference -
Full address in one field (minimum 6 columns):
Customer name, Country code, Postal code, Address, City, Order reference
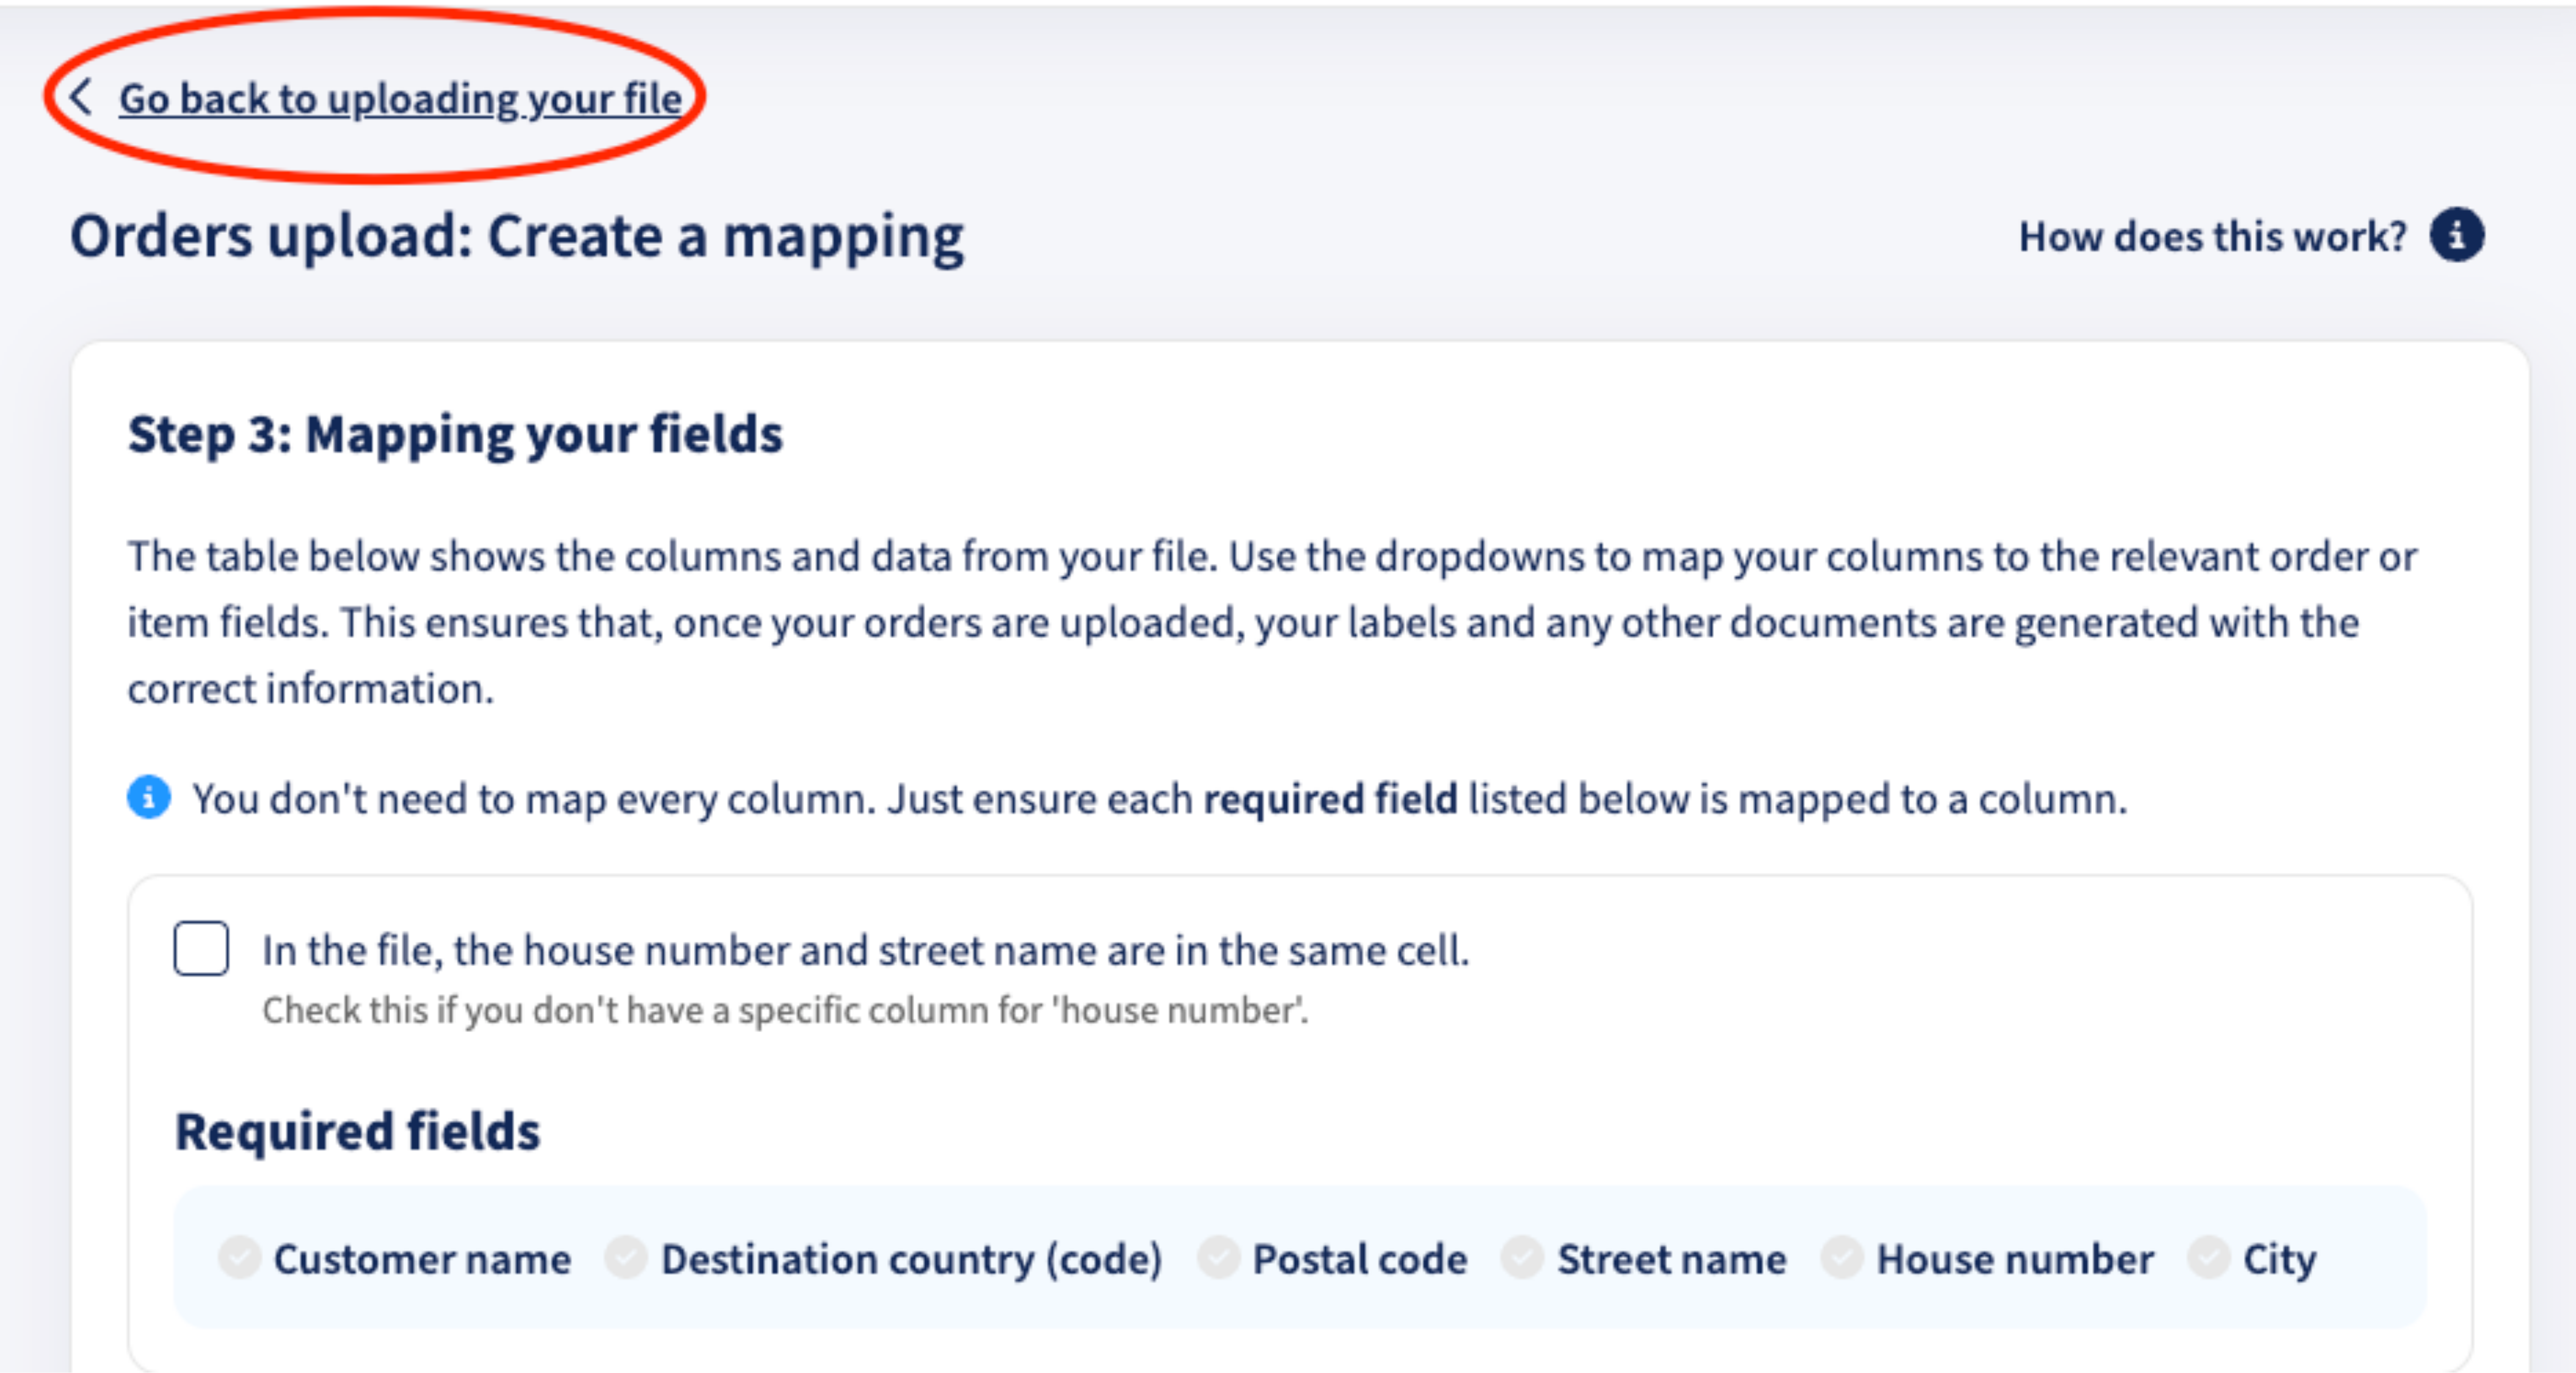
Step 3: Map your fields
Use the dropdown menus to match the columns in your CSV file with the corresponding Sendcloud fields.
- You only need to map the required fields. Optional fields can be left unmapped.
- If the house number is included in the address field, make sure to select the corresponding option
- The Required fields progress bar turns green once all mandatory fields are correctly mapped
When all required fields are marked in green, click Save to continue.

Step 4: Name and save your mapping
Give your mapping a clear and recognizable name so you can easily reuse it later. Saved mappings let you upload future CSV files without having to repeat the validation and mapping steps.
Once saved, Sendcloud immediately processes the CSV and creates the orders in your Incoming orders overview.

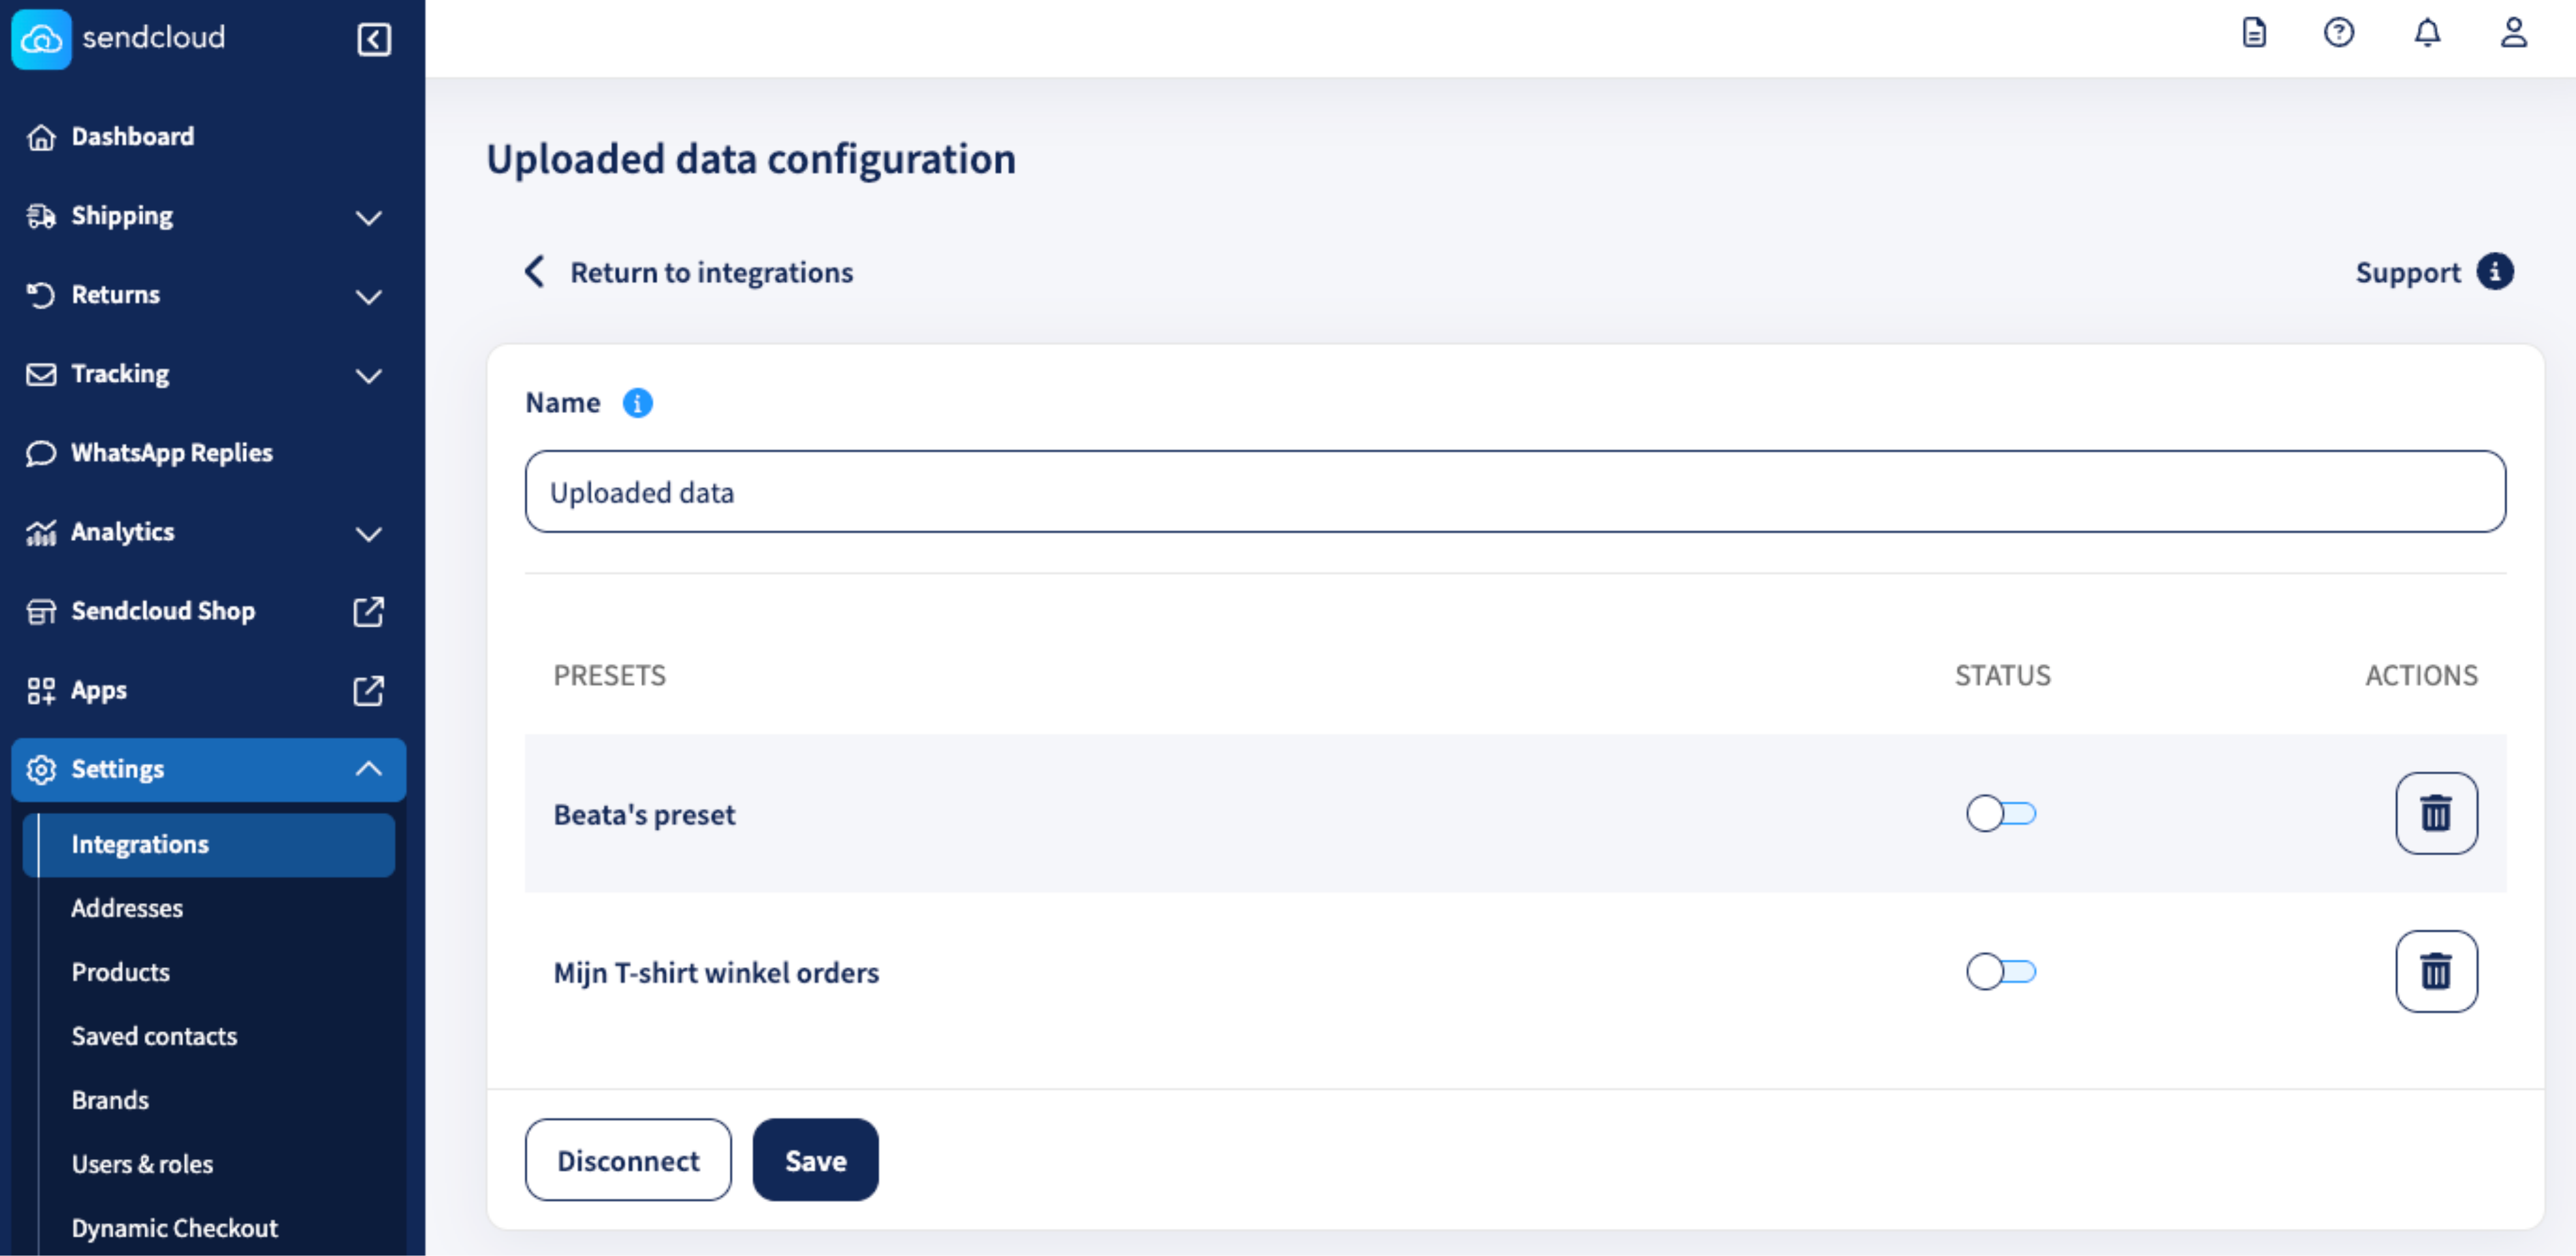
Managing your mappings
When you save a mapping, an Uploaded data integration is automatically created in Settings > Integrations.

From there, click Configure to manage, rename, or remove your saved mappings.
Deleting a CSV upload
You can either cancel a CSV upload before orders are created, or remove a completed CSV upload by disconnecting the Uploaded data integration, which deletes any unprocessed orders.
Cancel an upload (before orders are created)
If you click Go back to uploading your file, the uploaded CSV is automatically removed: no orders are created.
Remove a CSV upload after import
- Go to Settings > Integrations
- Find Uploaded data
- Click Disconnect
All CSV orders still in Incoming orders will be deleted. Orders with labels created/shipped will not be affected.