
Purpose: Learn how to connect your own Geodis carrier contract with your Sendcloud account in three easy steps.
The Sendcloud subscription plans have been updated. If the subscriptions shown in the banner above don’t match your current subscription plan and you’d like to know more, please click here
You must have a contract with Geodis in order to ship with Geodis through Sendcloud. To acquire a Geodis contract, contact Geodis directly.
Step 1: Activate your Sendcloud subscription
Sendcloud offers three subscriptions with which you are able to use your own transport contract: Lite, Growth and the Premium plan.
For more information regarding which plan is best for you and the needs of your business, you can always contact us via the support section of your Sendcloud account or click here.
Step 2: Connect your Geodis contract
- In your Sendcloud account, go to Shipping > Carriers
- Click on the My contracts tab
- Click Add your own contract
- Find Geodis in the list of carriers and click Add contract
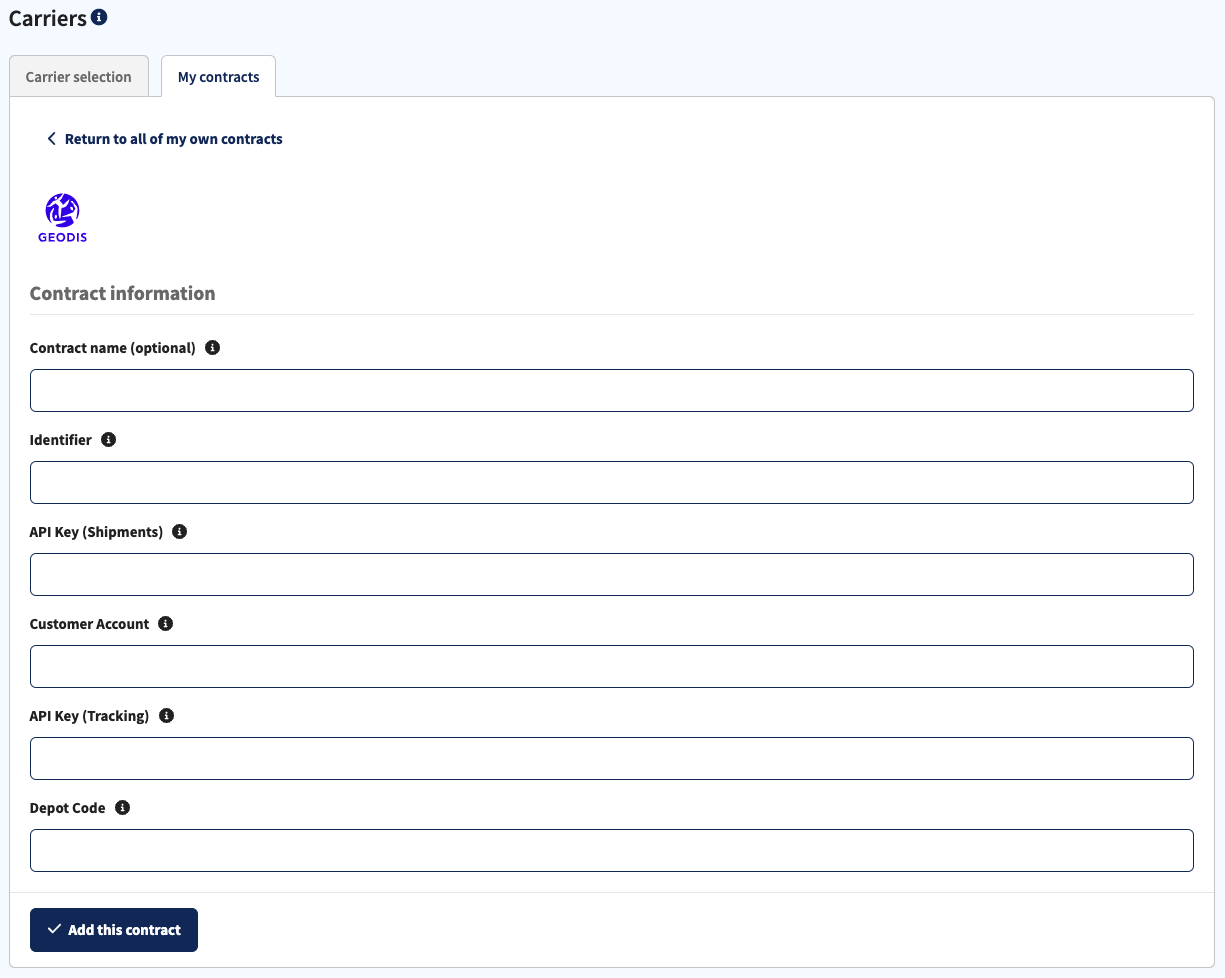
Step 3: Enter your Geodis account details
Fill in the fields below using your Geodis account details. If you don't already possess this information or if you're not sure where to find it, please reach out to your Geodis account manager.
- Contract name - Optional: add a name to easily identify your contract throughout the panel
-
Identifier - Unique identifier provided by Geodis.
-
API Key (Shipments) - for API Shipment
-
API Key (Tracking) - For API ZoomClient
-
Depot Code* - Depot code from Geodis Agency, also called CodeSA
- Customer Account - AccountNumber, also called CodeClient
*We can only support one Depot code. If you have more than one Depot code, you'll need multiple Sendcloud accounts.
Done! Once you've followed the steps above, your Geodis contract should now be successfully linked to your Sendcloud platform and you can begin shipping on your Geodis rates. When you create a label with a Geodis shipping method, the label price will now show as 0.00 EUR in your account.