Purpose: This article explains what Dynamic Checkout is and provides a step-by-step guide on creating and publishing a configuration for it.
What is Dynamic Checkout?
Dynamic Checkout is a Sendcloud feature that lets you show flexible delivery options to customers directly in your checkout.
With Dynamic Checkout, you can offer shipping choices that match your customers’ needs, helping reduce cart abandonment and improve the delivery experience.
This guide explains how to set up and publish Dynamic Checkout using the Sendcloud API. Since support for WooCommerce and Magento has been discontinued, new implementations must be built through the Dynamic Checkout API.
The API returns raw JSON, giving you the flexibility to build a checkout experience that fits your own store setup and workflow.
How to configure Dynamic Checkout
Step 1 Set up the API integration
First, create an API Integration using the Integrations section. To do that, follow these steps:
- Go to Settings > Integrations.
- Choose Sendcloud API and click Connect.
- Give the API integration a name, for example “My Webshop”, and click Save.
- Your API Public and Secret keys will be automatically generated. Copy them somewhere safe and include them in your request headers. You can consider the Public key as your username when authenticating with the API, and the Secret (Private) key as your password.
Step 2 Create a configuration
Once you've set up the API integration, it’s time to configure your Dynamic Checkout.
A configuration lets you define which delivery options your customers will see at checkout, based on destination, delivery method, and carrier preferences.
If you’re setting up Dynamic Checkout for the first time, you’ll first see a landing page explaining the main value of Dynamic Checkout. Click Get started to create a new configuration.
Otherwise, click on "Create new configuration"
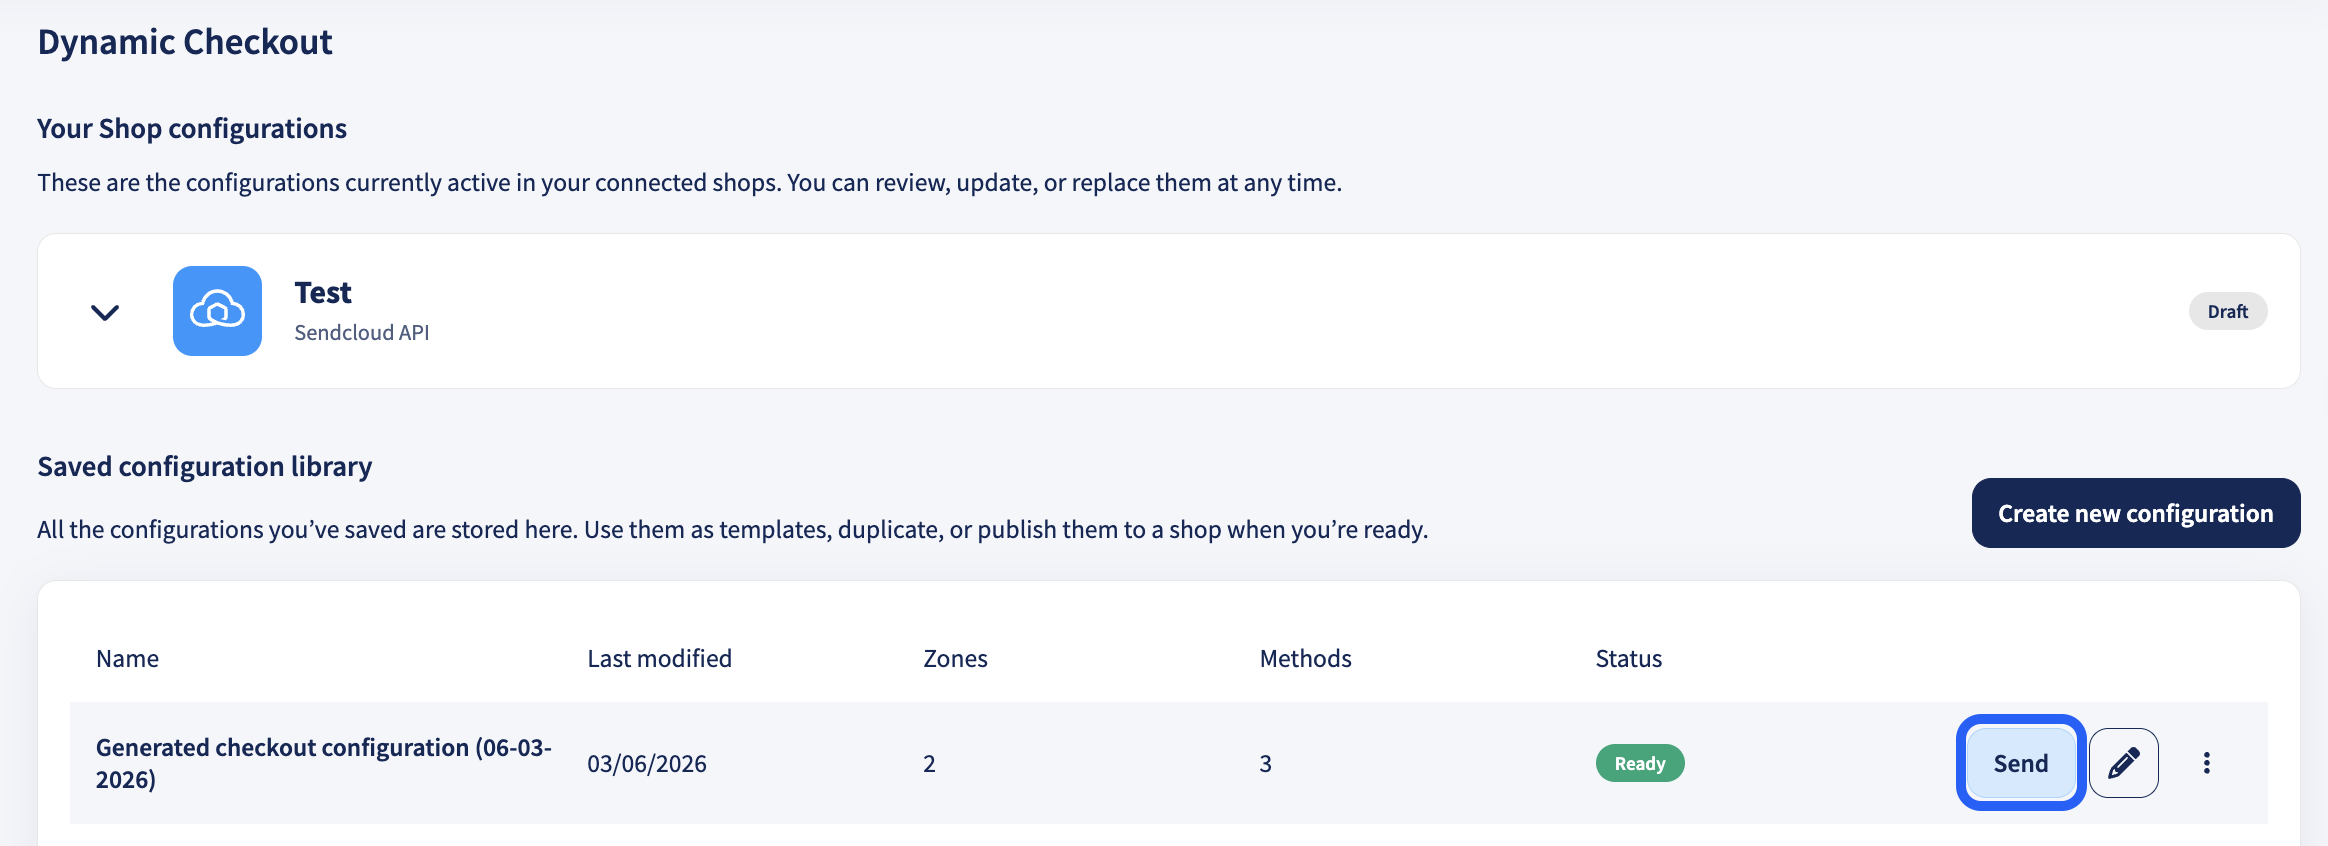
If you already have configurations, you’ll see an overview page divided into Your shop configurations and your Saved configuration library. From here, you can create a new configuration or manage existing ones.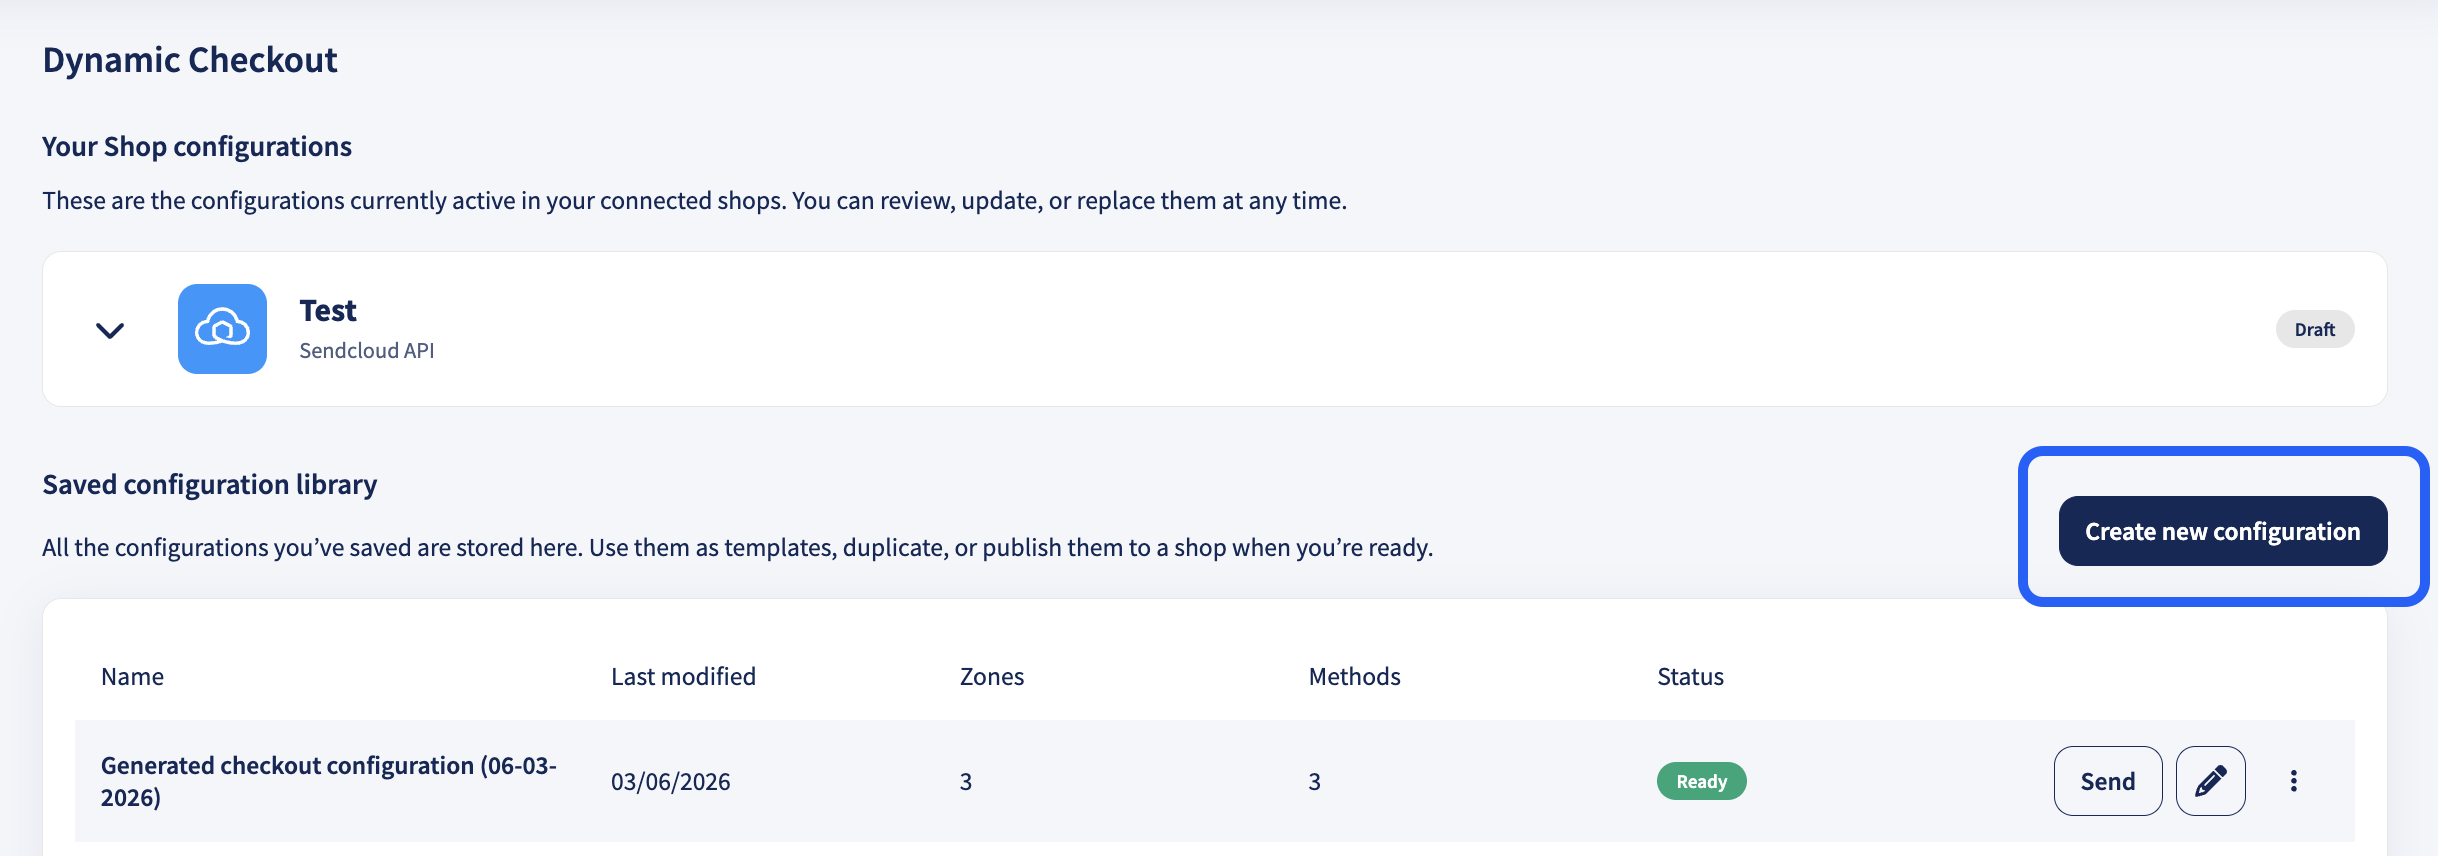
Step 3 Choose Shipping Destination
In the first step of the wizard, select your sender address, time zone, and the destinations (countries) you want to offer delivery options for.
Your destination selection determines which delivery methods and carriers can be configured in the next steps.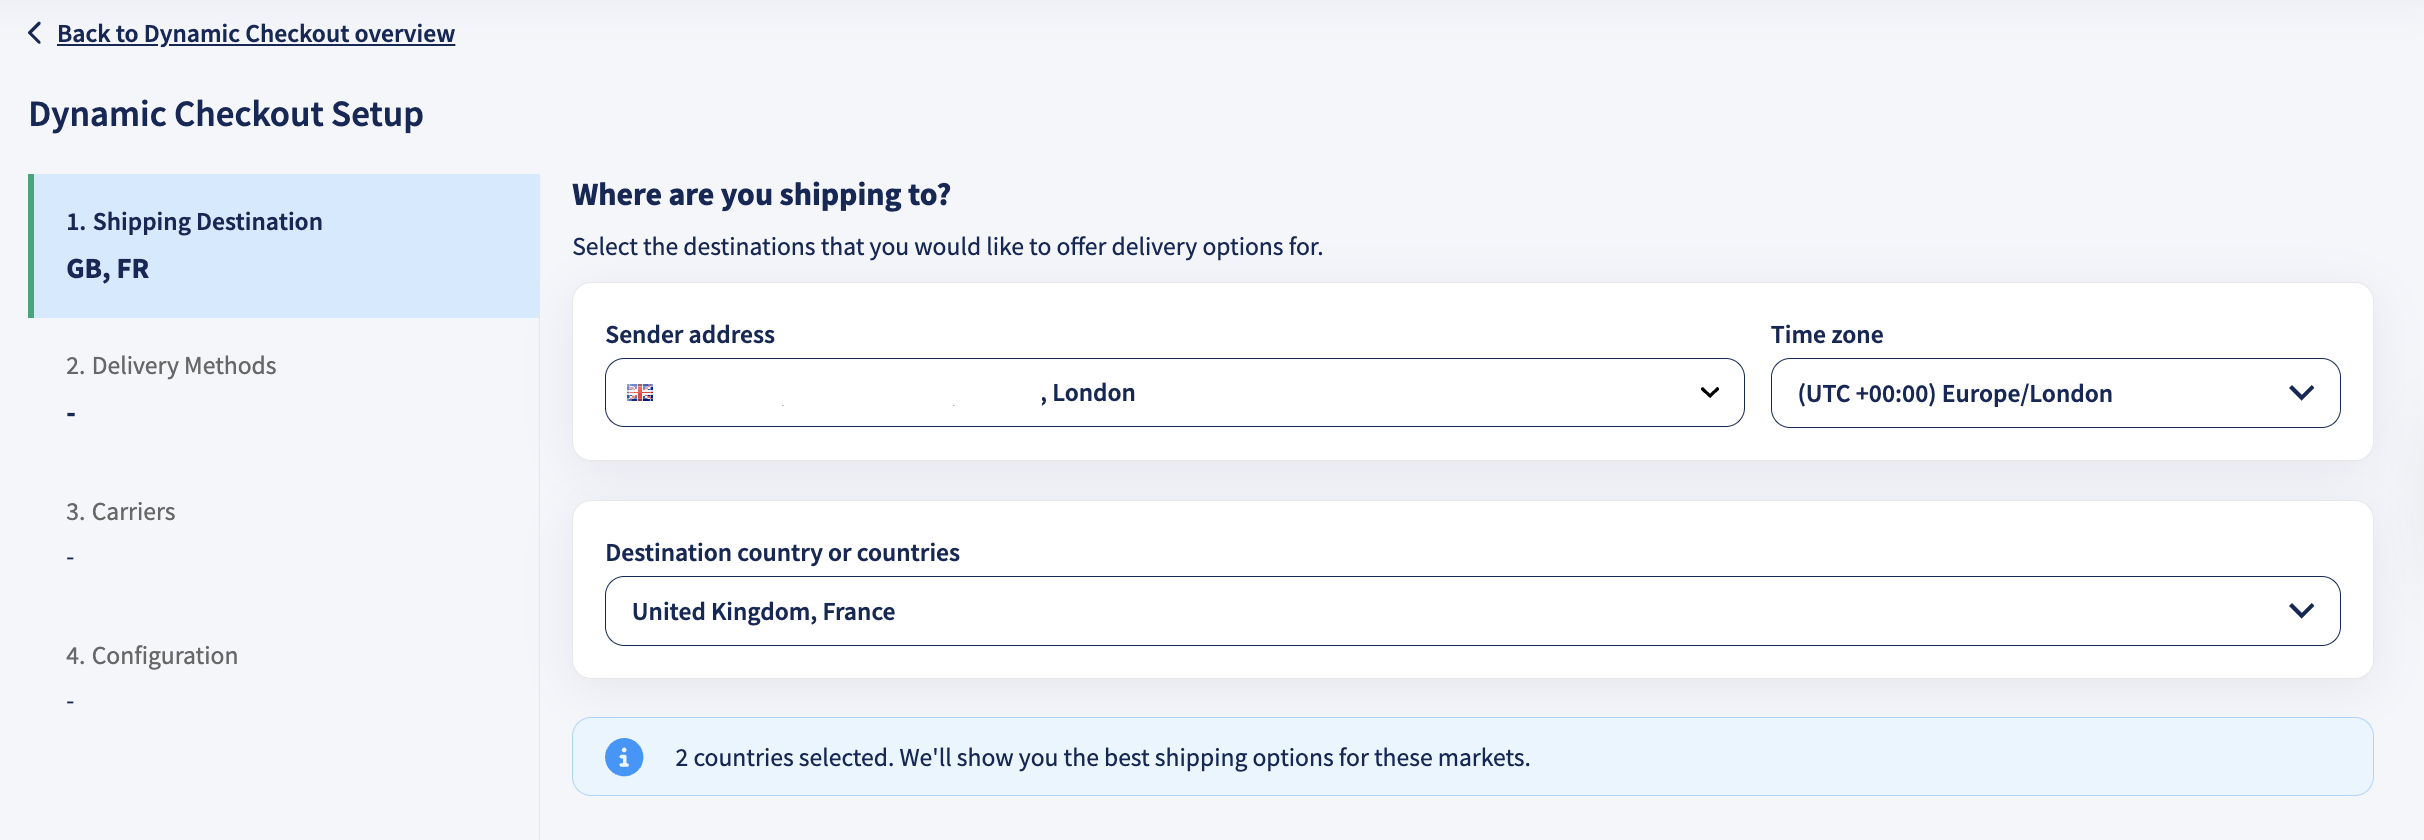
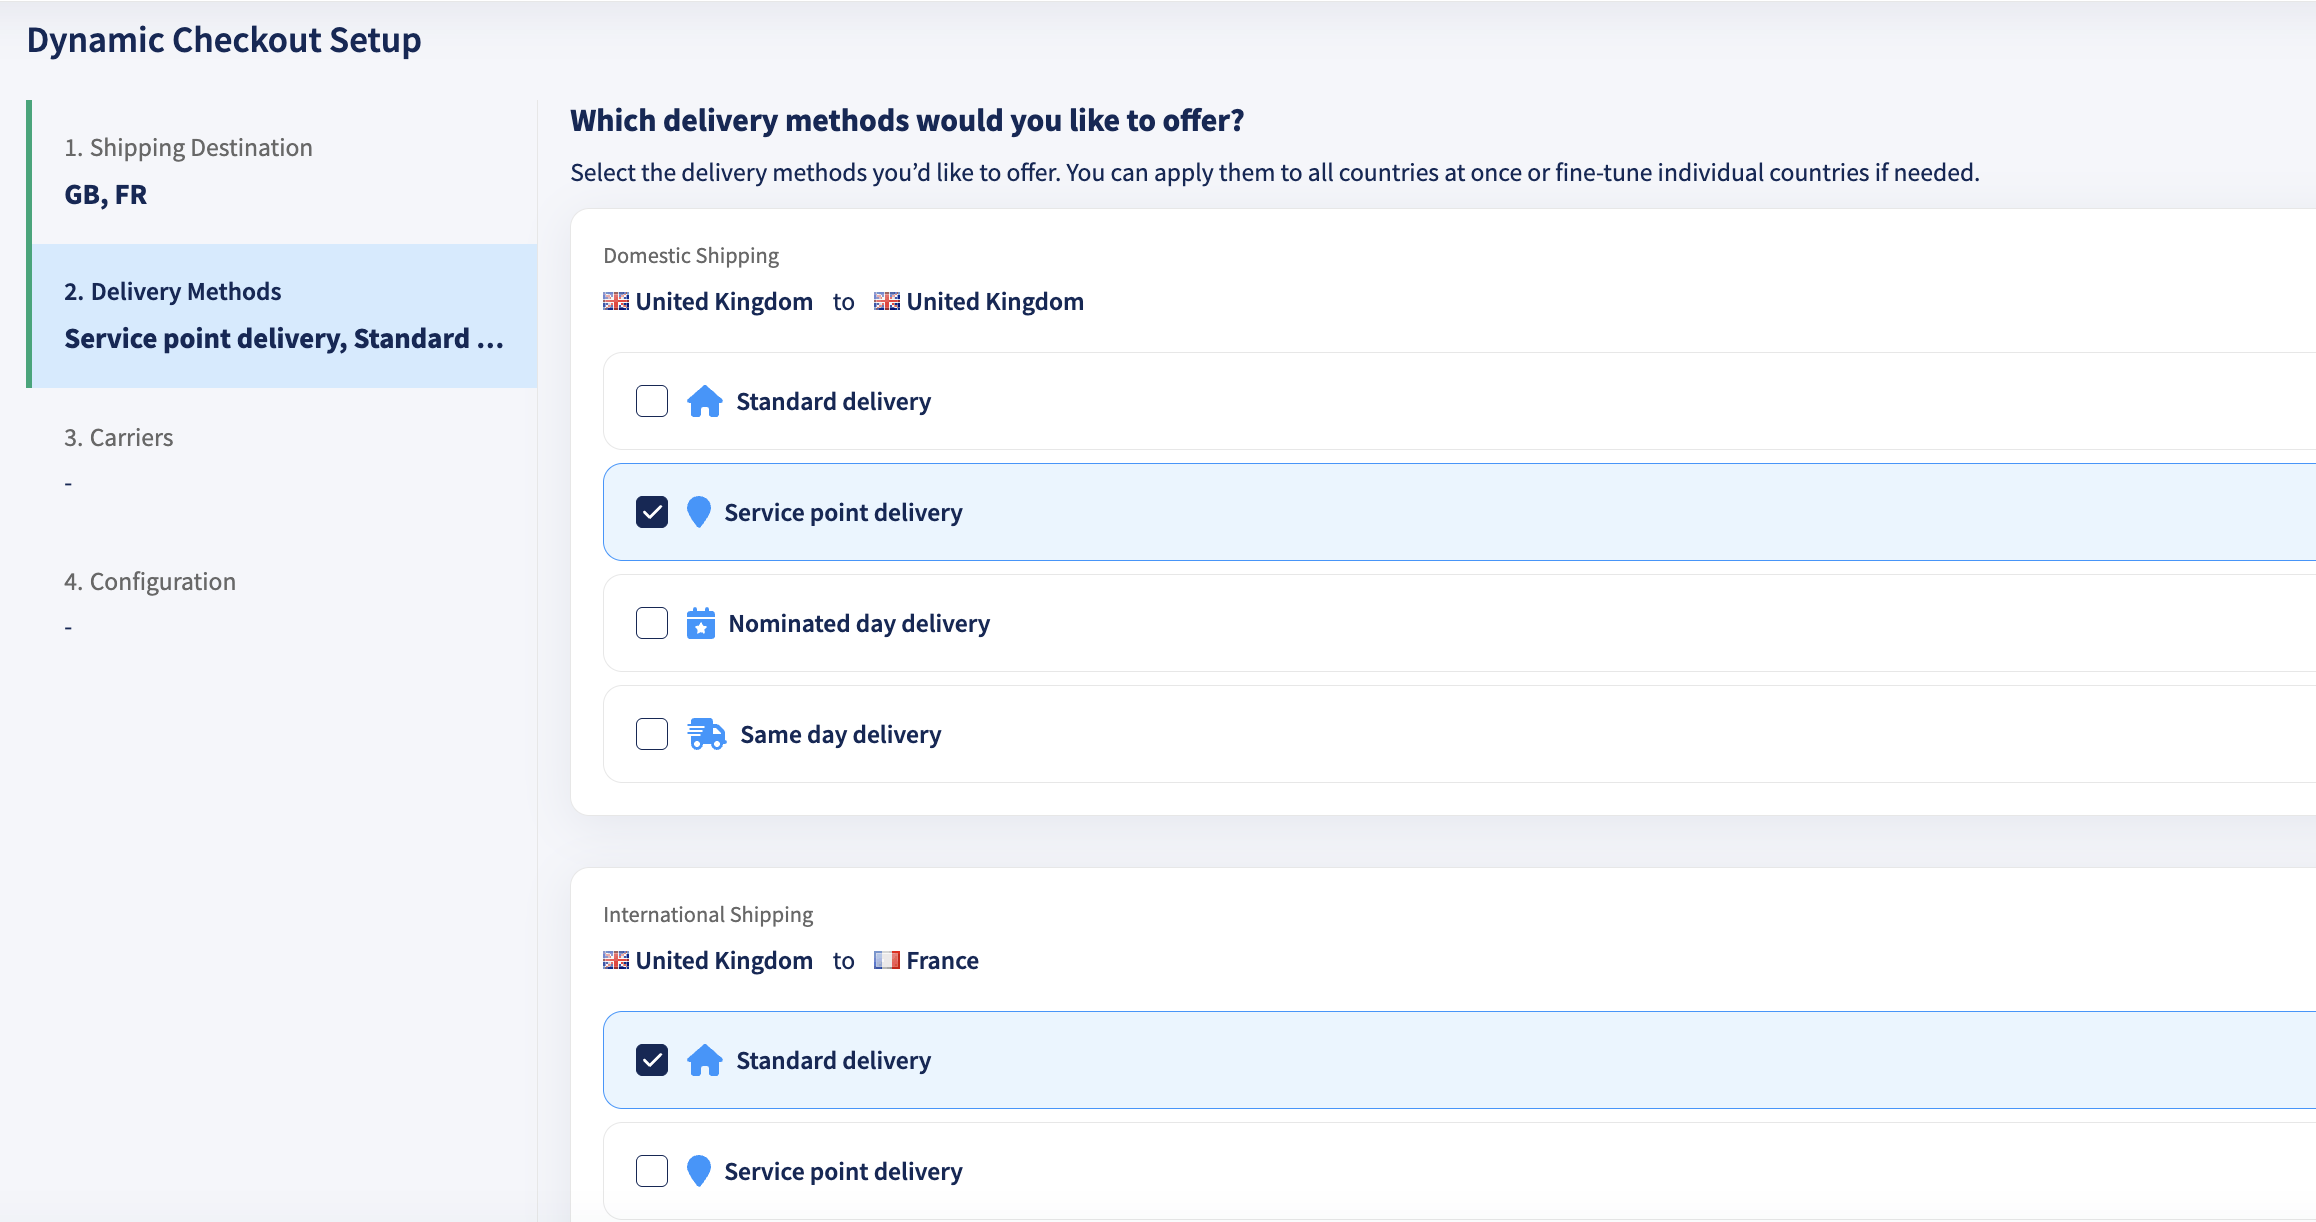
Step 4 Choose Delivery Methods
In the second step of the wizard, choose which delivery methods you want to offer. Delivery methods are grouped as domestic or international based on the destinations you selected.
Available delivery methods:
-
Standard Delivery
Offer standard delivery options to your customers. You can configure shipping services and pricing rules to match your checkout strategy.
➡ How to configure Standard Delivery -
Service Point Delivery
Let customers pick up their orders from a nearby service point.
➡ How to configure Service Point Delivery -
Nominated Day Delivery
Let customers choose the day they want to receive their parcel. Once integrated, a delivery day picker will appear at checkout and customers can select a delivery day up to 14 days in the future.
➡ How to configure Nominated Day Delivery -
Same Day Delivery
Offer an unbeatable delivery experience by letting customers receive their order on the very same day they place it. Customize your cut-off time to organize your logistics workflow around customer delivery times.
➡ How to configure Same Day Delivery
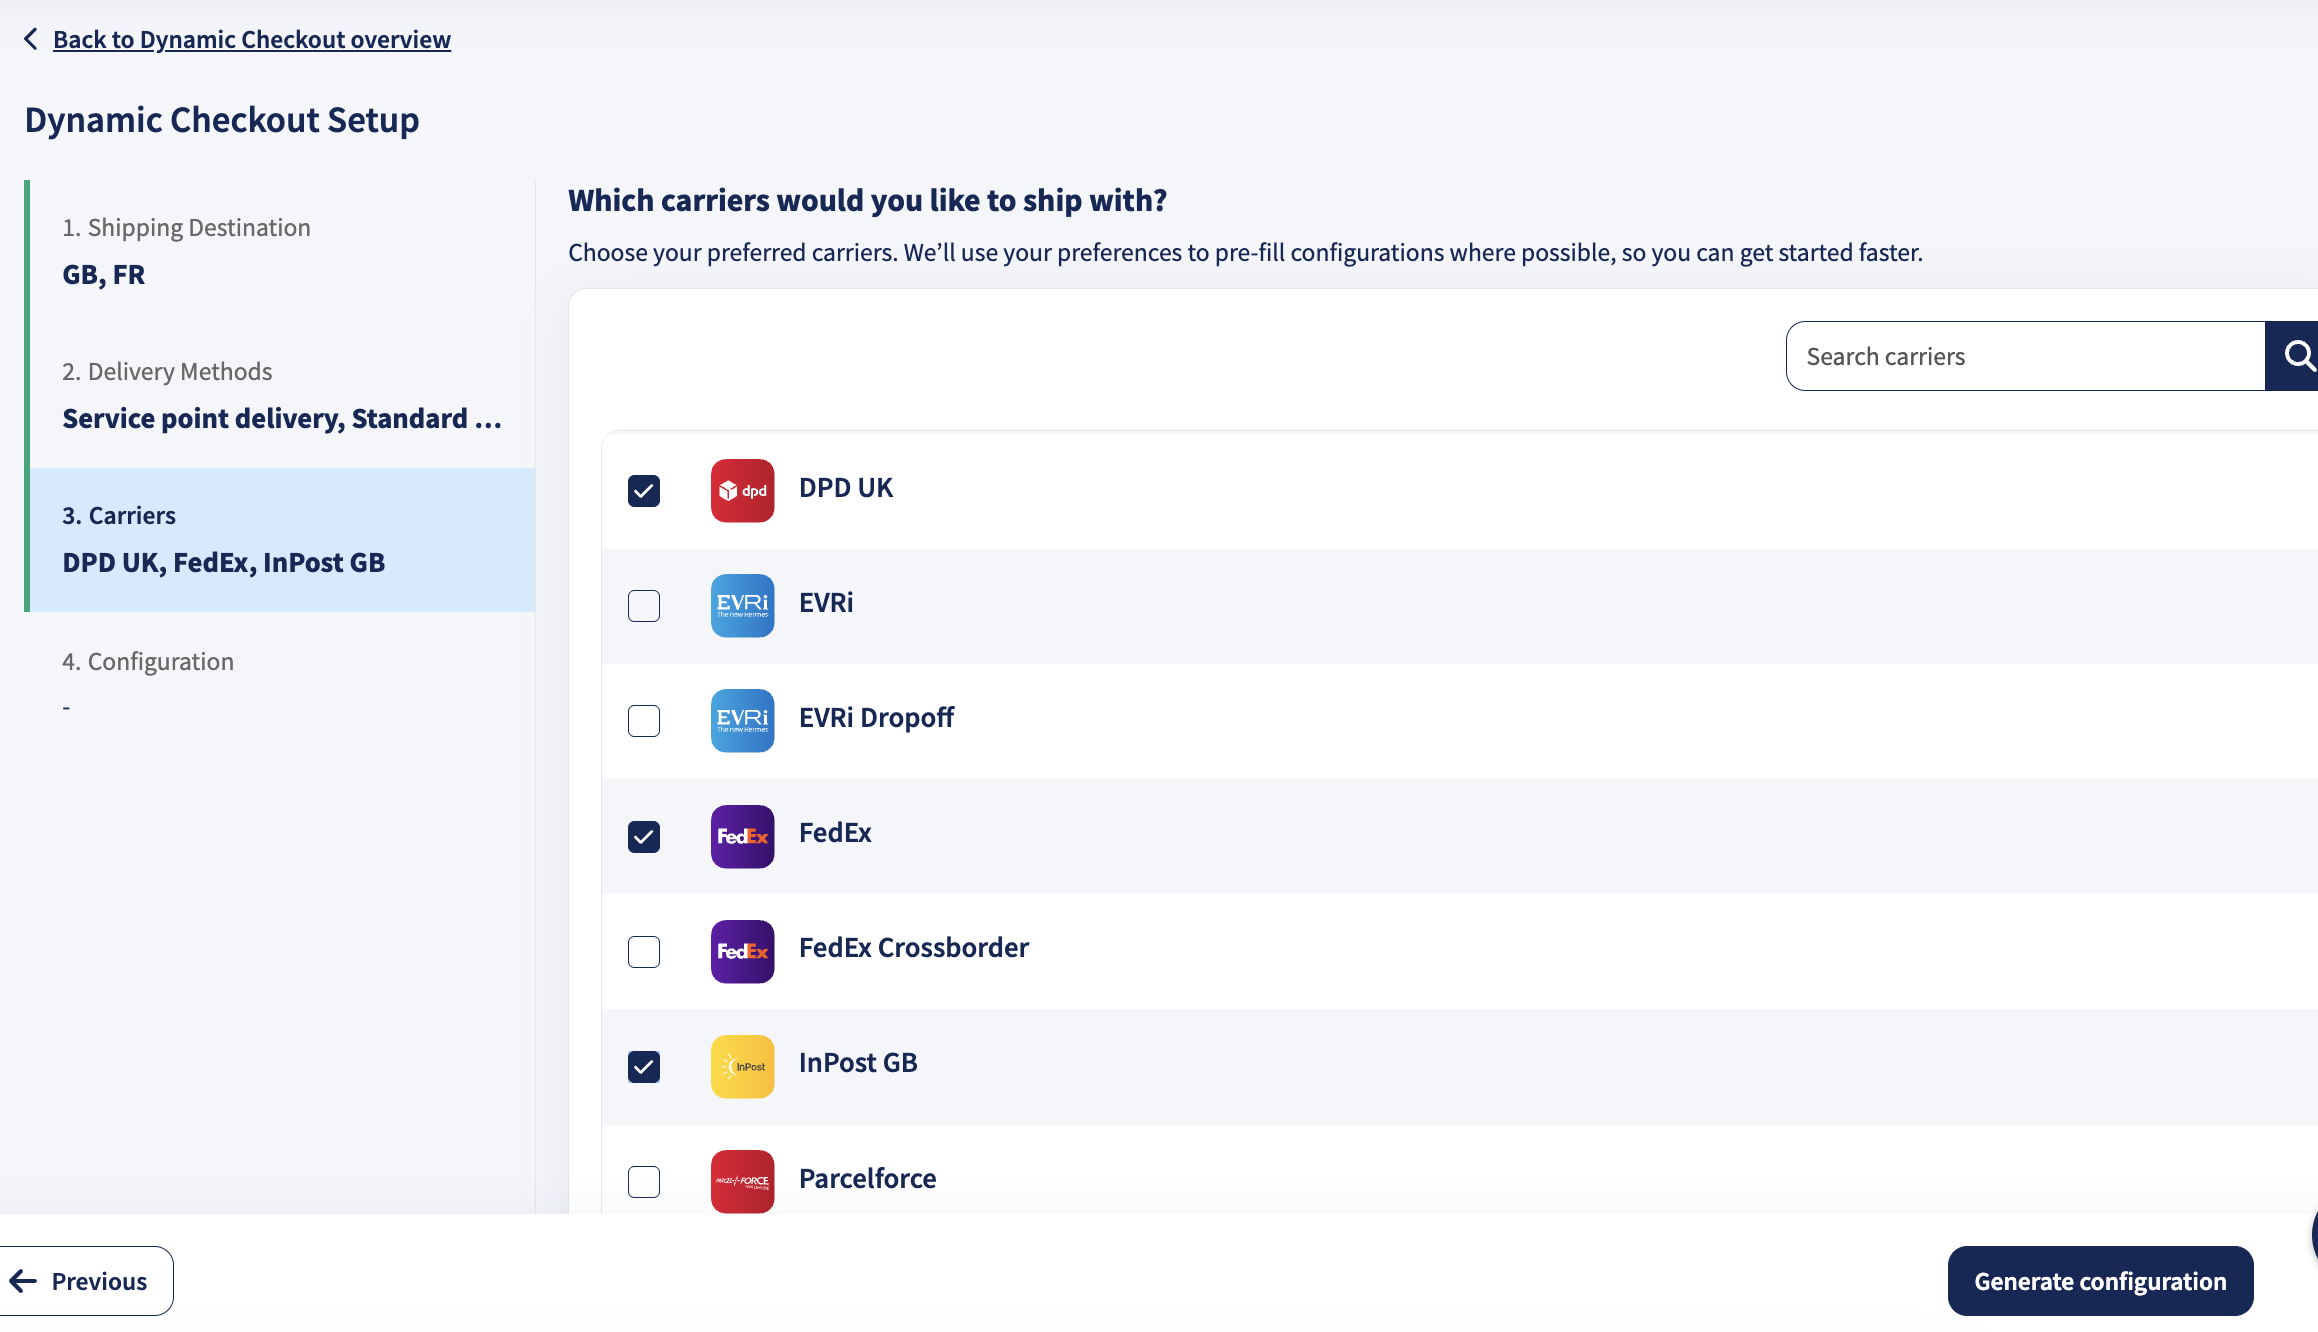
Step 5 Choose Carriers
In the third step of the wizard, select your preferred carriers for the delivery methods you chose.
Only carriers that are available in your account will appear.
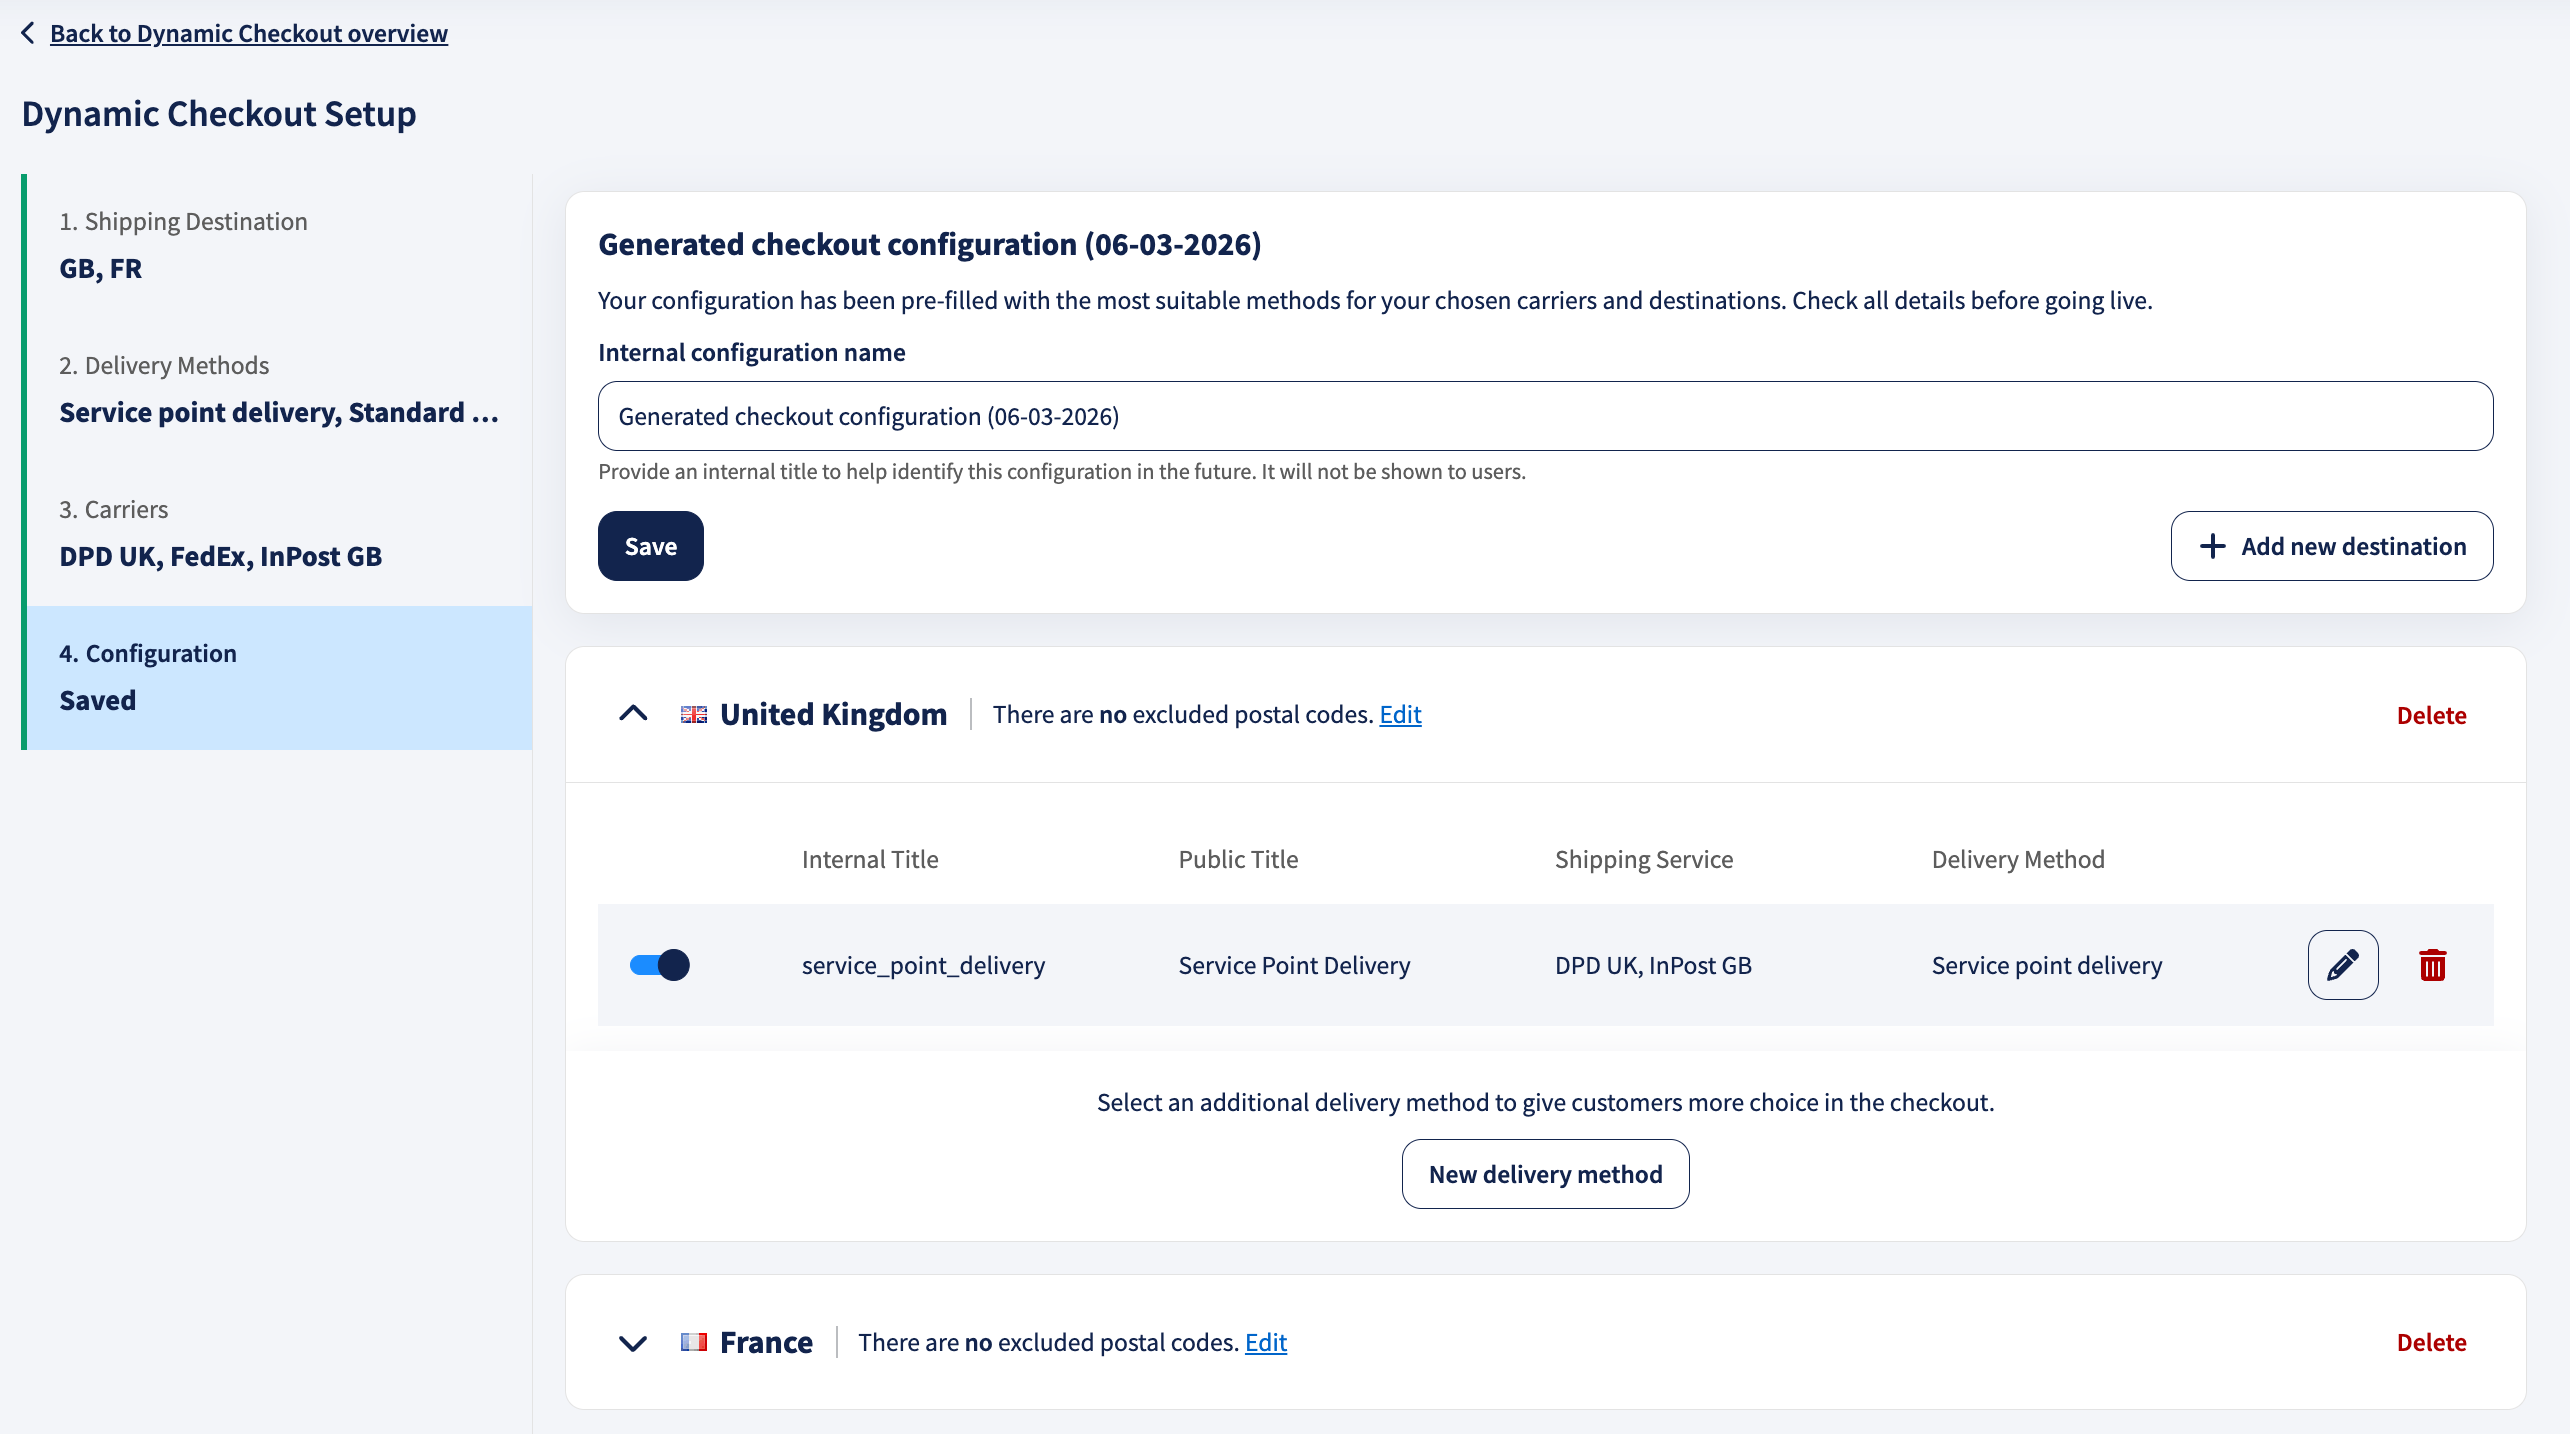
Step 6 Generate, review, and send your configuration
In the final step, your configuration is pre-filled with the most suitable methods for your chosen carriers and destinations.
Give your configuration a name and review the details.
To adjust a delivery method, such as changing the selected shipping service, defining rates and custom weight classes, setting handover times or closed days, or disabling it, click the pencil icon.
This opens the Delivery Method Editor. For each delivery method, you can customize:
-
Shipping service and weight limits:
Select the shipping service you want to use for each delivery method.
Sendcloud will automatically map the best-matching underlying carrier shipping method when orders are imported.Exceeding Weight Limits:
You can choose to display a delivery method at checkout even if an order exceeds the maximum weight limit of the selected shipping service.
When enabled, this setting ensures that the delivery method appears at checkout regardless of whether the total order weight exceeds the shipping product's defined weight range.Example:
If you configure DPD Classic (max weight: 31.5 kg) as your standard delivery method and enable this option, customers with heavier orders will still see DPD Classic as an option at checkout.Important notes:
- This does not change the shipping product’s actual weight limit.
- You may need to split such orders into multiple parcels, each requiring a separate shipping label.
- You can also define custom shipping rates for overweight orders by using the Define custom weight classes option.
This feature helps avoid losing orders from customers with heavy baskets, offering a smoother and more flexible checkout experience.
-
Shipping Rates:
Set rates using the default weight classes provided by the shipping service, or create custom weight classes. If available in your account, you can also offer free shipping for orders above a specific amount. -
Handover Days & Cut-Off Times:
Configure your handover days, visibility start/end time, cut-off time, and, where available, override transit time and closed day(s). These settings control when a method appears at checkout and which delivery dates are available.- If you don’t hand over parcels on weekends, Saturday and Sunday won’t be available for Nominated Day Delivery.
Carrier transit times, holidays, and working days impact delivery availability.
-
Checkout rules
Enable Use checkout rules if you want to automatically show/hide this method based on conditions (e.g., destination area, basket value, parcel characteristics, etc.).For more details about Checkout Rules, see this article.
-
General details
Set how the method appears:- Public title (what the shopper sees at checkout)
- Public description (optional helper text under the title)
- Internal title (for internal identification in Sendcloud)
Once you complete the setup, click on save then Complete setup and your configuration will be available in your Saved configuration library.
From there, you can set it live to your shop by clicking Send and selecting the integration you want to send this configuration to.
- Select your integration
- Click "send."
Click on the pen icon to edit a configuration or the 3 dots to rename, duplicate, or delete one.