Purpose: With the help of the return portal, you can process returns easily and quickly and receive them directly in the returns overview in your Sendcloud account. In this article we will explain how you can set up and activate the portal in a few simple steps.
Before you connect
A couple of quick checks to make your return portal go live without friction:
Enable direct debit (required)
Your return portal can only be activated once direct debit is enabled in your Sendcloud account.
International returns
They’re supported only if the original shipment was created in Sendcloud.
That way, all customs data, HS code, Country of Origin, and item/parcel details are included automatically. Customers can download the return label and customs document from the portal or from the confirmation email. For more info, click here.
Step 1: Set up your brand
-
Open the Brands Page
In your Sendcloud panel, go to Settings › Brands. -
Select or Create a Brand
- Click the brand you want to set up a return portal for.
- Don’t have a brand yet? Choose "+ Create New Brand" and follow the steps in this guide to add one.
-
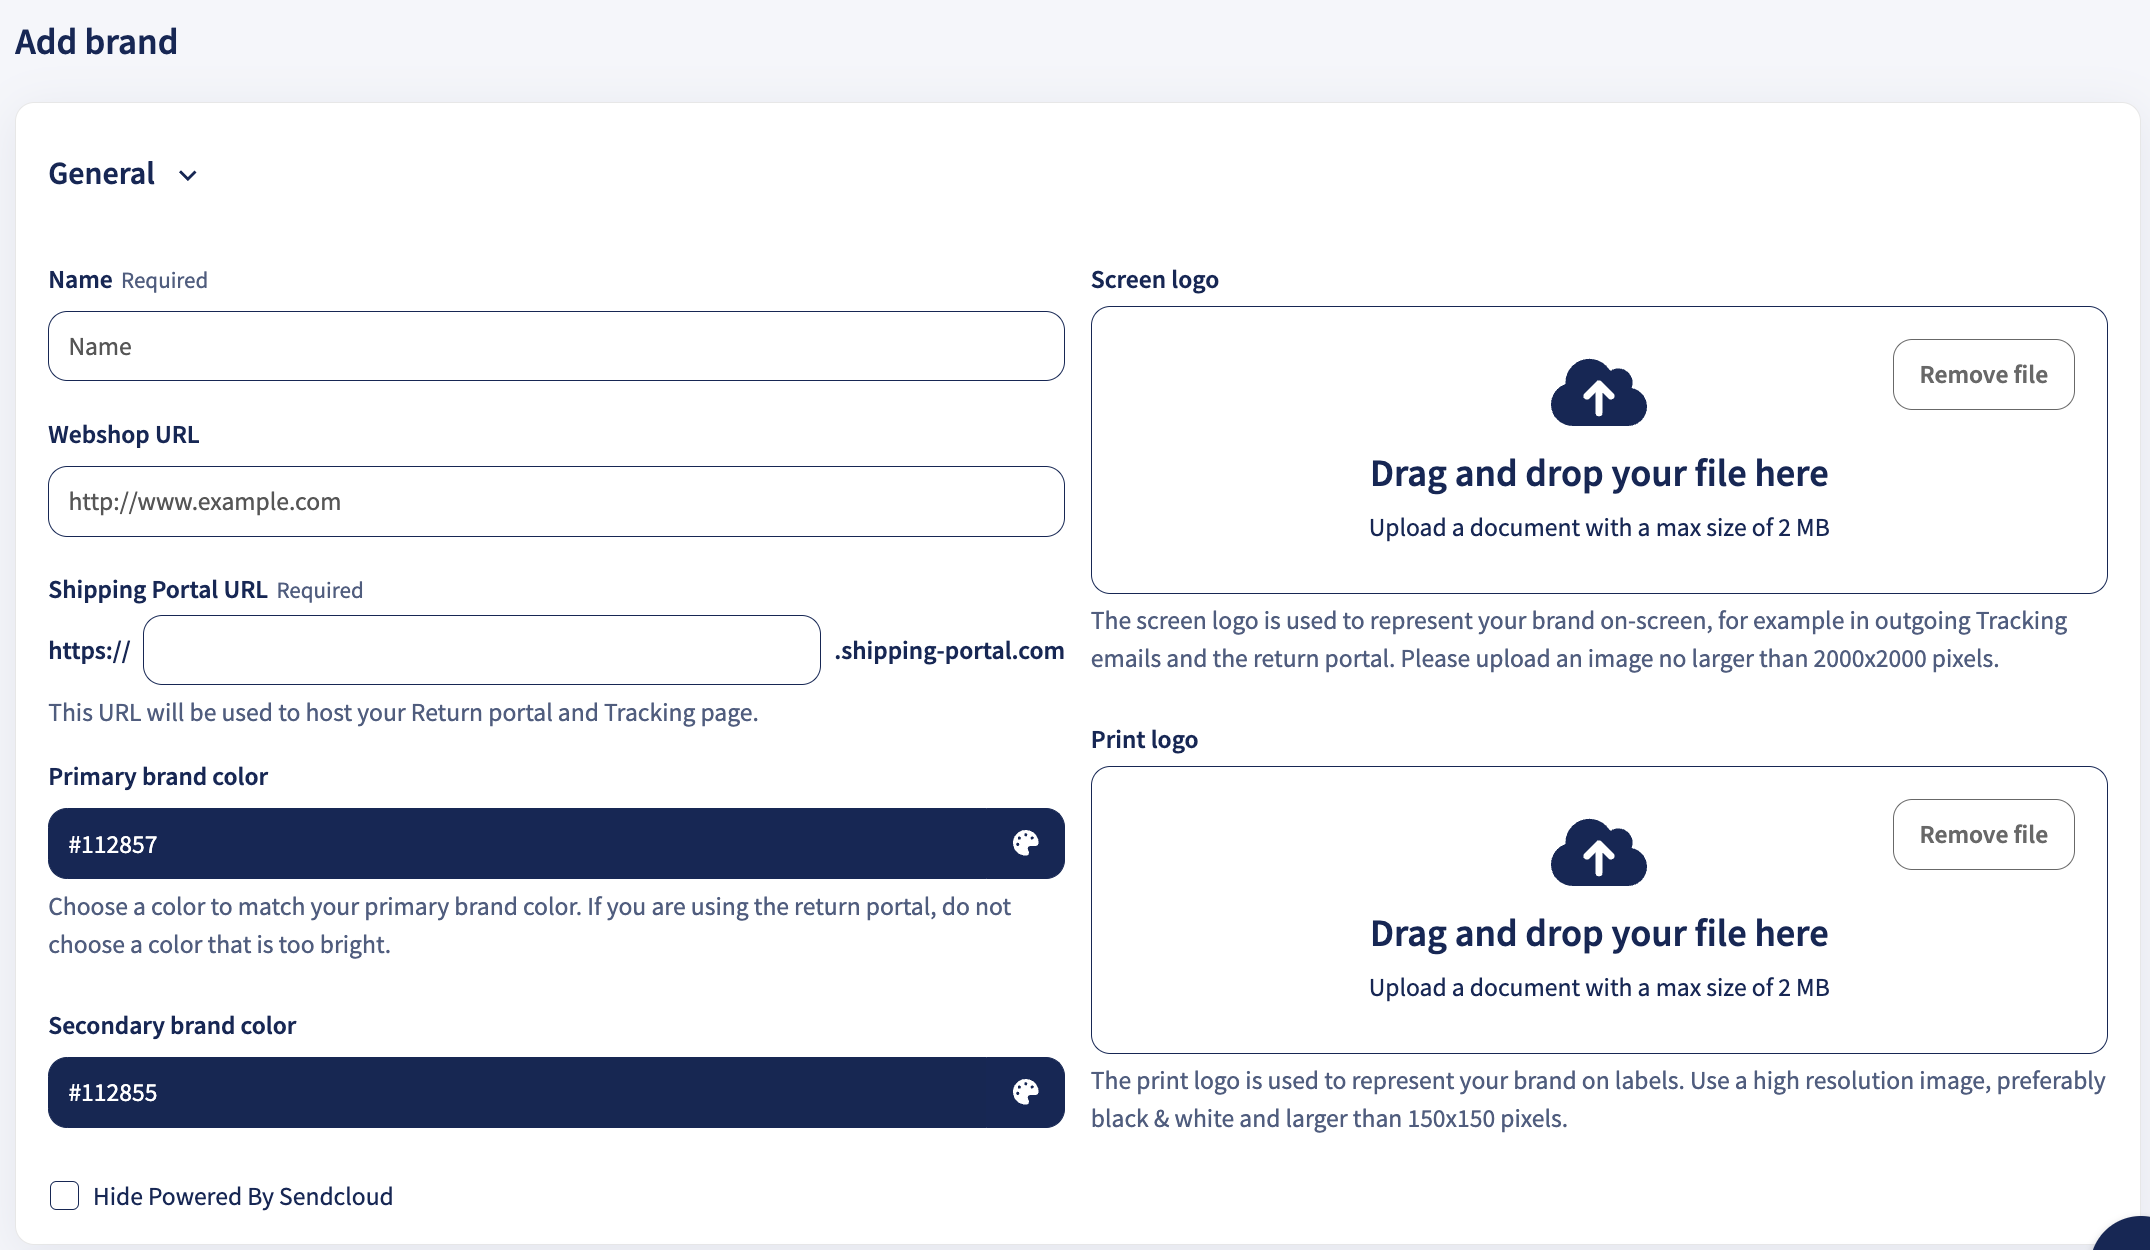
Customize Your Brand
Personalize your brand to maintain a consistent look and feel across every customer touchpoint, tracking emails, tracking page, and return portal. This keeps your brand front and center throughout the entire customer journey.
Tip: A well-branded return portal builds trust and reinforces your identity, even when customers are sending items back.
Step 2: Add a return address
Now, let’s make sure your customers’ parcels know exactly where to go when they head back to you.
You have two easy options:
-
Add It on the Spot
Go to Returns › Return Portal › simply click on Create address and enter the details. -
Set It Up from Settings
Go to Settings › Addresses › Return and hit Create new.
- Fill in all your return address details
- Set a label for easier recognition of your return address within the Sendcloud panel
- Click on Save, and your first return address is set
Note: If you have physical shops and you would like to offer your customers the option to return orders in-store, check the shop addresses for the store location. These addresses will be used to offer a return in-store option to your customers. Continue to read to know how to offer this option.

Step 3: Configure your portal
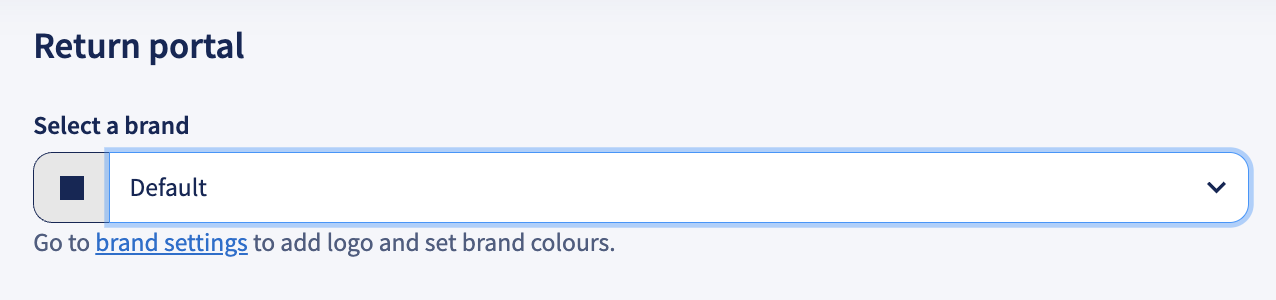
Ready to create your return portal? In your Sendcloud panel, go to Returns › Return portal.
From the dropdown menu, select the brand you’d like to set up.
Tip: Each brand needs its own return portal, so you’ll repeat these steps for every brand you offer.
What happens next? With your brand selected, you’re configuring how returns work for this brand, what customers can return, how they send items back, how you refund them, and any fees or approvals.
Feature availability
- Lite/Free plan can preview Return Portal settings.
- Growth plan includes core Return Portal functionality.
- Premium plan include advanced return features and configuration options.
Start with the Return settings (this is the foundation), then choose Return reasons, Refund methods, Return methods, and, if you charge for returns, configure Payments. You can adjust these choices anytime; they apply only to the brand you selected.
Return settings
Return address
Enter the full address where returned parcels will be delivered. Only one return address can be set per return portal. If you have one brand with multiple return locations, duplicate the brand and create a separate portal for each address. Double-check postal code, city, and country for accuracy.
Email notification
Add a verified email to receive a message every time a customer creates a return. The email must be one of the verified addresses in your Sendcloud account. For sub-users, the corporate (main) account’s email also needs to be verified.
Return policy URL (optional)
Link directly to your own return policy so customers know what to expect.
Customer support URL (optional)
Add a link to your help page or contact form for quick assistance.
Maximum return period
Set how long (in days) customers can request a return after delivery. EU law requires a minimum of 14 days.
The day the parcel is scanned as delivered counts as Day 0; Day 1 begins the next calendar day. For service-point deliveries, Day 0 is when the parcel is scanned as delivered to the pickup location, not when the customer collects it.
If no outbound shipment exists in Sendcloud, but the outbound order was imported from your webshop, the maximum return period starts on the day the order is imported into Sendcloud. This day counts as Day 0.
Some advanced return settings may only be available on Premium plans.
Return reasons
Choose the reasons customers can select when sending an item back.
- Search or scroll to select/deselect reasons (e.g. Arrived too late, Wrong size ordered, Poor quality / Faulty).
- Custom reason to create a custom reason that matches your business needs (available on Premium plan).
- Best practice: limit the list to around seven reasons to keep choices simple for customers.
For more info about the Right of Withdrawal, please check our article.
Refund methods
Decide how customers can be reimbursed once a return is approved:
- Items exchange – Allow a swap for different products or sizes.
- Money back – Provide a standard refund to the original payment method.
- Store credit – Issue a gift card or discount code.
If none of these is appropriate—for example, if you only accept returns of reusable packaging—deselect all three to skip the refund step entirely.
Return methods
Set the ways customers can send items back:
- Arrange a pick-up – Customers schedule a courier pick-up (available on Premium plan).
- At a drop-off point – No printer needed – Customer hands over the parcel; the carrier prints the label.
- At a drop-off point – Print at home – Customer prints the label and drops off the parcel.
- Return in store – Allow in-store returns. Mark the return address as a store location in the address settings.
Enabled carriers
Only carriers you have enabled are shown to customers. Activate additional carriers or add your own contracts in the Carriers page. To check pricing, go to Shipping › Shipping prices.
Some advanced return settings may only be available on Premium plans.
Payments for returns
Available only on Premium
Return fee (optional)
Display a fee that is automatically deducted from the refund when you process the return. Enter 0 to offer free returns. The fee is displayed to customers during the return-method step and is automatically subtracted from the refund amount.
Enable payments
Premium users can let customers pay directly in the portal. Requires a connection to Mollie. Supports methods such as Credit Card, PayPal, iDEAL, and more. Use test mode to trial the payment flow before accepting live payments.
Additional settings
Some additional return settings are only available on Premium plan.
- Allow returns without a Sendcloud outbound shipment – Useful when some orders ship via other platforms.
- Allow creating multiple returns per item – Lets customers return the same item more than once.
- Manually approve and reject returns – Review requests yourself and set custom rules.
Step 4: Design Your Portal
You made it work, now let’s make it beautiful!
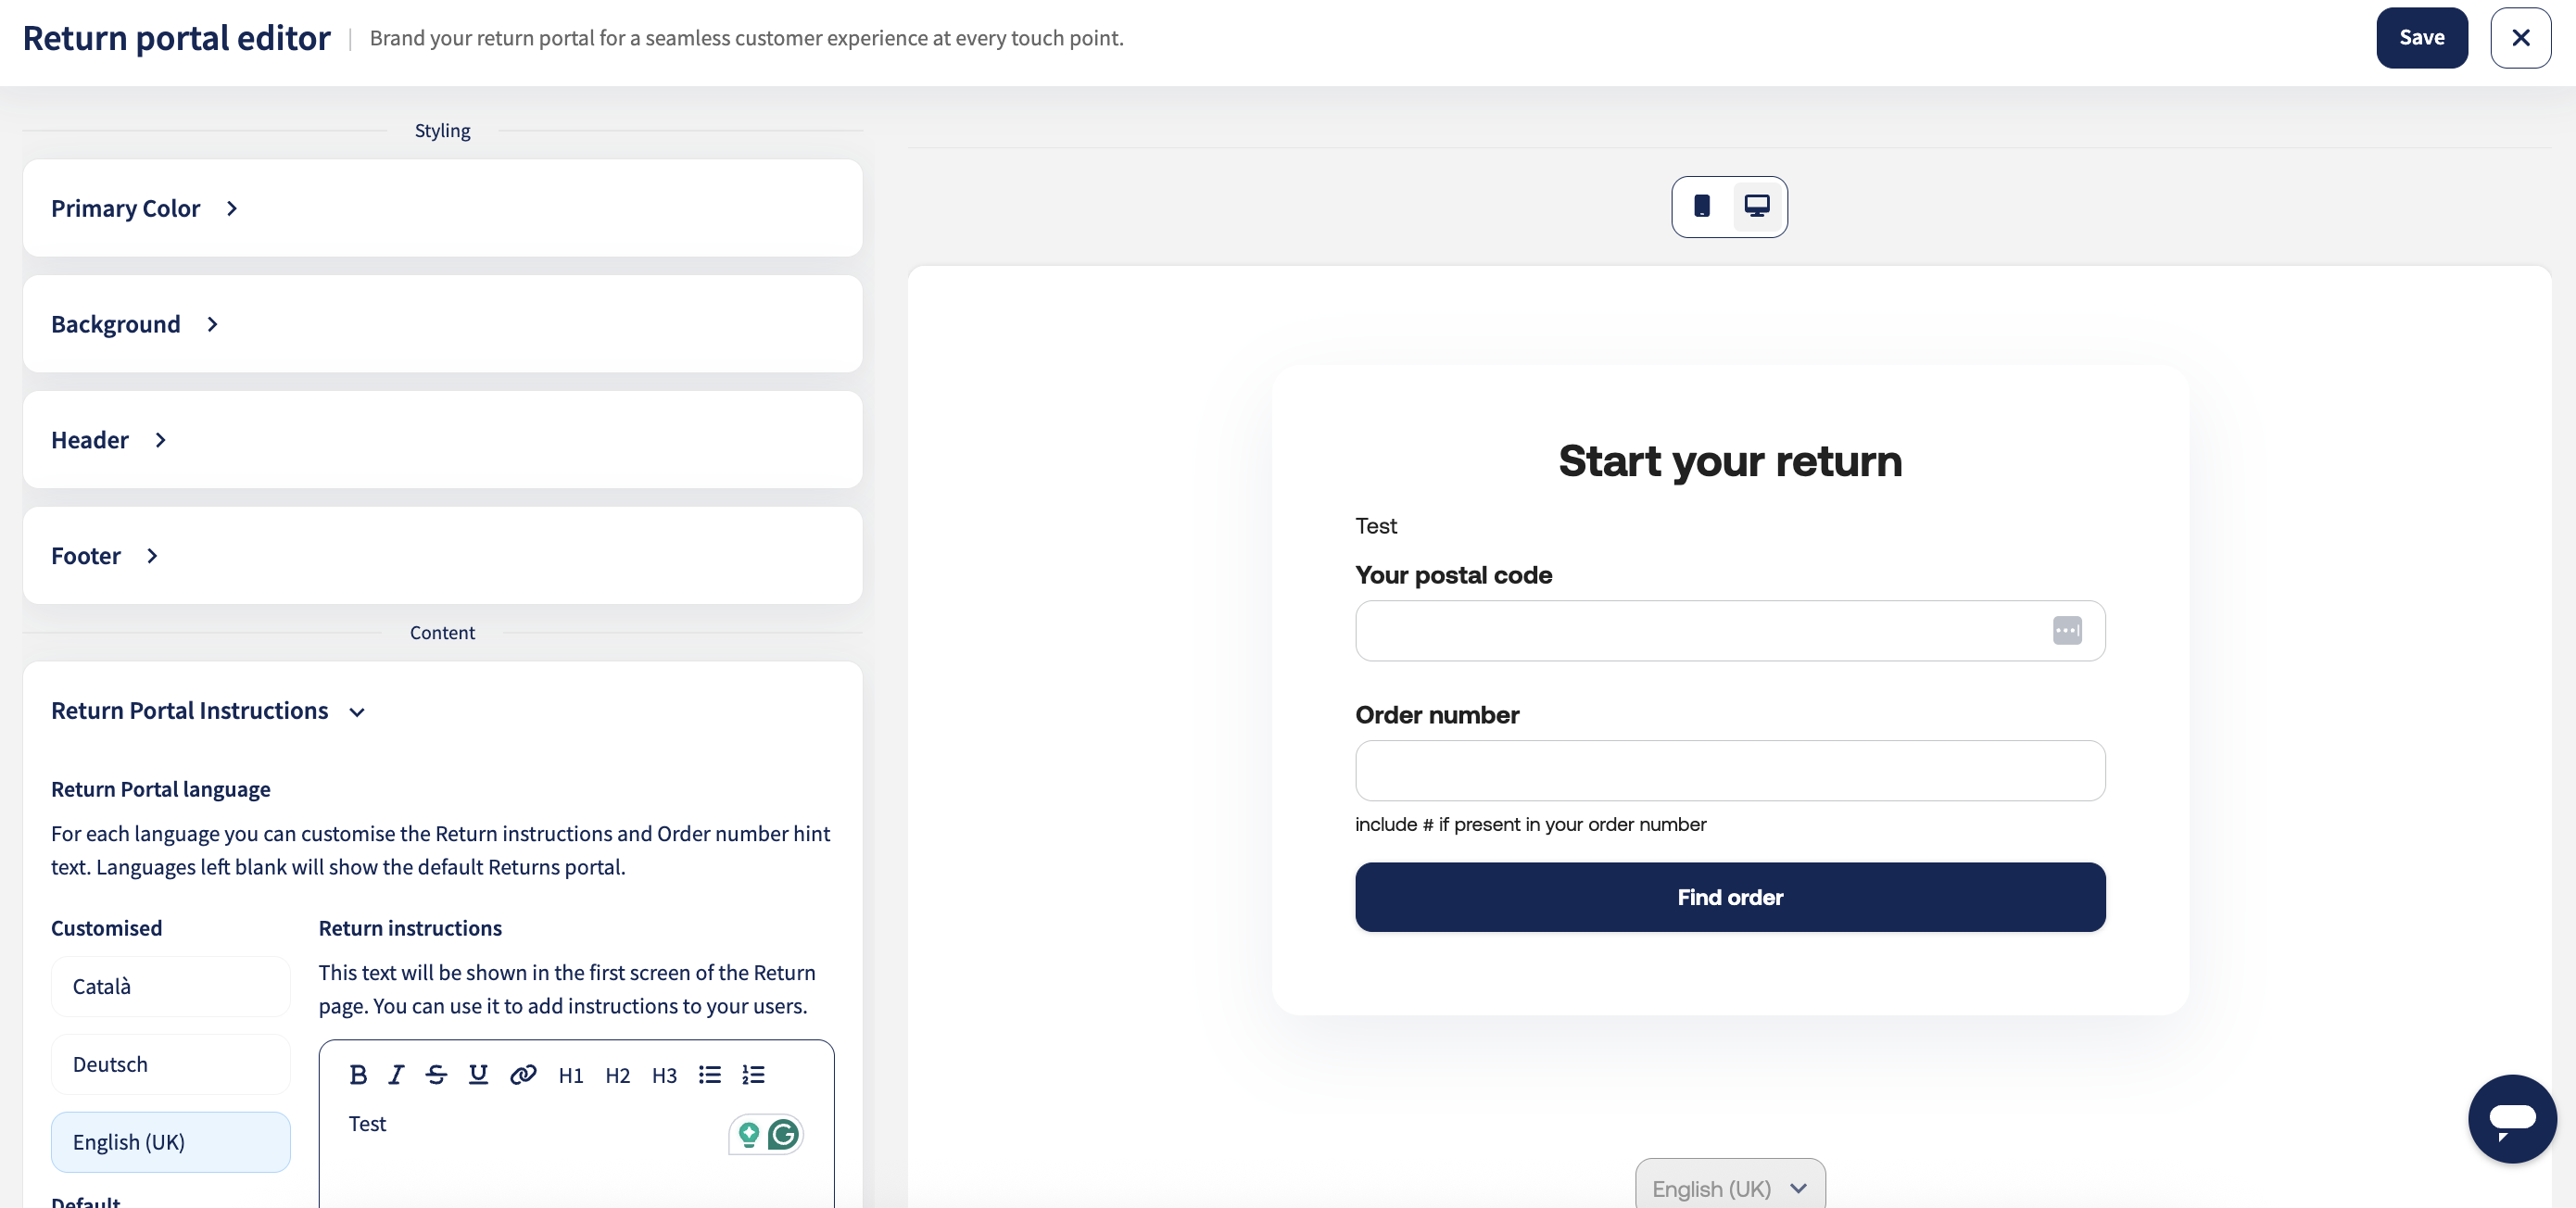
Click on the ✎ Edit design button, and a new Return portal editor page opens.
On the right, you’ll see a live preview with phone/desktop toggles so you can switch between views while you edit.
Styling
Primary color
Choose the brand color used for buttons and highlights. Pick a shade with good contrast on light backgrounds so text stays readable.
Background
Add an image or select a background color. Prefer clean, low-noise imagery so forms remain legible on desktop and mobile.
Header
Add your logo and helpful links (e.g., “Contact us”, “Return policy”). Keep it compact so the page stays task-focused.
Footer
Add secondary links (legal, FAQs, support). Great place for policy and help links.
Content
Return portal language
Choose the languages you want to customize: Català, Deutsch, English (UK), English (US), Español, Français, Italiano, Nederlands. Leave a language blank to use the default Returns portal text for that language.
Return instructions (first screen)
Tell customers exactly what to do: short, friendly, specific. You can use bold, italic, underline, headings, bullets, and links.
- What they need (e.g., order number + postal code)
- What to expect (label, any fee, timelines)
- Packaging requirements (tags, original box, etc.)
Example: Pack items securely and include all tags. Enter your order number and postal code to start your return. If a return fee applies, you’ll see it before confirming.
Personalize hint text (under Order number)
Add micro-copy that prevents mistakes. Example: “Include # if present in your order number.”
 Quick checklist before you hit Save
- Brand match: Color, logo, tone feel like your storefront
- Readability: High contrast; no text over busy images
- Clarity: Instructions are short and action-oriented
- Languages: Customized where needed
- Links: Policy/support links work and open correctly
Step 5: Return emails
Use tracking emails to notify customers at each return milestone.
Set up
- Go to Tracking → Email notifications and select the brand. Toggle Send Tracking emails to customers on.
- In the left list, find the Returns group and toggle the ones you need: (e.g., Return label created, Return received, Return request rejected).
- For any event, click Edit message to customise Subject, Button text, and Body, then Save. Use Send preview to test.
- (Optional) Open Settings (gear icon) to set Reply-to and BCC emails.
Ensure your webshop integration allows Sendcloud to send tracking updates (Settings → Integration → Configure → enable “Allow Sendcloud to send tracking updates to customers”).
Learn more
For dynamic tags, country targeting, showing purchased products (shipping emails only), marketplace restrictions, post-purchase emails, and troubleshooting, see Send branded Tracking emails to your customers (main guide).
How to embed your Sendcloud return portal into your online store
If you prefer to embed your Sendcloud return portal into your website instead of redirecting your clients to another page (via the link to your return portal), you can use the <iframe> element.
For an optimal experience, we recommend using the following dimensions:
Default mobile width: 350
Default mobile height: 800
Default desktop width: 660
Default desktop height: 1000
Important notes about using the return portal iframe element:
- Sendcloud cookie consent messages will still be active
- All buttons stay where they are (including the language selector and "manage cookie preferences" link)
- The mention "Powered by Sendcloud" will only be hidden if you have deactivated it beforehand (this is only possible for users with a Premium plan)
- Your header and footer will be removed from the iframe element
FAQ
What can you do if an order was created with the wrong address and now has to be returned?
You have two options:
- Add a new order and make a return without an outgoing shipment in Sendcloud by selecting "I don't have an outgoing shipment in Sendcloud" in the return portal.
- Create a manual return.
The return portal doesn’t work, and it gives a 404 error.
Check that the return portal is activated for the correct brand. Go to Returns > Return portal, select your brand from the dropdown, and confirm the toggle is set to Active.
Also confirm that direct debit is set up on your account, as the return portal requires it to generate labels. If both are in order and the error persists, contact Support.
The customer created a return but didn't receive the label.
Keep in mind that receiving the email with the return label can take up to 10 minutes.
If your customers are unable to print the return label or have misplaced it, you can easily resend the label to them. To do this, navigate to the specific return in the Returns overview, select the eye icon to view the return details, and click the "Resend return label" button to send it to the customer's email address.
What's the maximum number of days that a return can be accepted in the Return Portal?
The maximum number of days you can set to accept a return is 365 days. This limit complies with data retention policies, which only allow storing user information for up to one year.
Why does the return portal select the wrong brand for a return?
The return portal automatically selects the brand linked to the outgoing shipment. If a shipment was created with the wrong brand, it will use that brand for returns. You can change the brand by creating a manual return.
Can my customers choose to print a label instead of using a paperless return?
Within the return portal, users have the option to select either "No printer needed" or "Print at home", allowing flexibility in their return process.
Can I insure returns through XCover?
XCover Insurance does not currently cover returns processed through the Return Portal. You may need to explore alternative insurance options for your return shipments.
What should I do if my customer sees an "Oops, something went wrong" message when trying to create a return?
If one of your customers encounters an "Oops, something went wrong" message while attempting to create a return, it might be due to one of the following reasons. Here’s what you can check to help resolve the issue:
- Check if it's an international return: International shipments may have specific return methods that need to be activated. Ensure that the return method applicable to international shipments is active and configured correctly.
- Verify the customer's phone number: A missing phone number from the original order could cause this error. Confirm that the phone number was entered during the initial order process and is present in the return request.
If these steps do not resolve the problem, please contact our support team for further assistance, providing them with the order ID and any error messages you received. This will help us diagnose and resolve the issue more quickly.
How can I test my return portal?
You can easily test your return portal by creating test labels with the Unstamped Letter shipping method. While there isn’t a dedicated sandbox environment for the return portal, you can still test its functionality using the Track & Trace code from your test labels. Once you're happy with the results, don’t forget to activate your portal in the settings!
What happens to my return portal and return rules if I downgrade my subscription plan?
If you downgrade from Premium or Pro to Growth, your return portal will remain active. However, Premium features such as paid returns and custom return reasons will be disabled. Your existing return rules will not be automatically modified or disabled, even if they use features that are no longer available on your plan. We recommend reviewing and updating your return rule configuration after downgrading to ensure your return process continues to work as expected.
If you downgrade from Growth to a lower plan, your return portal will become inactive. Your existing return rules will remain saved in your account, but they cannot be enabled unless you upgrade to a plan that includes the return portal.