
Purpose: This article explains how to connect your Odoo account with Sendcloud to streamline your shipping process, generate shipping labels, and automatically synchronize delivery information between both systems.
Connect Odoo with Sendcloud
Before you get started:
- Make sure you have an Odoo and Sendcloud account.
- In Odoo, go to your Company settings and match the address to your Sender address in Sendcloud.
- Use the quick navigation inventory/configuration/warehouse management/warehouses to find your Warehouse settings. Make sure your Warehouse address name in your Odoo Settings matches your Company address and Contact name at Sender address in Sendcloud.
Generate Sendcloud API credentials
- In your Sendcloud account, go to Settings > Integrations.
- Search for Odoo Native and click Connect.
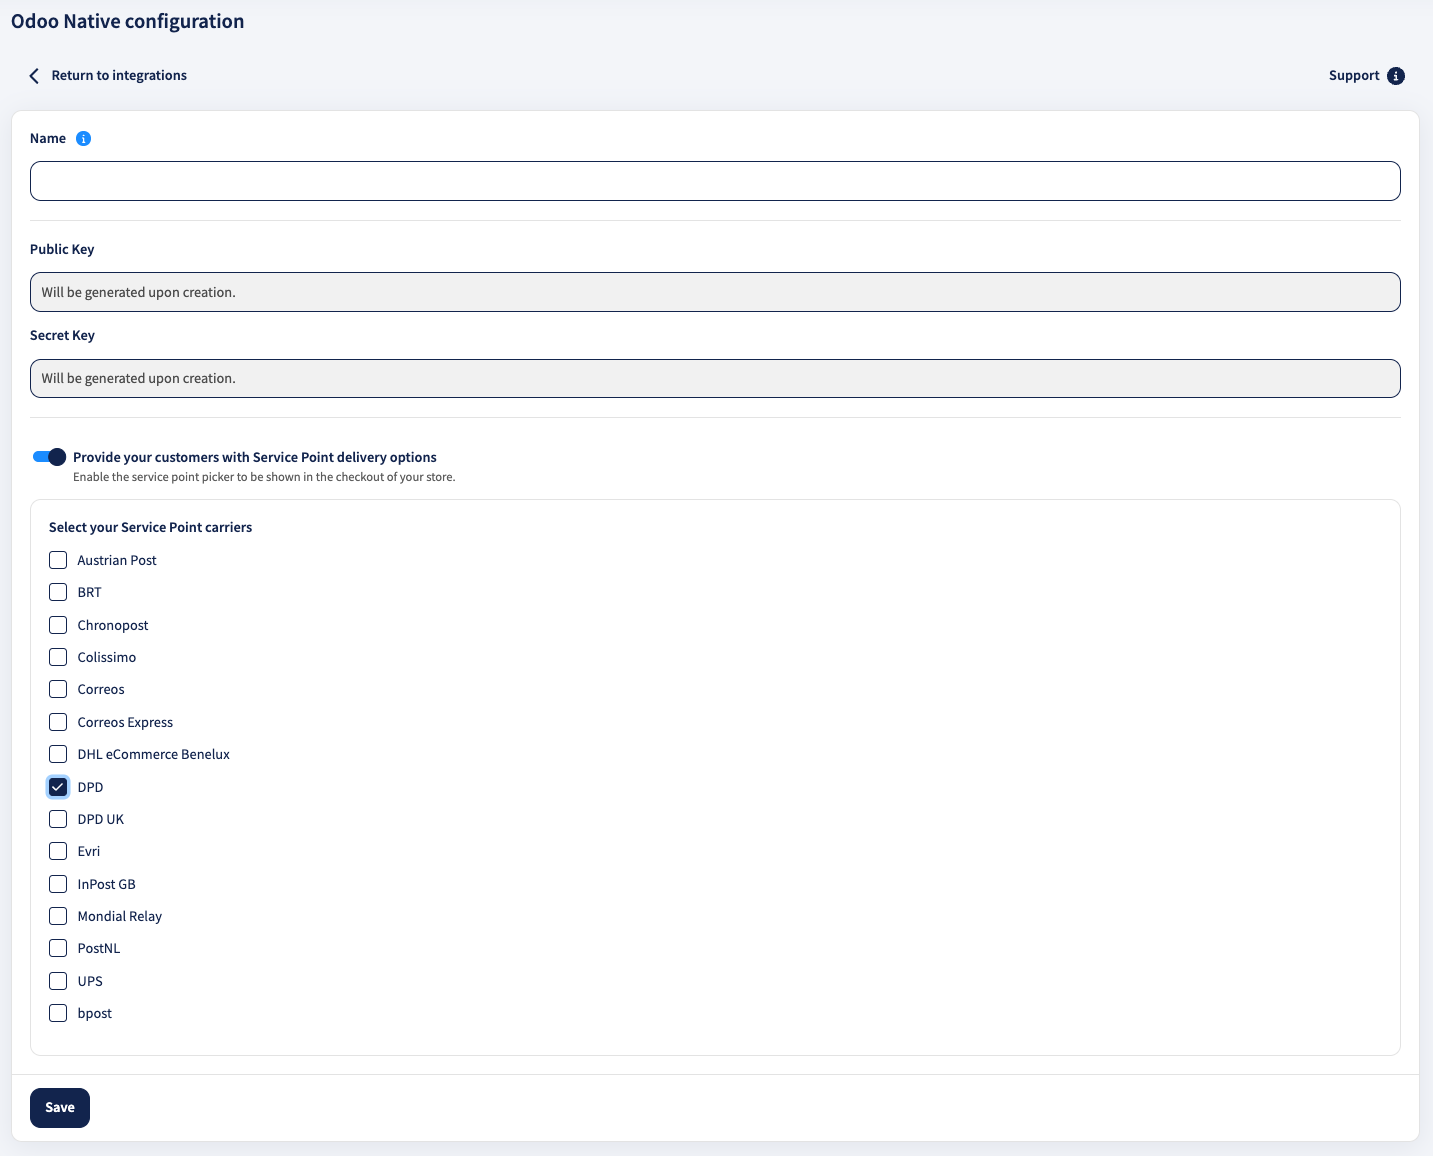
- You’ll be redirected to the Configuration page, where your Public and Secret keys will be generated.
- Name the integration using this format: Odoo CompanyName (for example: Odoo PopularWebshop).
- Enable Service Points and select the relevant shipping services.
- Click Save — your keys will be available to use in Odoo.
Configure the integration in Odoo
Install the Sendcloud shipping module
- In your Odoo environment (Home dashboard), go to the Apps module.
- Search for Sendcloud Shipping and click Install.
Activate the Sendcloud connector
- Go to Inventory > Configuration > Settings.
- Under Shipping Connectors, enable Sendcloud Connector.
- Click the Sendcloud Shipping Methods link below the connector name.
- On the Shipping Methods page, click Create.
Alternatively, you can access the page via Inventory > Configuration > Delivery > Shipping Methods.
Create a new shipping method
- Use the quick navigation: Sales/Configuration/Sales Orders/Shipping Methods to find Shipping methods
- Click on the New button to add a shipping method
- Enter a name for your shipping method
- Select Sendcloud as the provider
Then, open the Sendcloud Configuration tab and:
- Enter your Sendcloud Public Key.
- Enter your Sendcloud Secret Key.
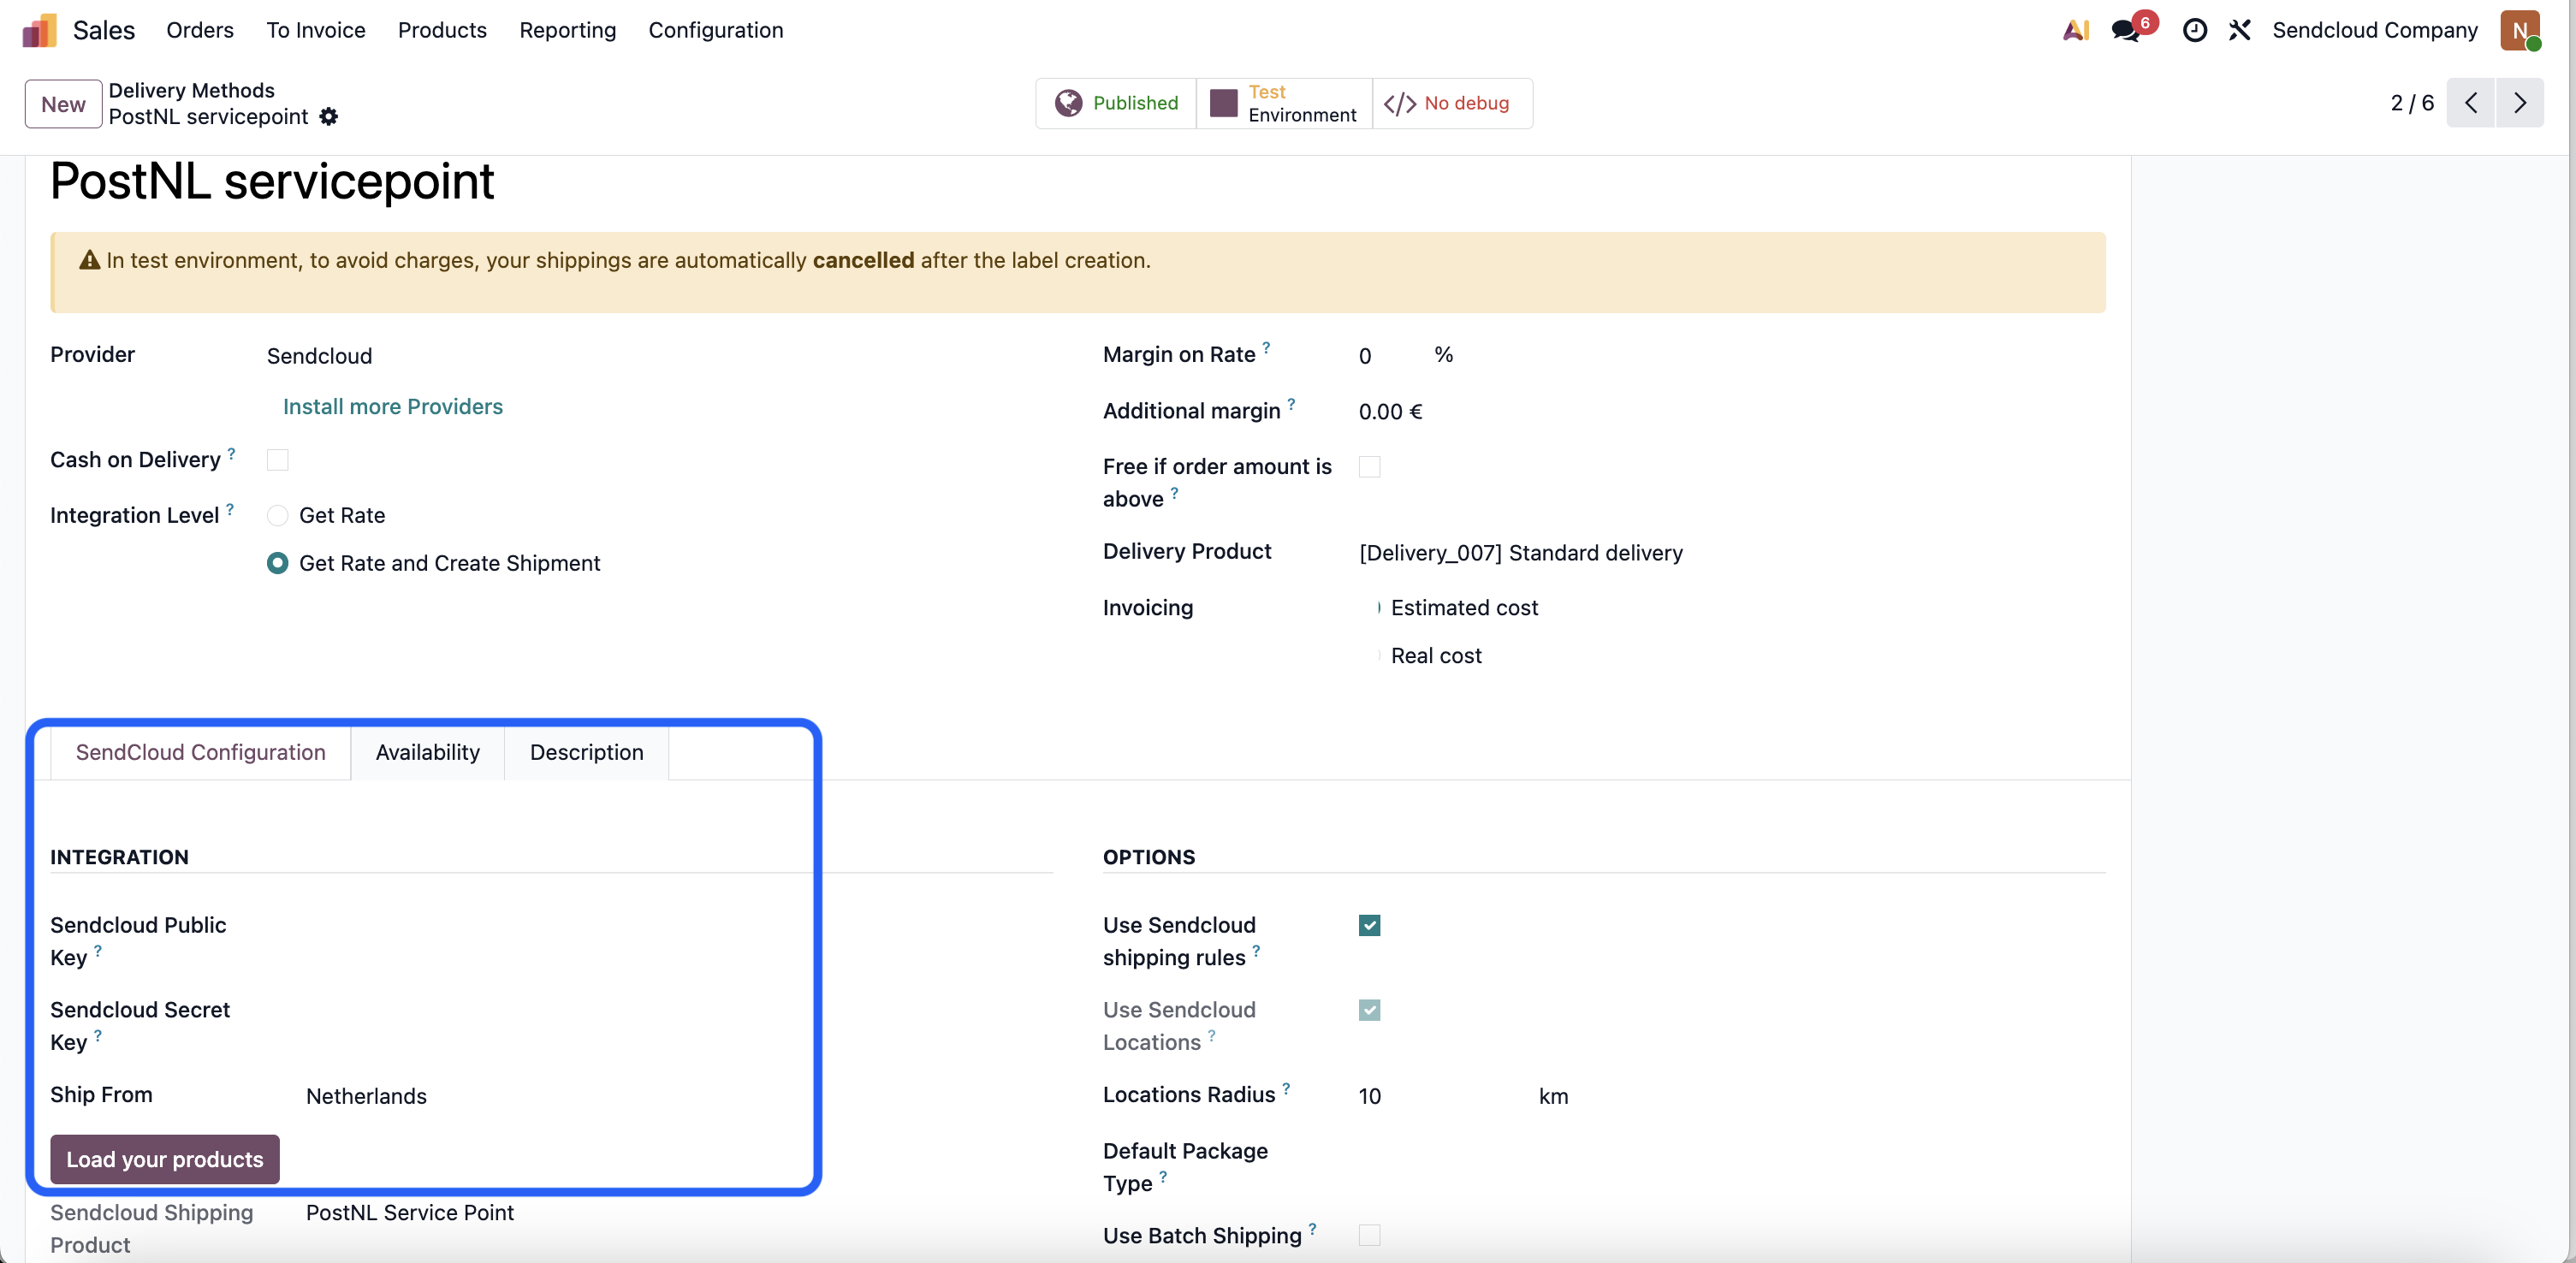
Click the cloud icon next to Shipping Methods / New to save the method.
Load your shipping products
- In the Sendcloud Configuration tab, click Load your Sendcloud shipping products. This will load all shipping products that you have activated in Sendcloud.
- Select the delivery and return methods your company will use.
- Click Select to confirm.
Tip: you can duplicate your previous shipping method if you want to create a new one.
Shipping information requirements
To successfully create shipping labels via Sendcloud, make sure the following data is correctly configured in Odoo:
- Customer details: Each customer record must include a valid phone number, email address, and shipping address.
- Product weight: Every product needs a specified Weight in the product form’s Inventory tab.
- Warehouse address: The warehouse name and address in Odoo must match the Sender address configured in Sendcloud (Settings > Addresses > Sender address).
Generate shipping labels in Odoo
How to generate labels
Go to Sales order, click on order, Click on Delivery button
- Create a quotation by going to Orders > Quotation > New and add a Sendcloud shipping product.
- Confirm and click Validate on the delivery.
- Sendcloud automatically generates shipping documents, which appear in the order’s chatter:
- Shipping label(s) based on the number of parcels
- Return label(s) if enabled in the connector
- Customs documents, when required by the destination country
The tracking number will also be added automatically.
Shipping rules
You can create shipping rules to automatically apply specific label generation settings based on certain conditions — for example, insuring high-value items or using a particular carrier service for certain destinations.
How to set up shipping rules
- In Odoo, go to Inventory > Configuration > Delivery > Shipping Methods.
- Select the intended Sendcloud shipping method.
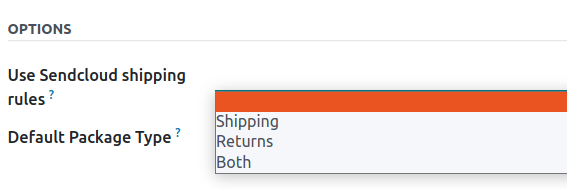
- Open the Sendcloud Configuration tab and scroll to the Options section.
- Under Use Sendcloud shipping rules, choose when to apply the rules:
- Shipping to customers
- Returns from customers
- Both
Once enabled, the shipping rules you’ve defined in your Sendcloud account will apply automatically to matching shipments.
Create rules in Sendcloud
- In your Sendcloud account, go to Settings > Shipping rules.
- Click Create new to add a new rule.
- In the Actions section:
- Set a Condition to determine when the rule applies (e.g. parcel weight, destination country, order value).
- Define the Action Sendcloud should take when the condition is met (e.g. add insurance, select carrier, enable signature on delivery).
See our How to create shipping rules article for more information.
FAQ
What if my shipment is too heavy?
If the shipment is too heavy for the configured shipping method, the weight is split to simulate multiple packages. Products will need to be put in different Packages to Validate the transfer and generate labels.
Shipping rules can also be set up in Sendcloud to use other shipping methods when the weight is too heavy. However, note that these rules will not apply to the shipping price calculation on the calculation of the sales order.