
Purpose: Learn how to export parcel data as a CSV file, what information is included in the export, and how to download your shipment and return data from the Sendcloud panel.
How to export your parcel data
Sendcloud provides access to a wide range of shipping data. You can export information about your parcels as a CSV file to gain more visibility into your shipments.
You can use this information to compare shipping methods, analyze shipping activity, create reports, or review your shipment history.
On the Growth, Premium, and Pro plans, you can export parcel data from the Created labels, Shipped, and Cancelled tabs.
Important: You can export parcel data dating back a maximum of one year.
Which information is included in the CSV export?
The CSV export includes sender, receiver, and parcel information. Select one of the categories below to see the available data fields.
Sender information
- from name
- from company name
- from telephone
- from email
- from address 1
- from address 2
- from city
- from postal code
- from country
Receiver information
- to name
- to company name
- to telephone
- to email
- to address 1
- to address 2
- to city
- to postal code
- to country
- to country state
Parcel information
- weight
- carrier
- tracking number
- created at
- announced at
- order number
- parcel items
- length
- width
- height
- Sub-user who created the parcel
💡 Identify who created a parcel
The Created labels CSV export now includes information about the sub-user who created each parcel. This is especially useful when multiple users manage shipments within the same Sendcloud account.
You can also find this information directly in the parcel detail view. If the sub-user has entered a name in their account profile, Sendcloud displays that name. Otherwise, their user ID is displayed instead.
Sub-users can add or update their name in their account profile. This information is not managed in the user roles settings.
How to download your CSV export
Follow the steps below to export your parcel data from the Sendcloud panel.
- Go to Shipping and open the Created labels, Shipped, or Cancelled tab.
- Use the available filters to find the parcels you want to include in your export.
- Select the parcels you want to export.
- Click Actions and select Export as a CSV file.
- The export starts in the background. You can continue working in Sendcloud while the file is being prepared.
- Once the export is ready, an email containing the download link is sent to the registered email address associated with your account.
- Open the email and click the link to download your CSV file.

💡 Good to know: The export runs in the background, so you don't need to keep the export page open while your file is being prepared.
Download your export from notifications
If you don't receive the export email at the primary email address associated with your account, you can also download the file directly from the Sendcloud panel.
- Click the Notifications icon in the top-right corner of the platform.
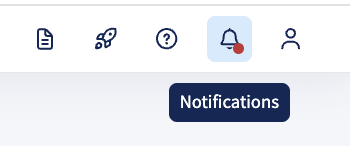
- Find the notification for your completed CSV export.
- Click the available download link to download your file.
How to export return parcel data
You can also export information about your return shipments as a CSV file.
- Go to the Returns tab in your Sendcloud panel.
- Open the Actions dropdown menu.
- Select Export as a CSV file.