
Purpose: Learn how to connect your own Mondial Relay carrier contract with your Sendcloud account in three easy steps.
To apply for a contract with Mondial Relay you can create a professional account here.
Step 1: Activate your Sendcloud subscription
Sendcloud offers three subscriptions with which you are able to use your own transport contract: Lite, Growth and the Premium plan.
For more information regarding which plan is best for you and the needs of your business, you can always contact us via the support section of your Sendcloud account or click here.
Step 2: Enable your carrier contract
Once you have activated a Sendcloud subscription, you can connect your carrier contract.
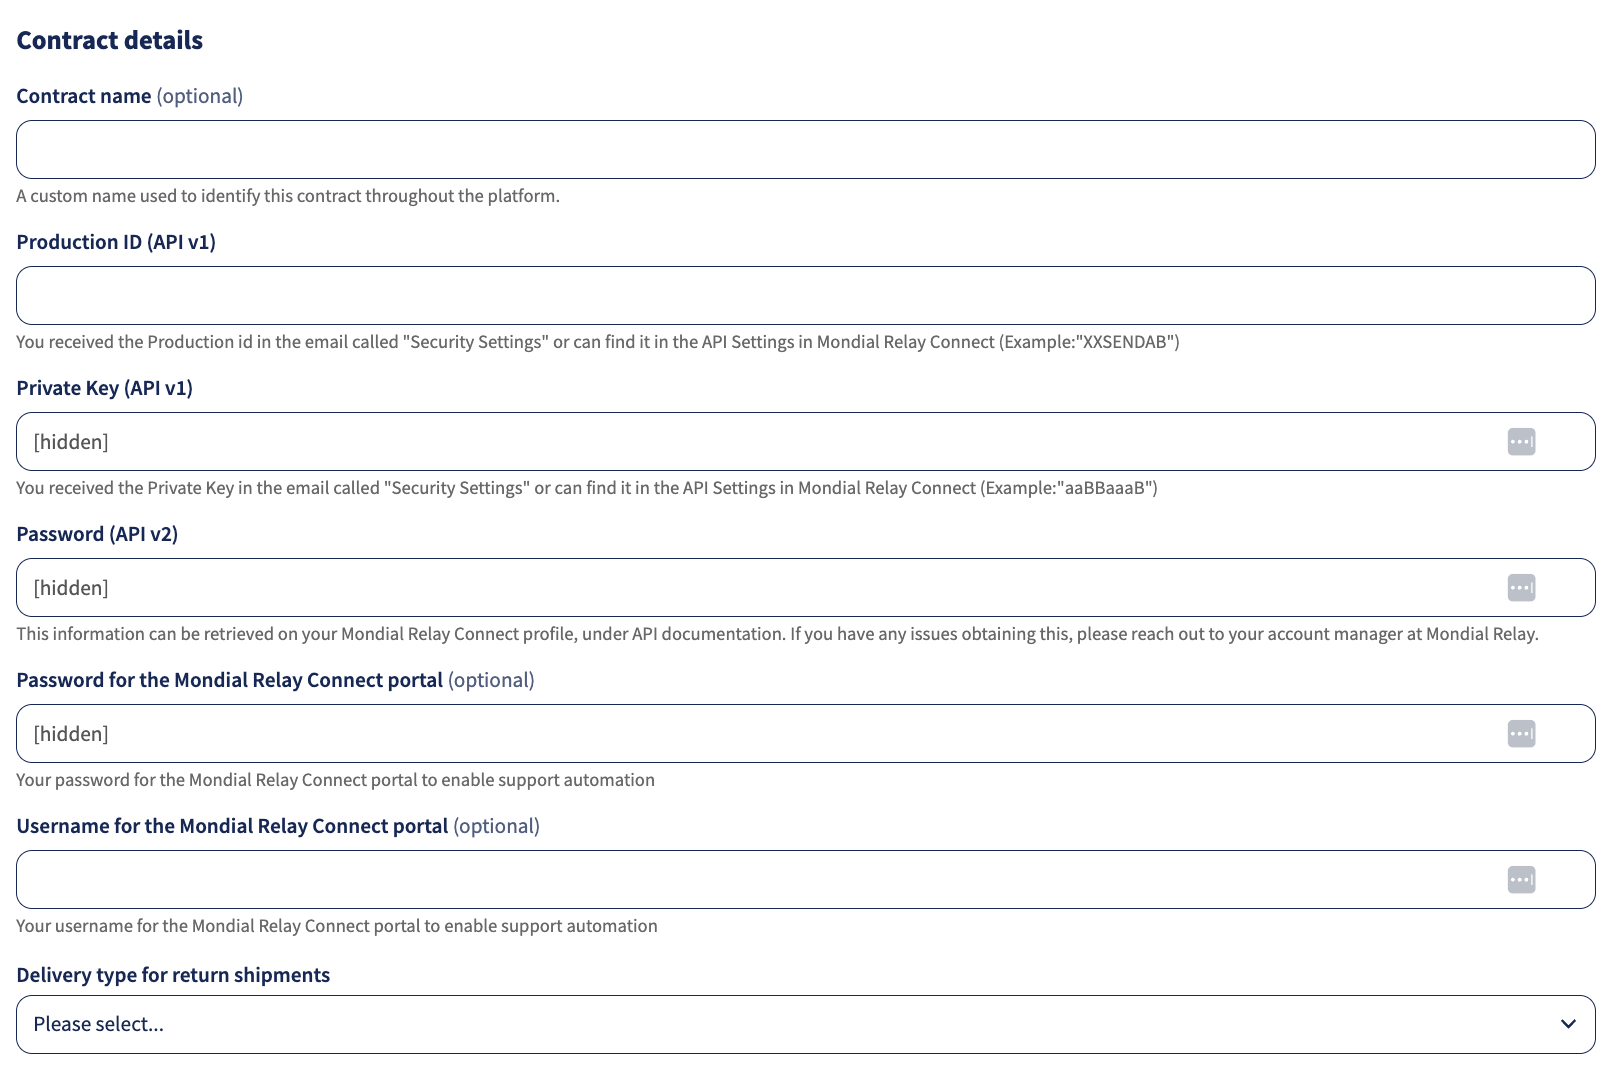
In your Sendcloud panel navigate to Shipping > Carriers. Find Mondial Relay in the list of carriers and press Enable. Then go to the My contracts tab and find Mondial Relay from the list. Click Add contract. Here you can add the credentials needed to validate the connection to Mondial Relay.
Step 3: Enter your Mondial Relay account details
Once your Mondial Relay professional account is open, you will receive a document by email entitled "Security Settings". This document includes the following information:
- Contract name (optional): You may choose a name for your Mondial Relay contract in Sendcloud, such as "My Mondial Relay contract".
- Product ID: Example: "FRSENDCL" (8 characters)
- Private key: Example: "aaBBaaaB" (8 characters)
- Password (API v2)
- Password for the Mondial Relay Connect portal (optional)
- Username for the Mondial Relay Connect portal (optional)
- Delivery type for return shipments
Complete the form with the information above and click Add this contract when you are done.
These fields can be obtained via the Mondial Relay portal or from your Mondial Relay account manager.
Note:
- Please check that your Mondial Relay account is sufficiently funded before connecting your contract to your Sendcloud account.
- Mondial Relay shipments must be handed over to Mondial Relay, either through a Mondial Relay pickup or by dropping them off at a Mondial Relay Service Point. Parcels cannot be handed over to another carrier, even if another carrier name appears on the shipping label due to last-mile delivery partnerships.
Done! Once you've followed the steps above, your Mondial Relay contract should now be successfully linked to your Sendcloud platform and you can begin shipping on your Mondial Relay rates. When you create a label with a Mondial Relay shipping method, the label price will show as 0.00 EUR in your account.