
Purpose: This guide provides step-by-step instructions for installing and setting up the Sendcloud WooCommerce V2 plugin.
Related articles
→ Self-hosted Shop Systems: Troubleshooting Integration Issues
→ WooCommerce V2 Troubleshooter
Connect your WooCommerce V2 online store to Sendcloud
- In the Sendcloud panel, go to Settings > Integrations > Find WooCommerce V2 > Click Connect
- You will be redirected to WordPress. Click Download to download the Sendcloud module.
Installing the Sendcloud Plugin
To install the plugin from the WordPress Marketplace:
- Go to the WooCommerce admin panel and navigate to Plugins > Add Plugin (or Add New Plugin in older versions).
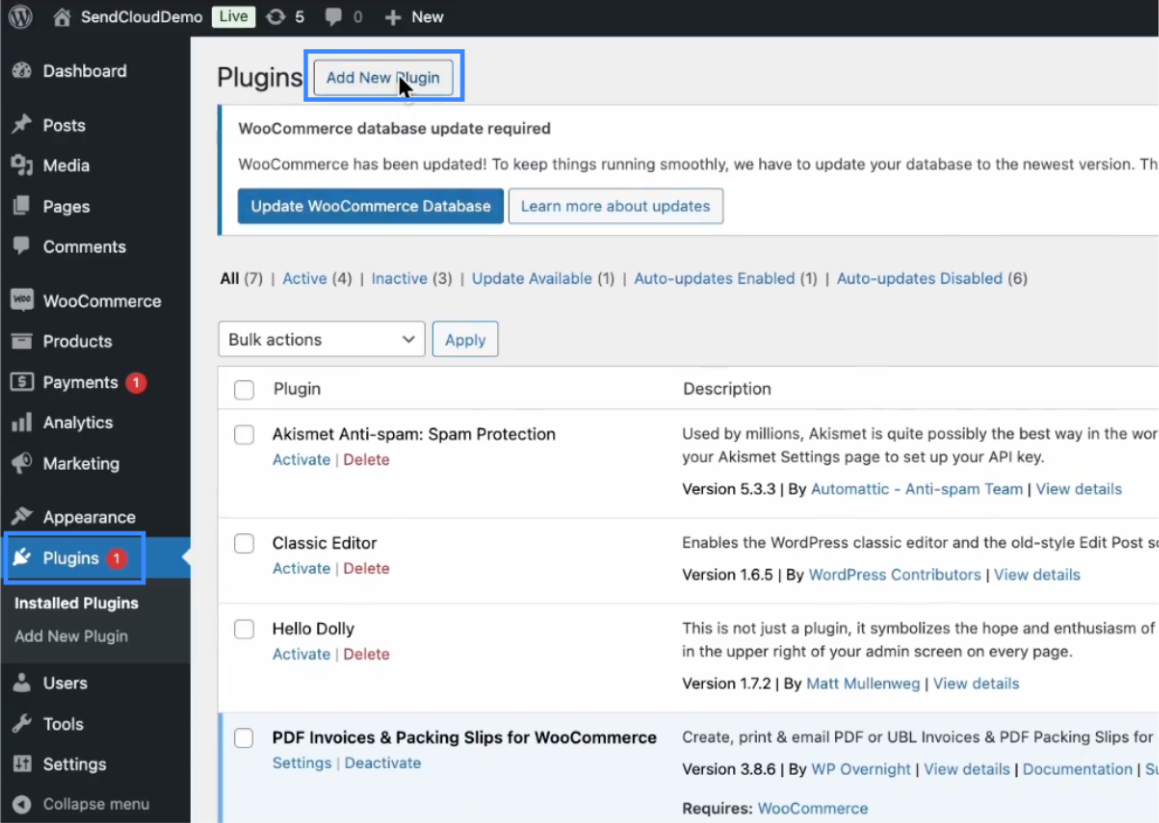
- Search for “Sendcloud” then click on Install Now
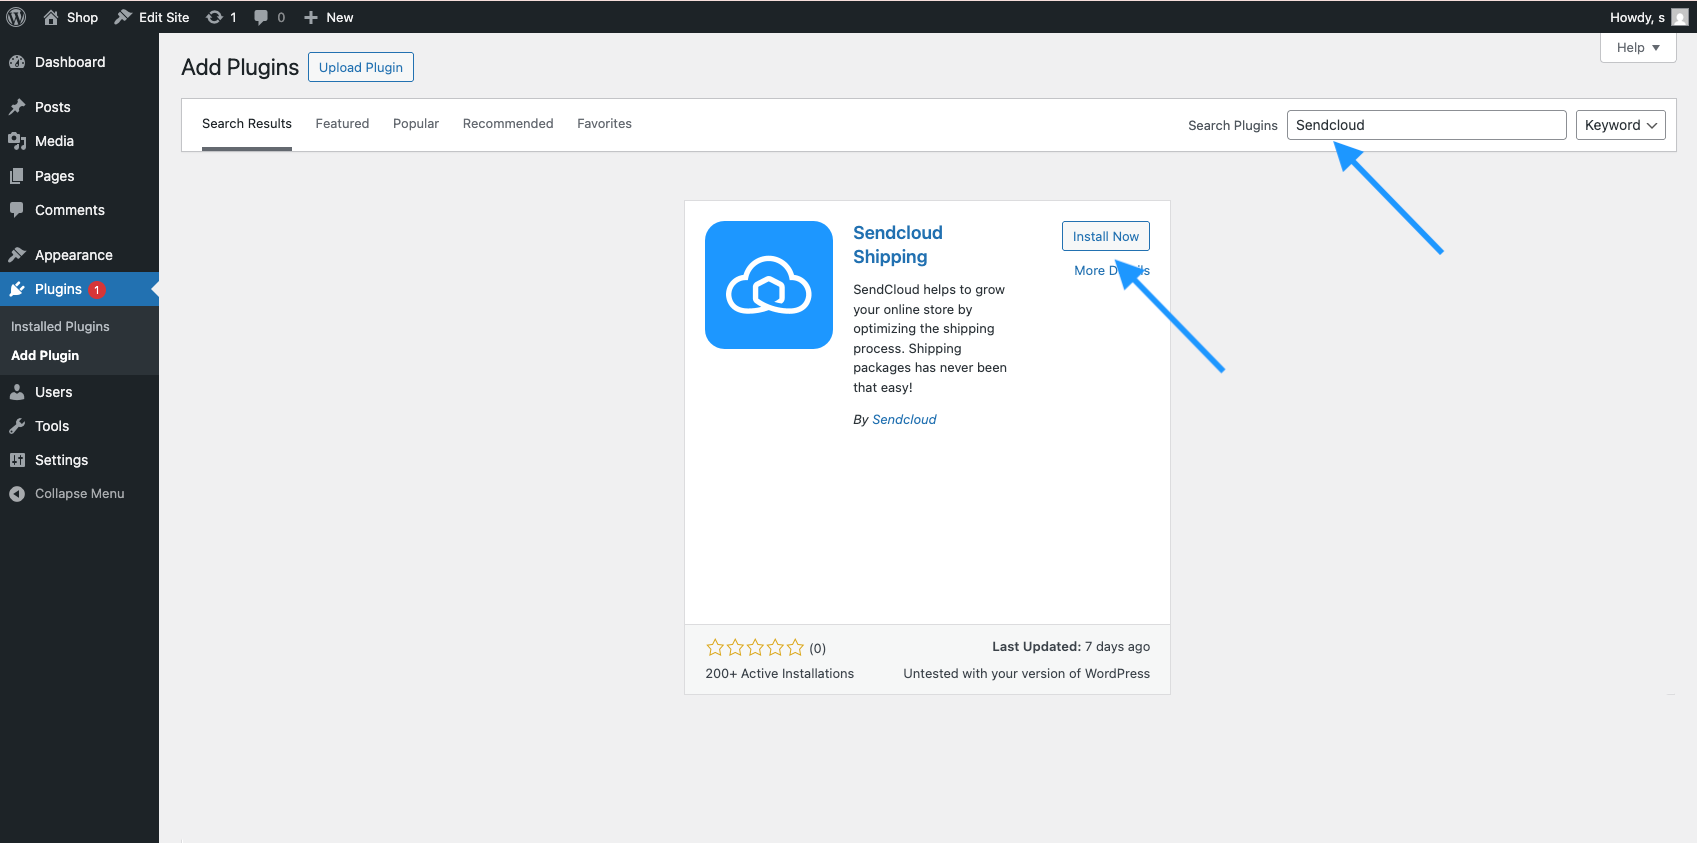
- Once installed, click on Activate

Connecting with Sendcloud
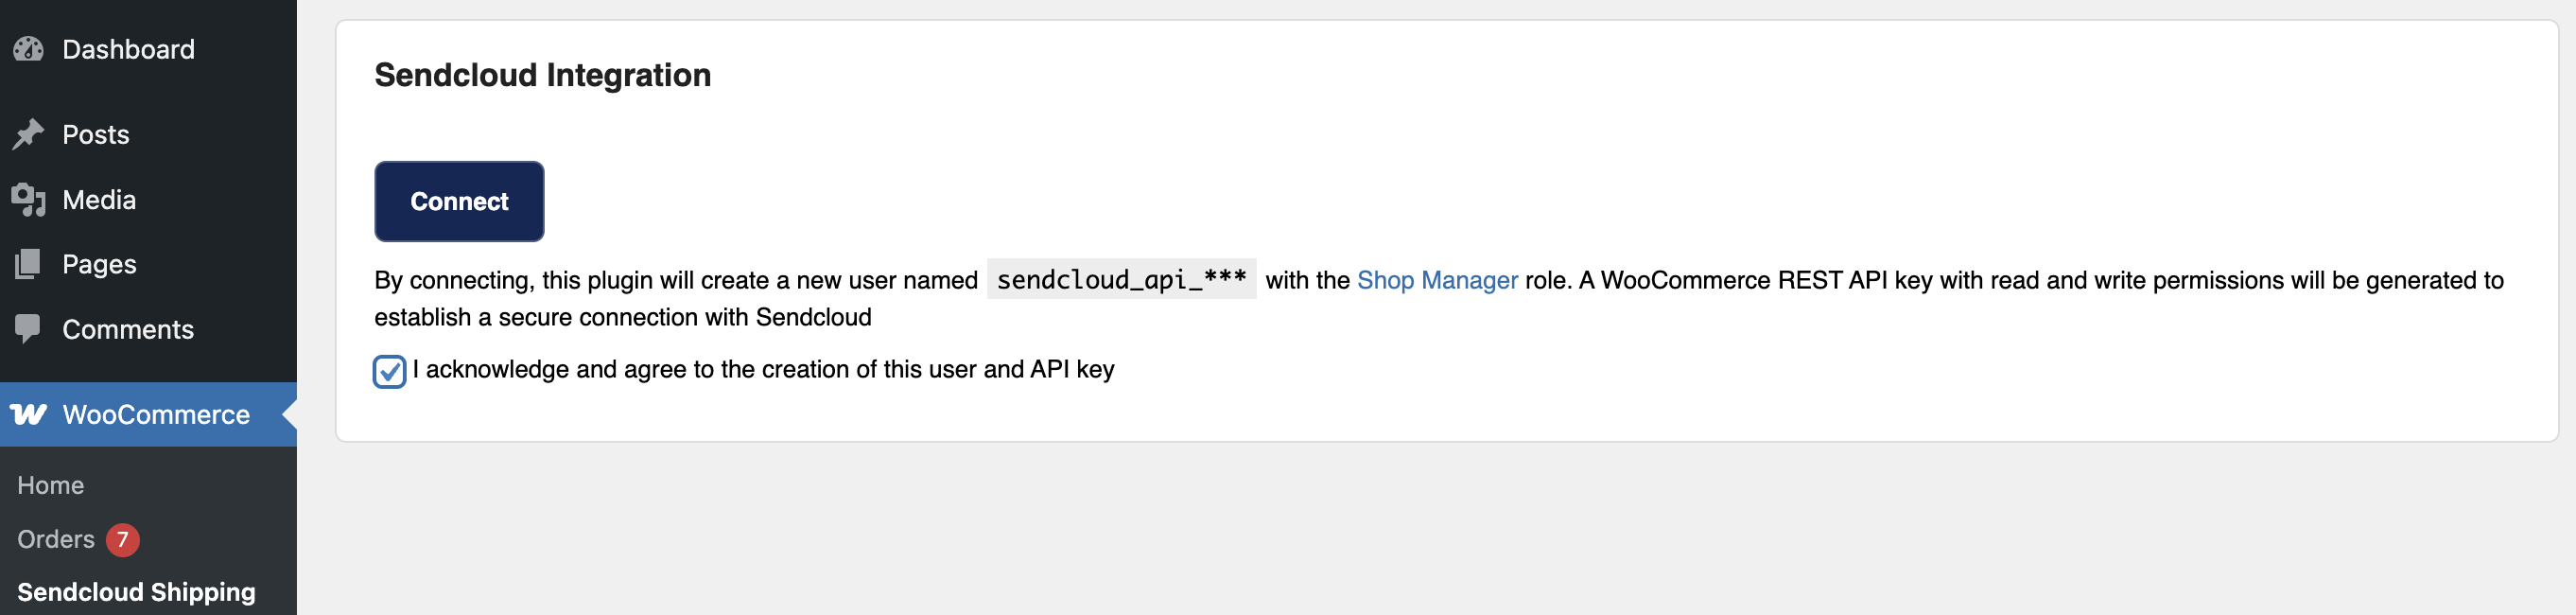
- After installation, go to WooCommerce > Sendcloud Shipping > Tick the checkbox to enable the Connect button, then click Connect to start the integration.
- You’ll be redirected to a new tab to enter your Sendcloud credentials.
- Once entered, the integration will be created and you’ll be redirected back to the Sendcloud panel. To confirm the connection, go to Settings > Integrations.

Important to know: After successfully connecting your WooCommerce store to Sendcloud, the following resources will be automatically created in your shop admin:
- A user named sendcloud_api with the role Shop manager.
- A webhook named Sendcloud Update Order that listens to the topic
order.updated. It uses the following delivery URL format:https://woocommerce.eu-central-1-0.sendcloud.com/v1/webhooks/fetch_order/<6 digit integration ID>
This webhook is triggered when an order is updated in WooCommerce, for example when the address, order status, or items are changed. It notifies our middleware, which retrieves the updated order data and syncs it with the Sendcloud panel.
Adding shipping zones & rates
Shipping zones allow you to offer different rates and shipping methods on your checkout page, based on the customer's location. You can also use shipping zones to differentiate between domestic and international shipments, so you can apply a different pricing policy per zone.
You can manually add rates and shipping zones via WooCommerce by following the steps below:
- From the sidebar menu in your WooCommerce dashboard, go to WooCommerce > Settings > Shipping and then click Add shipping zone
- Give your shipping zone a name, select the regions you want to include, and add your shipping methods.
- When you add a shipping method, you'll have the option to decide from the following pricing methods:
— Fixed rate: Set a unique delivery fee
— Free delivery: Grant a free delivery to your customers
— Local pickup: Customers will pick up the order themselves - Once the shipping method is added, click on Edit to add rates for this method:
- For more information about adding rates and shipping classes in WooCommerce, see the following article: Product Shipping Classes - WooCommerce.
Order Synchronization
- Live Synchronization: Orders sync automatically when created or updated in WooCommerce.
- Manual Synchronization: You can manually sync orders using the order fetching button in the Sendcloud panel.
Product Data Configuration
-
Set EAN Codes: Go to Products > All Products, select a product, and under Product Data > Inventory enter the EAN:
- Use the 'EAN by Sendcloud' field for WooCommerce versions below 9.2

- Use WooCommerce’s native EAN field for versions 9.2 and above.

- Use the 'EAN by Sendcloud' field for WooCommerce versions below 9.2
-
International Shipping Fields: Enter the HS Code and Country of Origin under the Shipping tab in the product data.

⚠️ Using 3rd party plugins
If you're using WooCommerce, Magento, or PrestaShop with third-party plugins or custom themes, there’s a chance they might interfere with the Sendcloud plugin.
To ensure long-term stability and fast updates, we’ve decided to limit support for third-party plugins and themes.
Potential issues
Conflicts with external plugins can cause issues like:
- Shipping labels are not generating correctly
- Orders are not syncing between your shop and Sendcloud
- Missing service point selectors
Troubleshooting
What to do if you run into issues:
- Disable other plugins/themes and re-test
- If the problem disappears, reach out to the plugin provider
If you’d like us to support a specific plugin, you can submit a request through the Support section in your account.