
Purpose: Learn how to connect your PrestaShop V2 online store easily with Sendcloud in minutes.
Related articles
→ Self-hosted Shop Systems: Troubleshooting Integration Issues
Connect your PrestaShop online store to Sendcloud
- In the Sencloud panel, go to Settings > Integrations > Find PrestaShop V2 > Click Connect
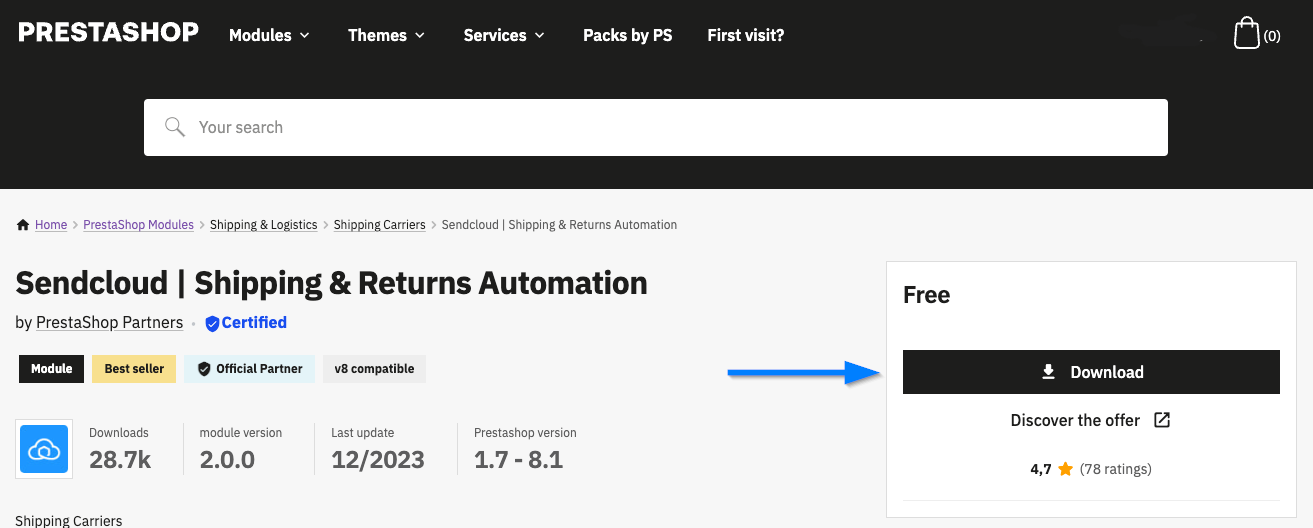
- You will be redirected to the PrestaShop Marketplace. Click Download to download the Sendcloud module.
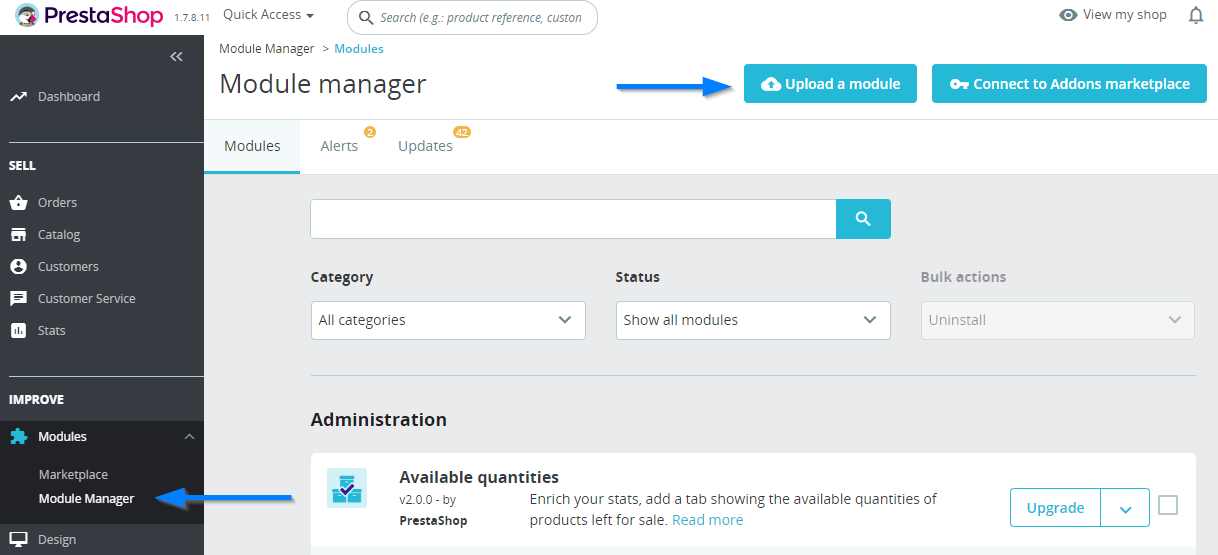
- When the download is completed, go to Modules > Module Manager > Click Upload a Module
-
To install the module, upload or drag and drop the downloaded zip file
Note: Since module version 2.0.14, when installing the module, the .htaccess file in the shop gets regenerated to ensure we can retrieve all the needed data from the shop. If you had any custom rules defined in this file, please restore them from the backup file, created during the installation process and located next to the original .htaccess file. - When the module installation is complete, click Configure
- In the new page that has opened, click Connect with Sendcloud
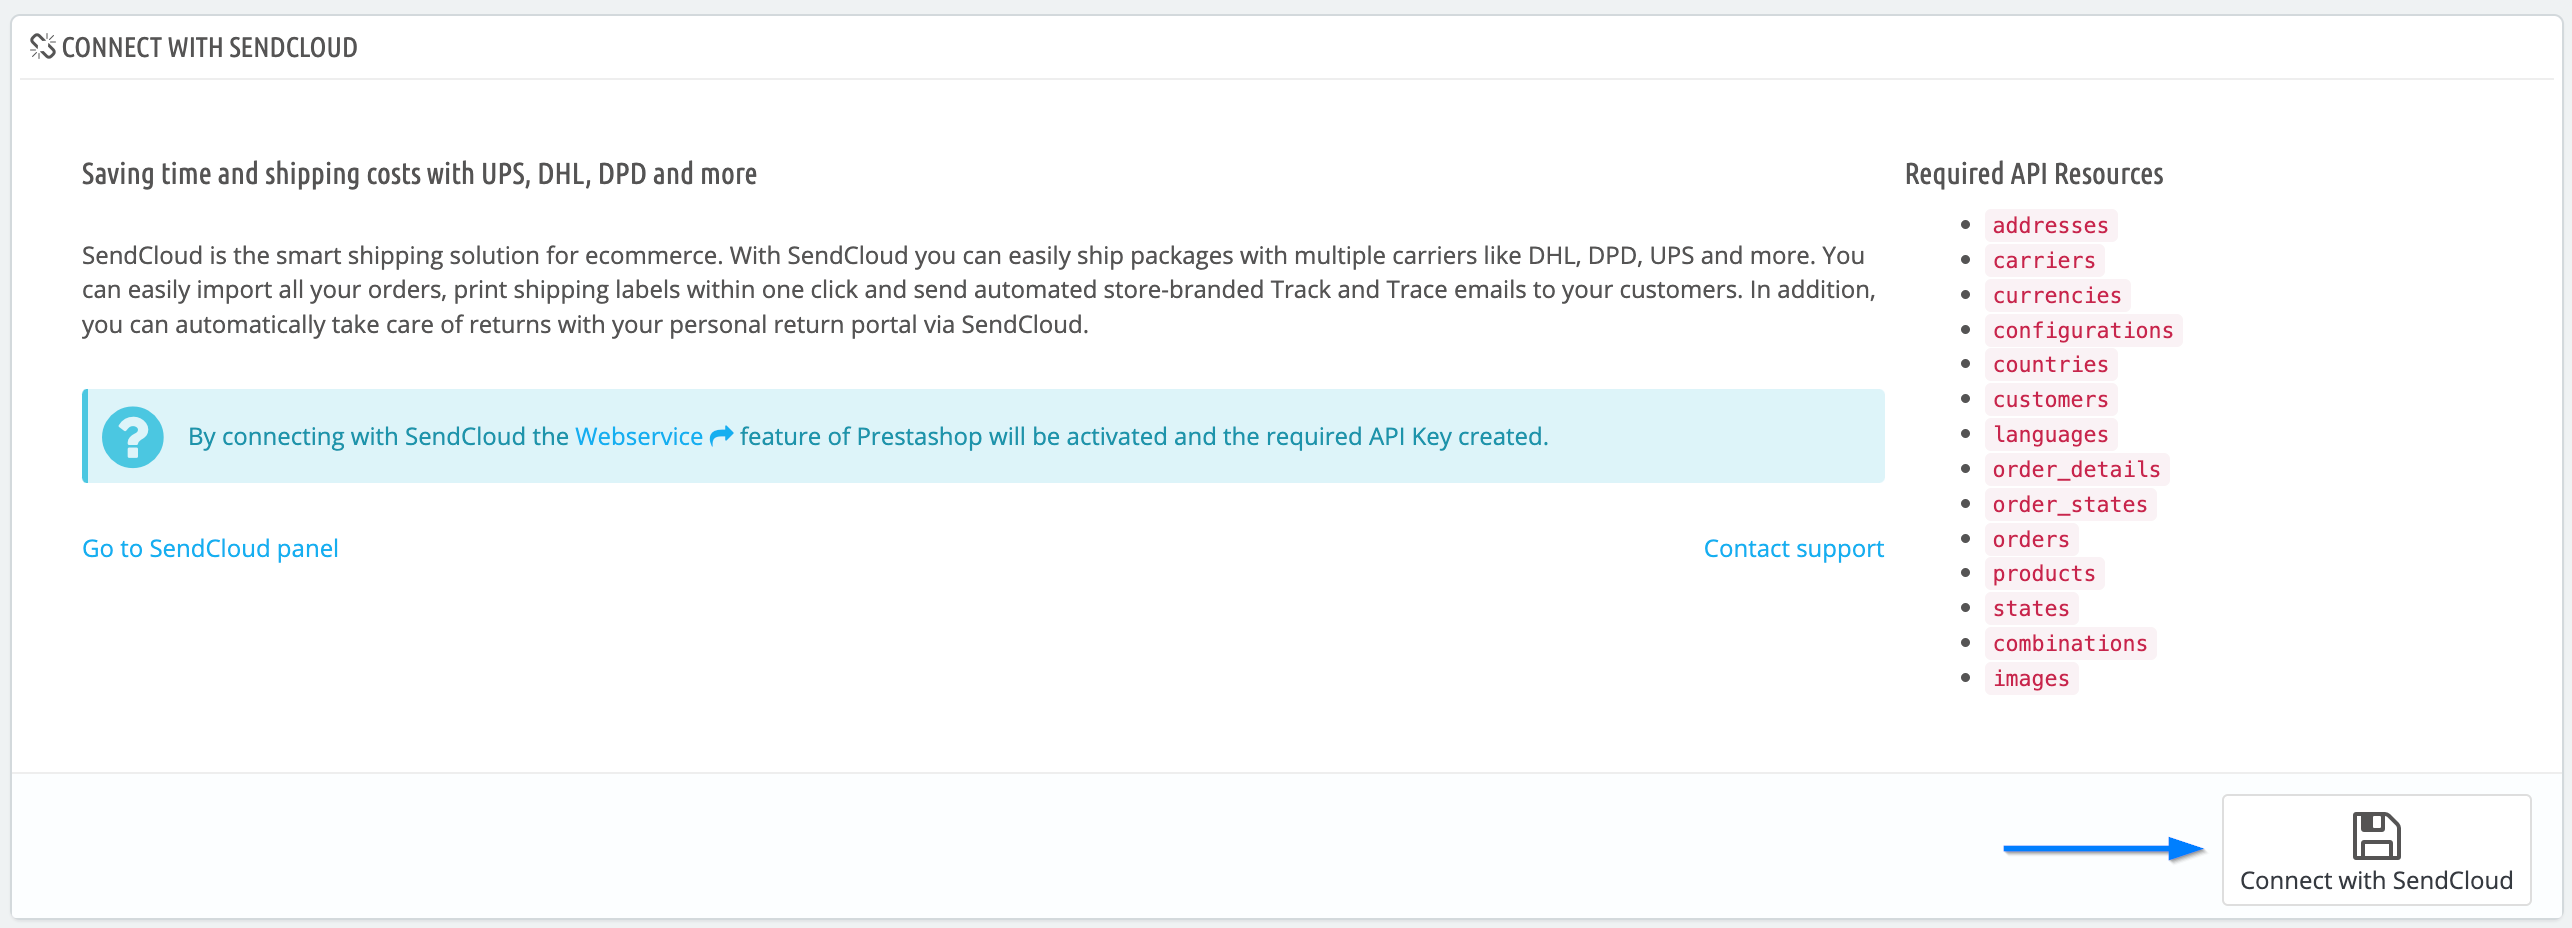
- Click Connect to confirm that you authorize the connection to Sendcloud.
Upgrading from PrestaShop V1 to V2
Sendcloud panel
Once you have installed and configured the PrestaShop V2 plugin, follow these steps in the Sendcloud panel:
- Go to Settings > Integrations
-
Find your legacy integration
 Note: The legacy version of your plugin is the one called "PrestaShop".
 - If you have service points enabled, take note of the carriers that you have selected and uncheck the box to disable service points

- A pop-up window will appear. Click Disconnect > Click Yes disconnect my shop to confirm.
PrestaShop back office
After disconnecting your integration from your Sendcloud panel, open your PrestaShop admin dashboard and follow these instructions:
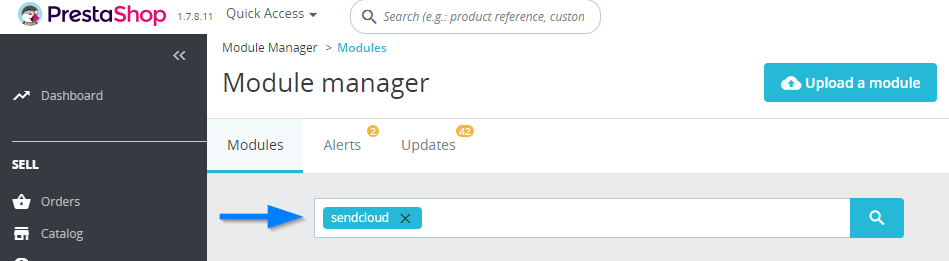
- Navigate to Modules > Module Manager
- Use the search bar on top of the page to search for Sendcloud. You will find two modules: Version 1.6.2 and Version 2.0.0 (or newer).
- Click the down arrow next to the v.1.6.2 module to show more options

- Click Disable > Click Yes, disable it to confirm your choice.
Reactivate service points in the Sendcloud panel
If you previously used service points and deactivated them, follow the steps described in the article Service points for PrestaShop to re-enable them. Check the list of carriers you wrote down so that you can remember which ones you used.
⚠️ Using 3rd party plugins
If you're using WooCommerce, Magento, or PrestaShop with third-party plugins or custom themes, there’s a chance they might interfere with the Sendcloud plugin.
To ensure long-term stability and fast updates, we’ve decided to limit support for third-party plugins and themes.
Potential issues
Conflicts with external plugins can cause issues like:
- Shipping labels are not generating correctly
- Orders are not syncing between your shop and Sendcloud
- Missing service point selectors
Troubleshooting
What to do if you run into issues:
- Disable other plugins/themes and re-test
- If the problem disappears, reach out to the plugin provider
If you’d like us to support a specific plugin, you can submit a request through the Support section in your account.