
Purpose: This guide provides step-by-step instructions for installing, setting up, and migrating to the Sendcloud WooCommerce V2 plugin.
WooCommerce V2 does not require a separate plugin download.
The WooCommerce V2 integration uses the standard Sendcloud WooCommerce plugin, which currently shows version 1.0.21 in WordPress. Even though the plugin version does not mention “V2”, this is the correct plugin for connecting to WooCommerce V2.
Ensure that orders are importing correctly with WooCommerce V2. Once confirmed, please uninstall V1 to avoid duplicate orders, which could cause confusion during processing.
Dynamic Checkout is deprecated in WooCommerce V2. To continue using this feature, a custom API integration is required. Remove the Dynamic Checkout app before migrating.
Connect your Woocommerce V2 online store to Sendcloud
- In the Sencloud panel, go to Settings > Integrations > Find WooCommerce V2 > Click Connect

- You will be redirected to Wordpress. Click Download to download the Sendcloud module.
Installing the Sendcloud Plugin
Next, to install the Sendcloud plugin for WooCommerce:
-
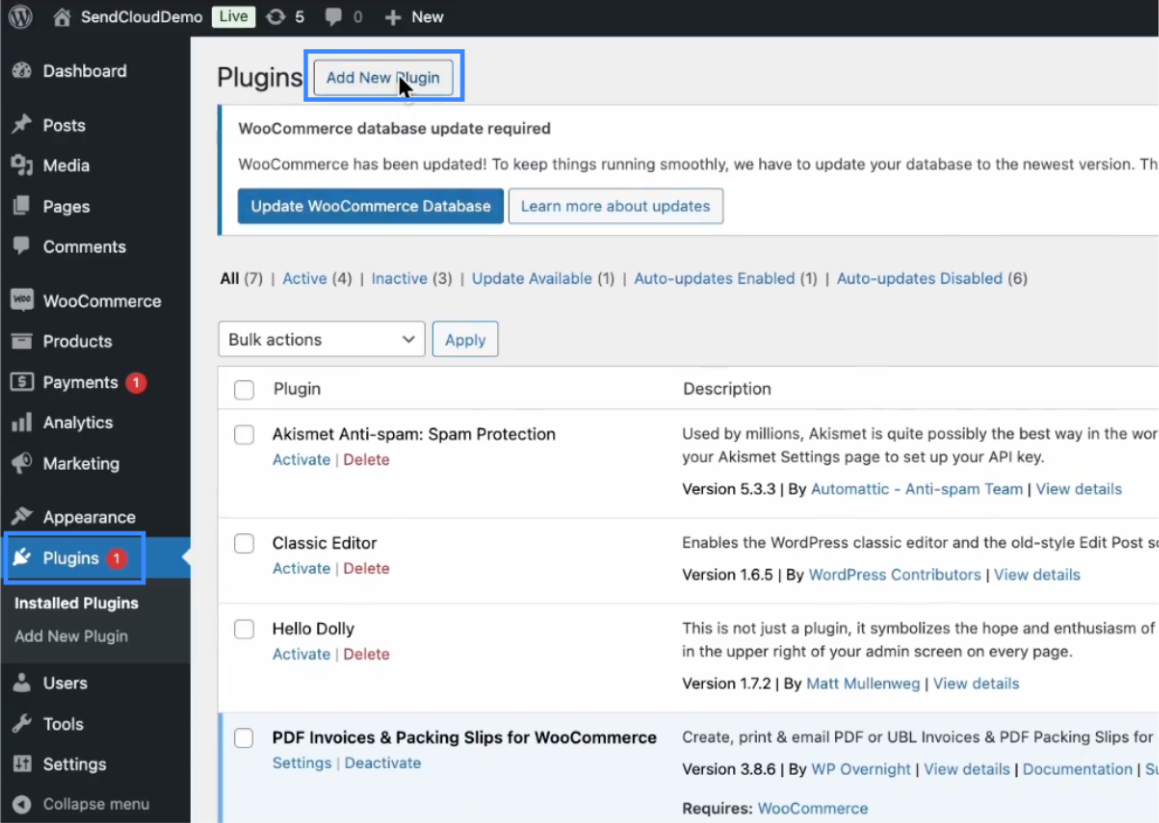
Upload the Plugin: Go to the WooCommerce admin panel, navigate to Plugins > Add New Plugins, and click Add New Plugin.
-
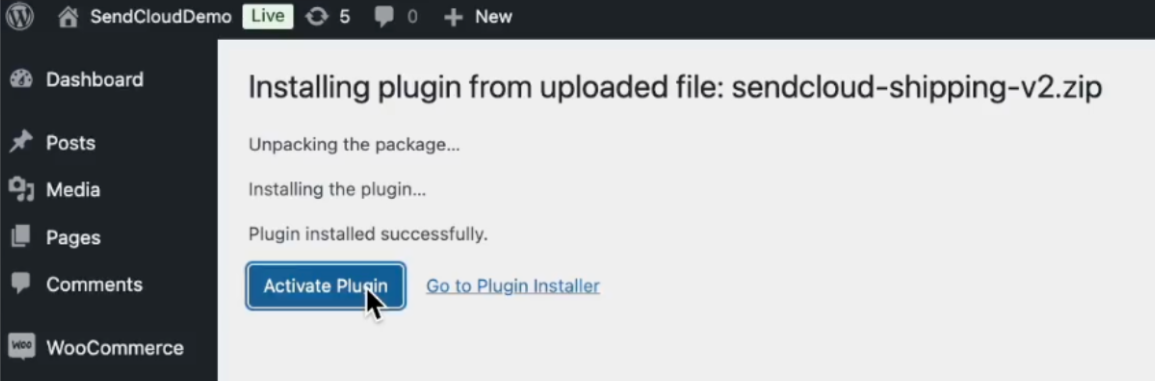
Upload the ZIP File: Choose the ZIP file, then click Install Now.

-
Activate the Plugin: Once installed, click on "activate plugin".
Connecting with Sendcloud
To connect your WooCommerce store with Sendcloud:
-
Click Connect: After installation, go to WooCommerce > Sendcloud Shipping and click on Connect.

-
Enter Sendcloud Credentials: You’ll be redirected to a new tab to enter your Sendcloud credentials.
-
Successful Connection: Once your credentials are entered, the integration will be created, and you’ll be redirected to the Sendcloud panel. To confirm the connection, go to Settings > Integration.

Order Synchronisation
Sendcloud offers two ways to sync orders:
- Live Synchronisation: Orders sync automatically when created or updated in WooCommerce.
- Manual Synchronisation: Manually sync orders using the order fetching button in the Sendcloud panel.
Product Data Configuration
-
Set EAN Codes: Go to Products > All Products and select a product. Under Product Data > Inventory, enter the EAN in:
- ‘EAN by Sendcloud’ field for WooCommerce versions below 9.2

- WooCommerce’s native EAN field for versions 9.2 and higher.

- ‘EAN by Sendcloud’ field for WooCommerce versions below 9.2
-
International Shipping Fields: For international shipments, enter the HS Code and Country of Origin under the Shipping tab in product data.

Important Note on Plugin Activation and Field Visibility
- Keep Both V1 and V2 Activated: In the WooCommerce backend, activate both Sendcloud V1 and V2 plugins to allow for easy rollback if needed, ensuring continuity of settings and fields.
- Field Visibility: When V2 is activated, fields for EAN, HS Code, and Country of Origin will be visible in WooCommerce.
- Connection Requirement: To sync these fields correctly with Sendcloud, V2 must be activated and connected.
Migration Notes and New Features
- Importing EANs for Pack&Go: Import and scan EANs to print labels automatically. For more details, refer to the Pack&Go single-scan mode article.
- HPOS Support: WooCommerce V2 includes HPOS for enhanced order storage performance.
Service points
If your WooCommerce V1 integration already had service point delivery methods enabled, you can now migrate them to V2 automatically: no need to recreate them manually.
Note: This applies only if service points were previously enabled in your V1 setup.
How to Migrate Service Point Shipping Methods
-
Verify Service Point Settings in Sendcloud
After installing the plugin and connecting your store, go to Settings > Integration > Configure.
- Make sure service points are enabled.
- Ensure that carriers supporting service point delivery are selected.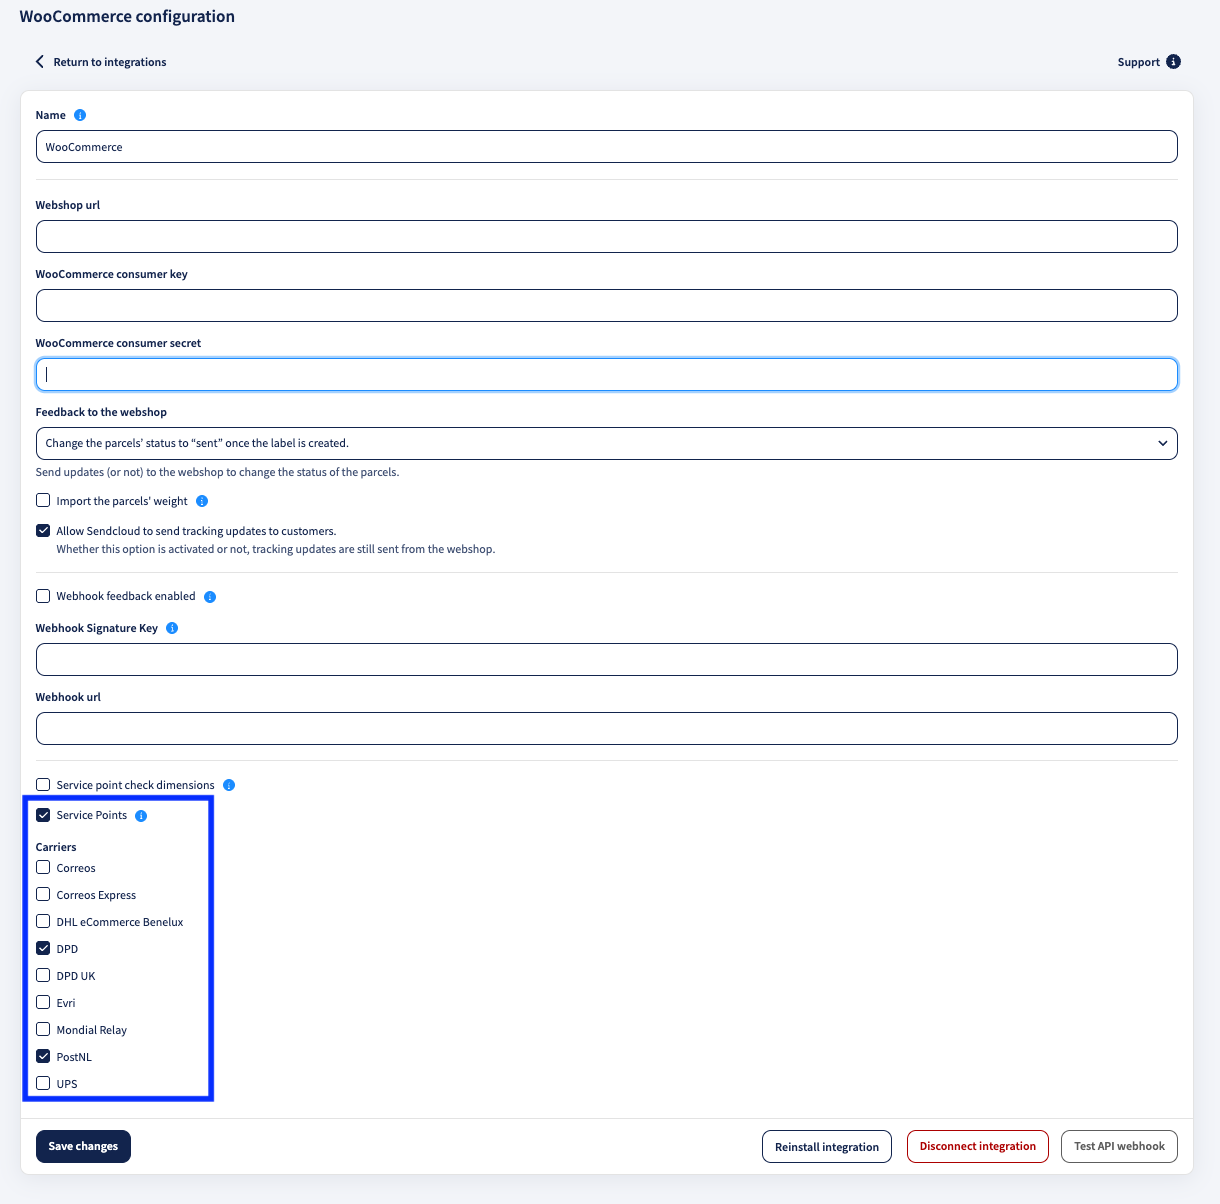
-
Migrate via the WooCommerce Plugin
Go to your WooCommerce admin panel, open the Sendcloud plugin page, and click the Migrate Service Points button.
– This will copy all existing service point shipping methods from V1.
– Once migration is complete, the button will disappear automatically.
-
Review and Activate the New Shipping Methods
– Navigate to WooCommerce > Settings > Shipping.
– In the relevant shipping zones, you will see duplicated service point methods
– The new ones will be disabled by default to avoid any potential disruptions and to ensure that any changes in sensitive parts of your shop are only performed with your explicit consent.
-
Final Check and Activation
Review the new shipping methods, rename or adjust settings if needed, then enable the new methods and disable the old ones.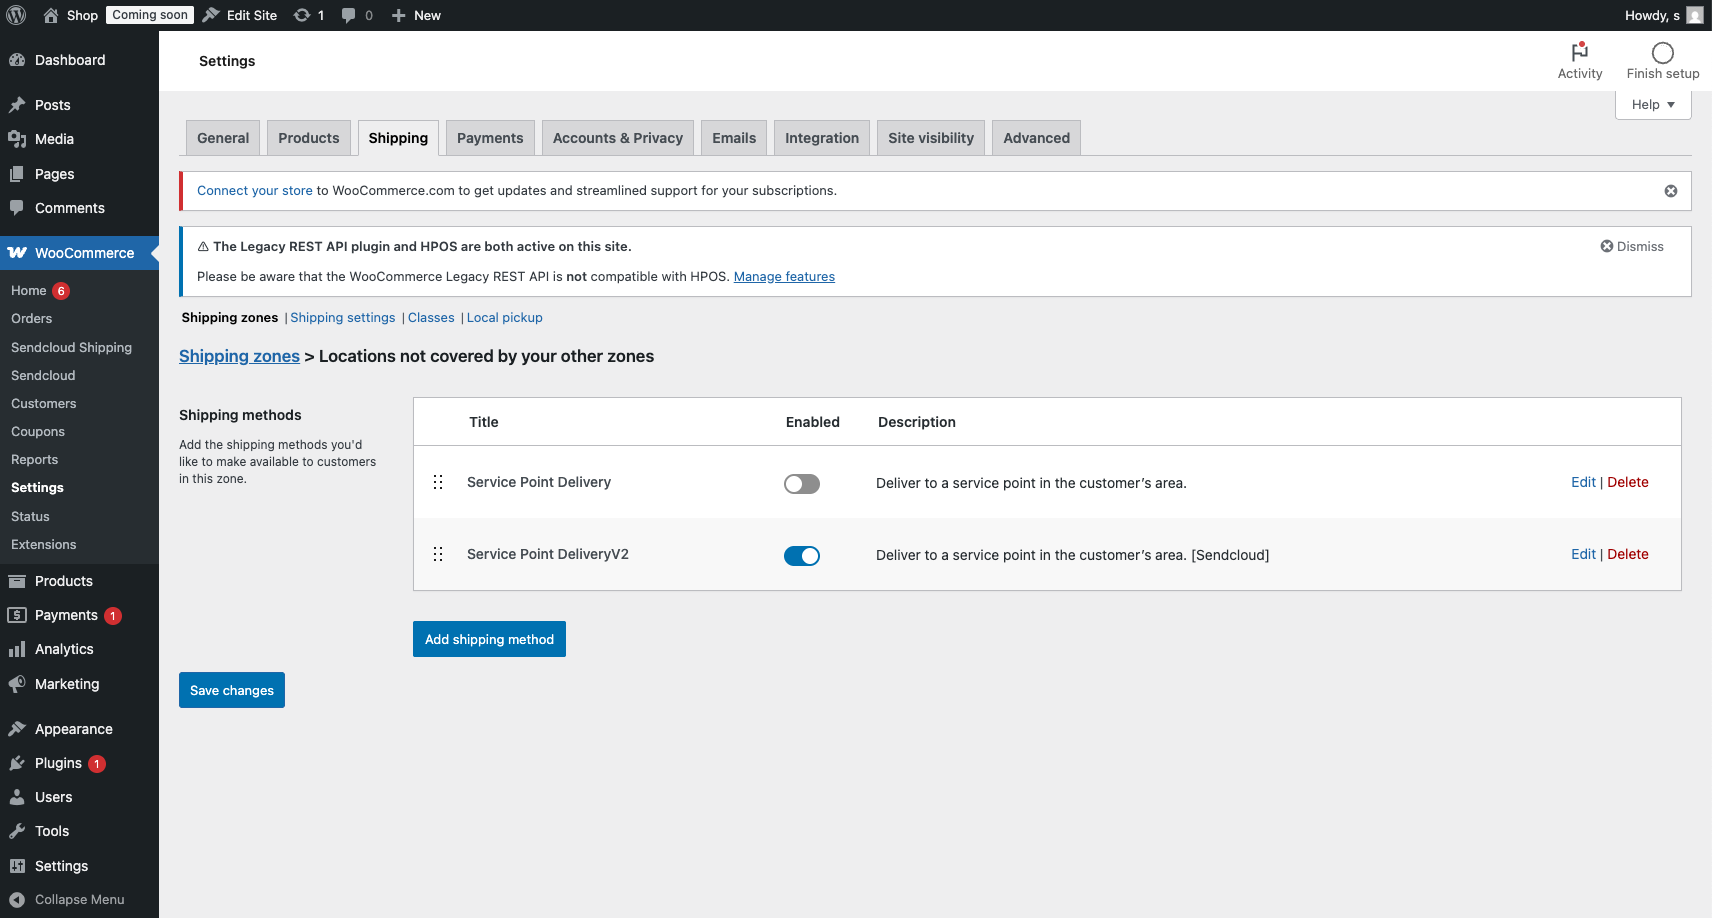
FAQ
Do I Need to Deactivate V1 First?
No, there is no need to deactivate V1 before activating V2. Activating V2 will not automatically remove the V1 integration in Sendcloud. Both integrations will remain active, allowing you to easily roll back if needed. If anything goes wrong with V2, you can simply deactivate or uninstall V2 and continue using V1 without any interruption.
What if I Encounter Issues with V2?
If you have any issues, please contact our support team.
What Happens to My Shipping Rules and Service Points?
During migration, all shipping rules and service point settings in Sendcloud will transfer automatically from V1 to V2. Service point shipping methods configured directly in WooCommerce can be migrated automatically. You can use the migration button available in your Sendcloud plugin settings to transfer these configurations without needing to reapply them manually:
Can I still use Dynamic Checkout in V2?
Dynamic Checkout is deprecated in WooCommerce V2. To continue using this feature, a custom API integration is required. Make sure to remove the Dynamic Checkout app before migrating to WooCommerce V2, as it cannot be removed after the migration.
How is setting up service points in WooCommerce V2 different from V1?
The setup process is very similar:
- Enable service points in Sendcloud.
- Choose the carriers you want to offer service points with.
- Save your settings.
The main change is the name of the shipping method, which is now "Service Point Delivery [Sendcloud]" in WooCommerce V2.