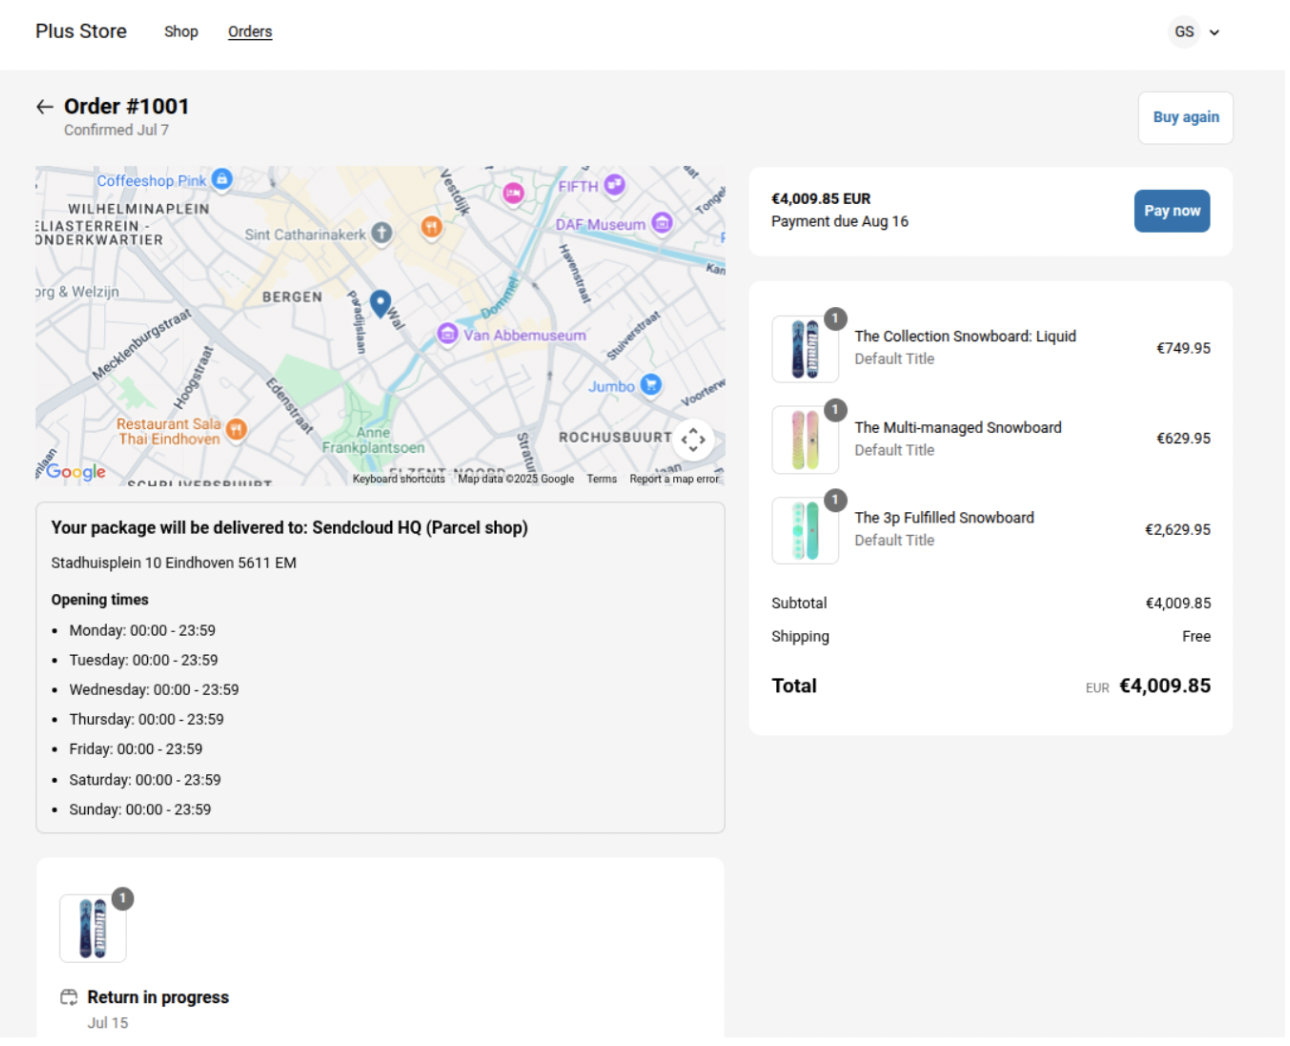
Purpose: This guide will walk you through the process of setting up service points in your Shopify checkout using Sendcloud.
Related articles
Before You Begin: Know Your Shopify Plan
| Your plan | Where customers choose | Where they see the selected point |
|---|---|---|
| Shopify Plus | Checkout page | Thank You / order confirmation page |
| Basic | Thank You page, after checkout | Order confirmation page |
| Grow / Advanced | Before payment during checkout, OR after on the Thank You page | Order confirmation page |
Only the Basic plan is limited to selection after checkout, on the Thank You page; this is a Shopify limitation, not ours.
On Grow and Advanced, customers can also choose their service point before payment, during checkout. To set that up, see our plan-specific service points guide.
Step 1: Set Up Service Points in Sendcloud (applies to all Shopify plans)
- Go to your Sendcloud panel.
- Navigate to Settings > Integrations.
- Click Configure under your Shopify shop integration.
- Enable the Service Points option.
- Choose carriers from the Carriers list
- Click Save.
✅ Sendcloud is now ready to handle service point delivery.
Auto-Assign Service Points (enabled by default)
This means that service point information may not be available immediately after the order is created. If a third-party system processes the Shopify order before Sendcloud imports it, it may initially receive the order without the service point information.
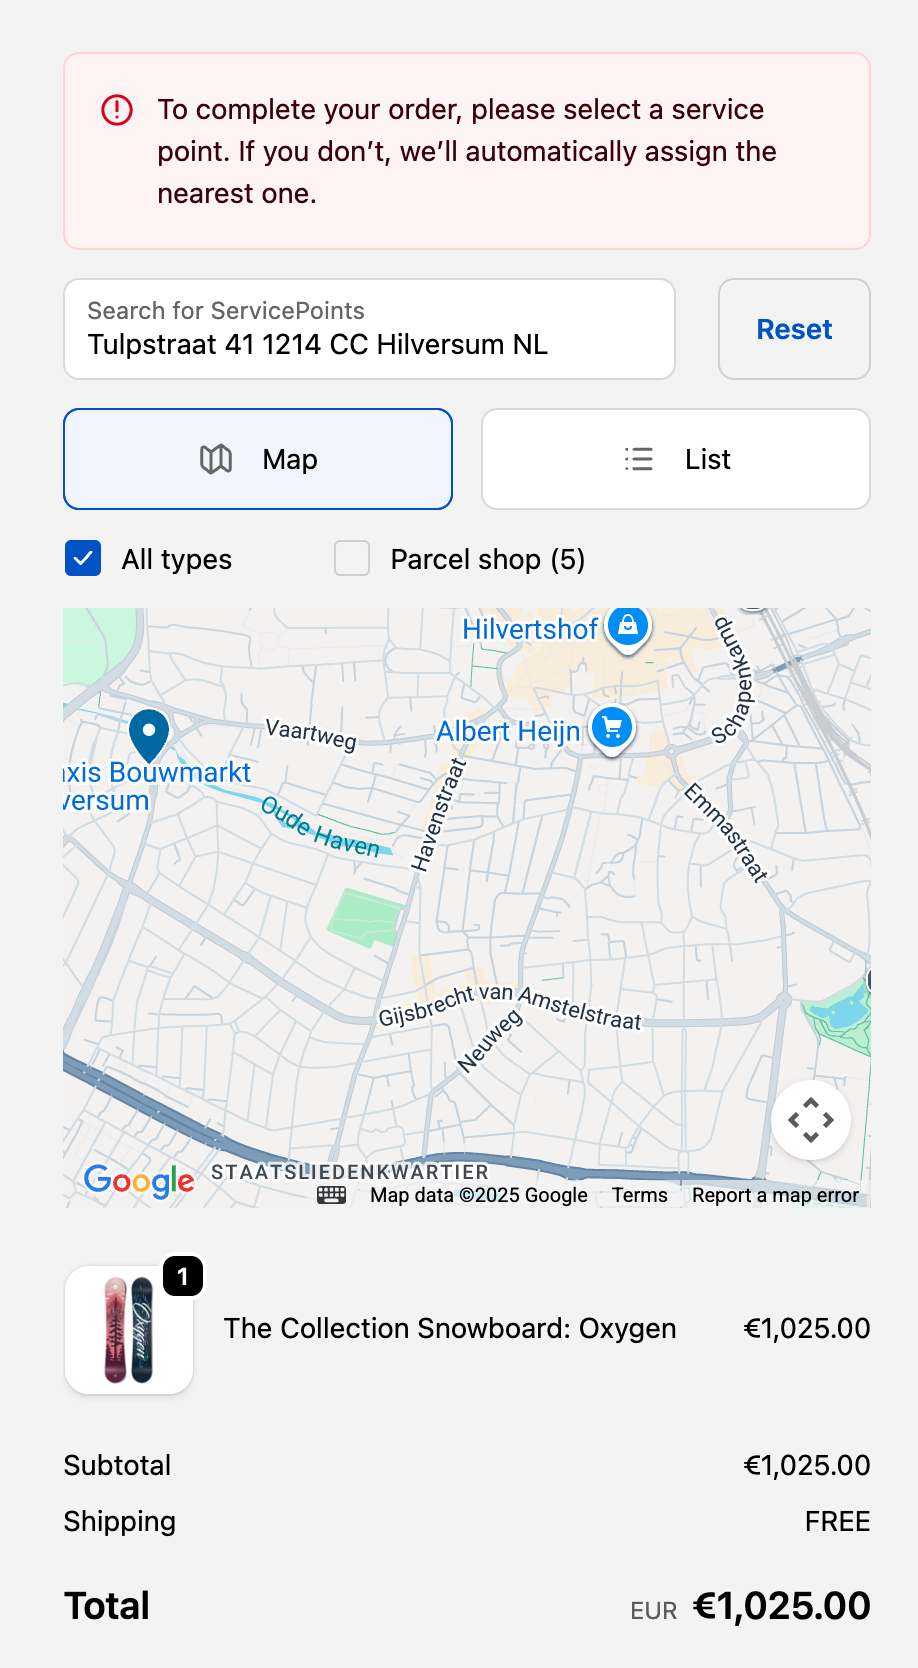
Auto-Assign Service Points is enabled by default for Shopify integrations. If a customer completes checkout without selecting a service point, Sendcloud automatically assigns the nearest available service point based on the shipping address, selected carrier, and delivery method. This helps ensure that service point delivery orders always include a valid service point, even when the selection step is skipped during checkout.
When a service point is automatically assigned, customers see an updated notification on the Thank You page. Customers can still review or change the assigned service point on this page.
See notification message here
Manage Auto-Assign settings
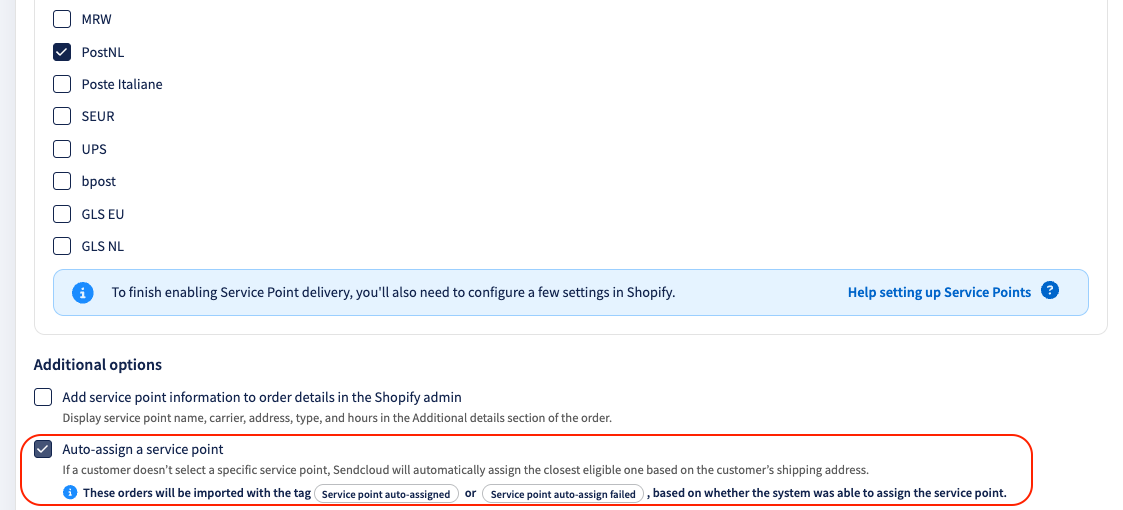
- Go to Settings > Integrations in your Sendcloud panel.
- Open your Shopify integration.
- Enable/disable Auto-assigning a service point.
- Save your changes.
Order tags in Sendcloud
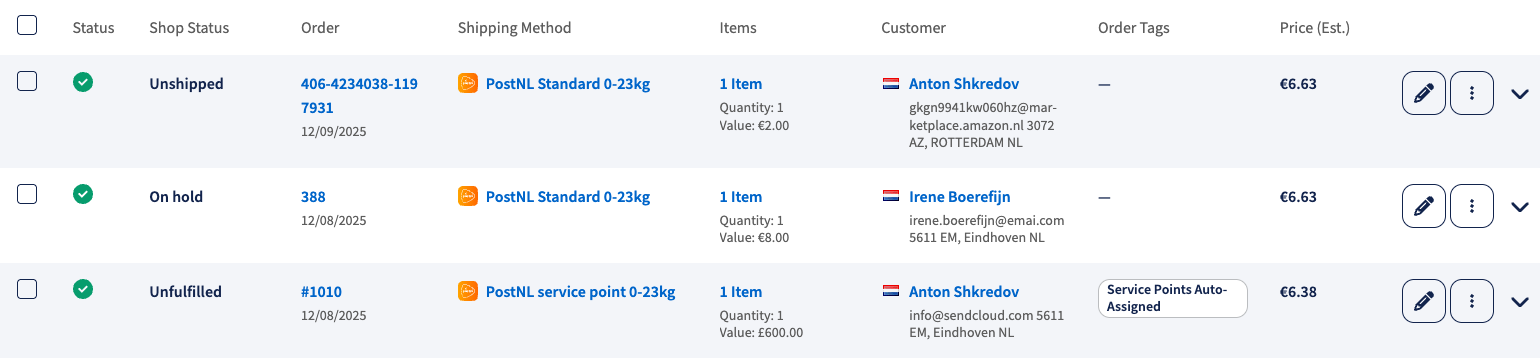
If a customer does not select a service point during checkout, Sendcloud automatically assigns one. These orders are tagged in Sendcloud as "Service point auto-assigned" or "Service point auto-assign failed" (if no suitable service point is found), making them easy to identify in Sendcloud. These tags are not visible in Shopify.
💡 Tip: In the Incoming Orders View (IOV), make sure the Order tag column is enabled so you can easily see whether a service point was auto-assigned.
Step 2: Set up Carrier Delivery methods and shipping rates in Shopify
- Go to Settings > Shipping and Delivery in Shopify.
- In the Shipping profiles section, open the profile you want to edit.
- For each shipping zone (or create a new one), click Add rate and enter your rates.
Name your rates like this:
- Service Point Delivery UPS
- Service Point Delivery PostNL
- Or just: Service Point Delivery (to show all the available carriers at once)
See image here
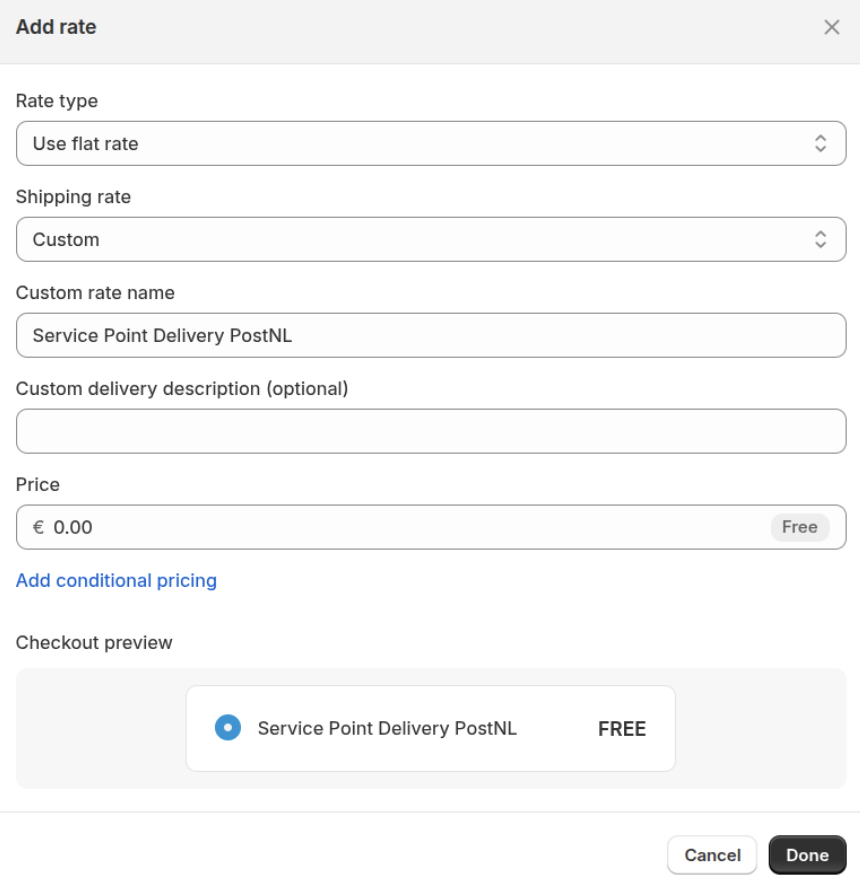
For multilingual stores, use these translations:
- 🇬🇧 English: Service Point Delivery
- 🇳🇱 Dutch: Servicepunt
- 🇩🇪 German: Paketshop Zustellung
- 🇫🇷 French: Livraison en Point Relais
- 🇪🇸 Spanish: Recogida en Punto de Servicio
- 🇮🇹 Italian: Consegna al Punto di Servizio
Recommended Service Point shipping rate names
We recommend using one of the following naming formats for your Shopify shipping rates.
Standard naming (recommended)
Use this format whenever possible:
- Service Point Delivery UPS
- Service Point Delivery PostNL
Or, if you want customers to see service points from all enabled carriers, use:
- Service Point Delivery
Add extra information to your shipping rate
You can add descriptive text to your shipping rate name without affecting Service Point functionality. This is useful for distinguishing shipping options by weight, parcel size, or promotions.
For example:
- Service Point Delivery UPS under 10kg
- Service Point Delivery UPS – Small parcels
- Service Point Delivery DPD up to 5kg
Carrier-specific example: InPost
If you're using InPost, we recommend one of these approved shipping rate names:
- 24/7 InPost Lockers & Shops
- Collect from 24/7 InPost Lockers & Shops
- Pickup from 24/7 InPost Lockers & Shops
These examples can be copied directly into your Shopify shipping rate configuration.
Recommended names for multilingual stores
If your store uses multiple languages, we recommend the following translations:
- 🇬🇧 English: Service Point Delivery
- 🇳🇱 Dutch: Servicepunt
- 🇩🇪 German: Paketshop Zustellung
- 🇫🇷 French: Livraison en Point Relais
- 🇪🇸 Spanish: Recogida en Punto de Servicio
- 🇮🇹 Italian: Consegna al Punto di Servizio
Add it under “Custom delivery description,” for example:
"(Select your service point after payment)"
See image here
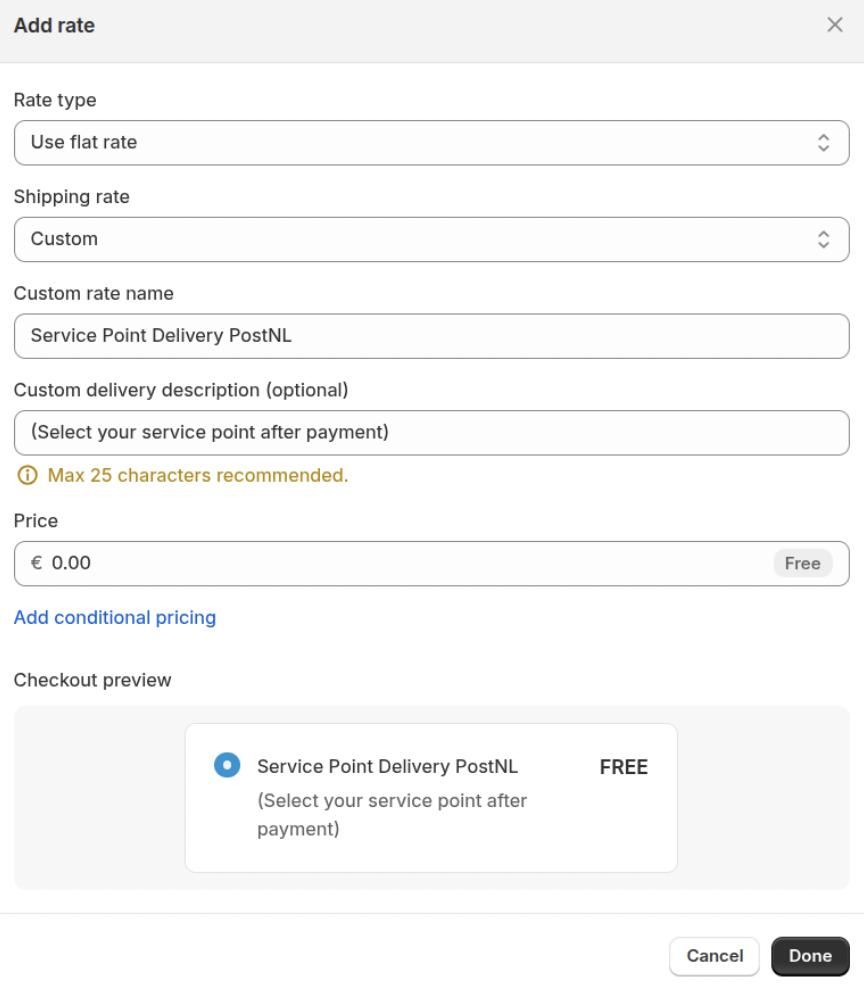
Check Shopify’s native pickup point map
Shopify offers a native feature that allows pickup points to be displayed directly from the shipping settings.
If this option is enabled at the same time as Sendcloud pickup points, two pickup point maps may appear at checkout, which can be confusing for your customers.
When using Sendcloud pickup points, we recommend that you disable the following Shopify option:
“Ship to pickup points from shipping”
How to check this setting:
- In your Shopify admin, go to Settings > Shipping and delivery
- Check whether the option “Ship to pickup points from shipping” is enabled
- Disable it if you want to use only the Sendcloud pickup point selector
Step 3 Add the Service Point Picker to the Thank You page
Setup instructions
Watch the video
Note: If the video appears blurry, please change the quality to 1080p.
- In your Shopify Admin, go to Settings > Checkout.
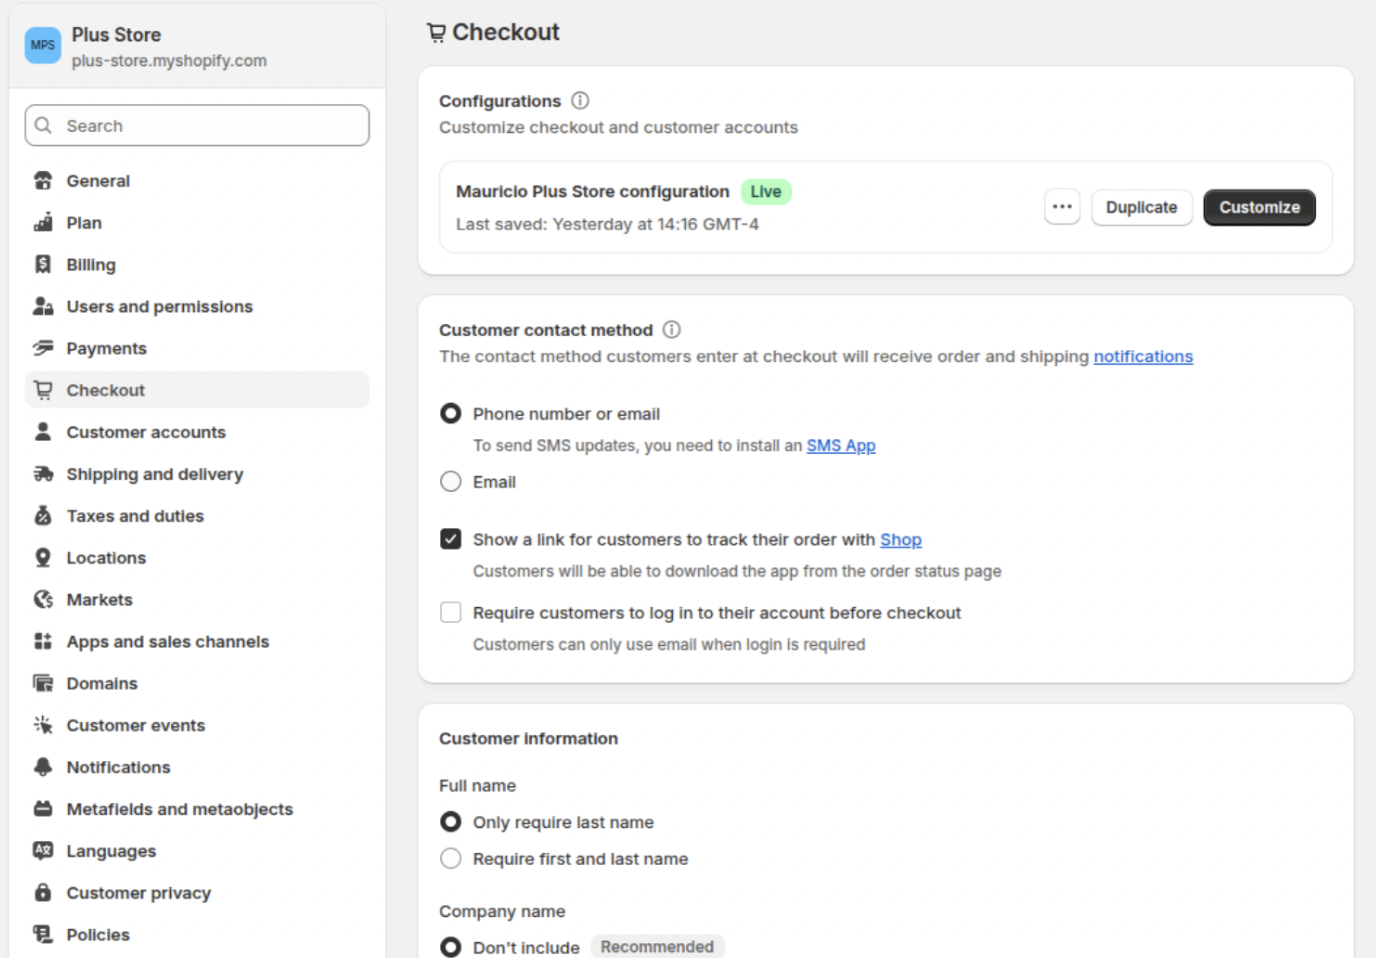
- Under “Checkout configuration,” click Customize.
- In the theme editor, select Thank You from the dropdown menu
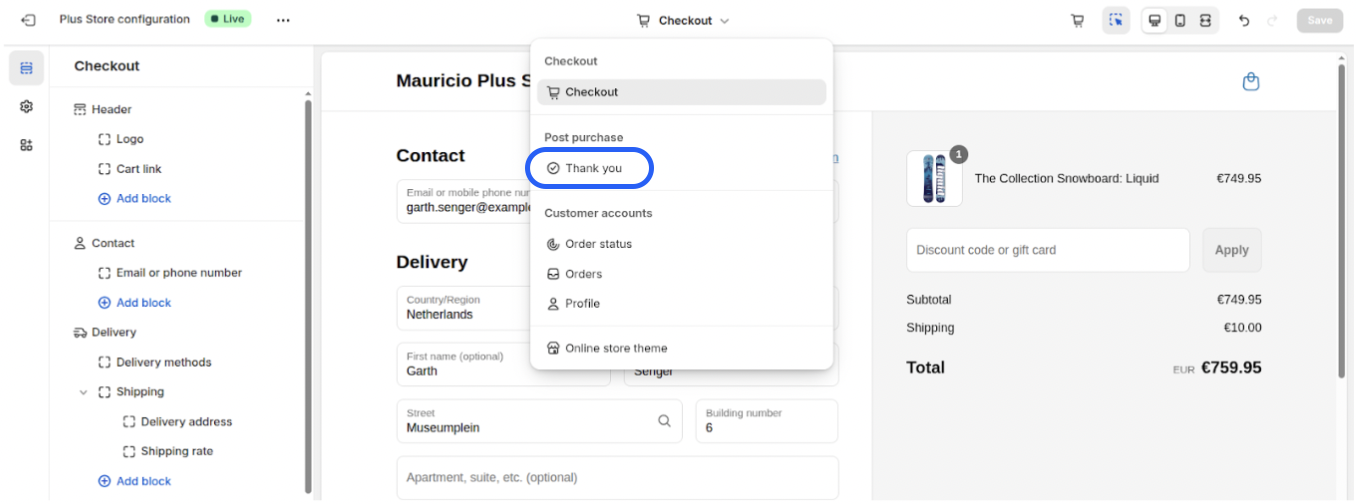
- Click + Add app block.
- Choose Non-Plus Service Point Picker.
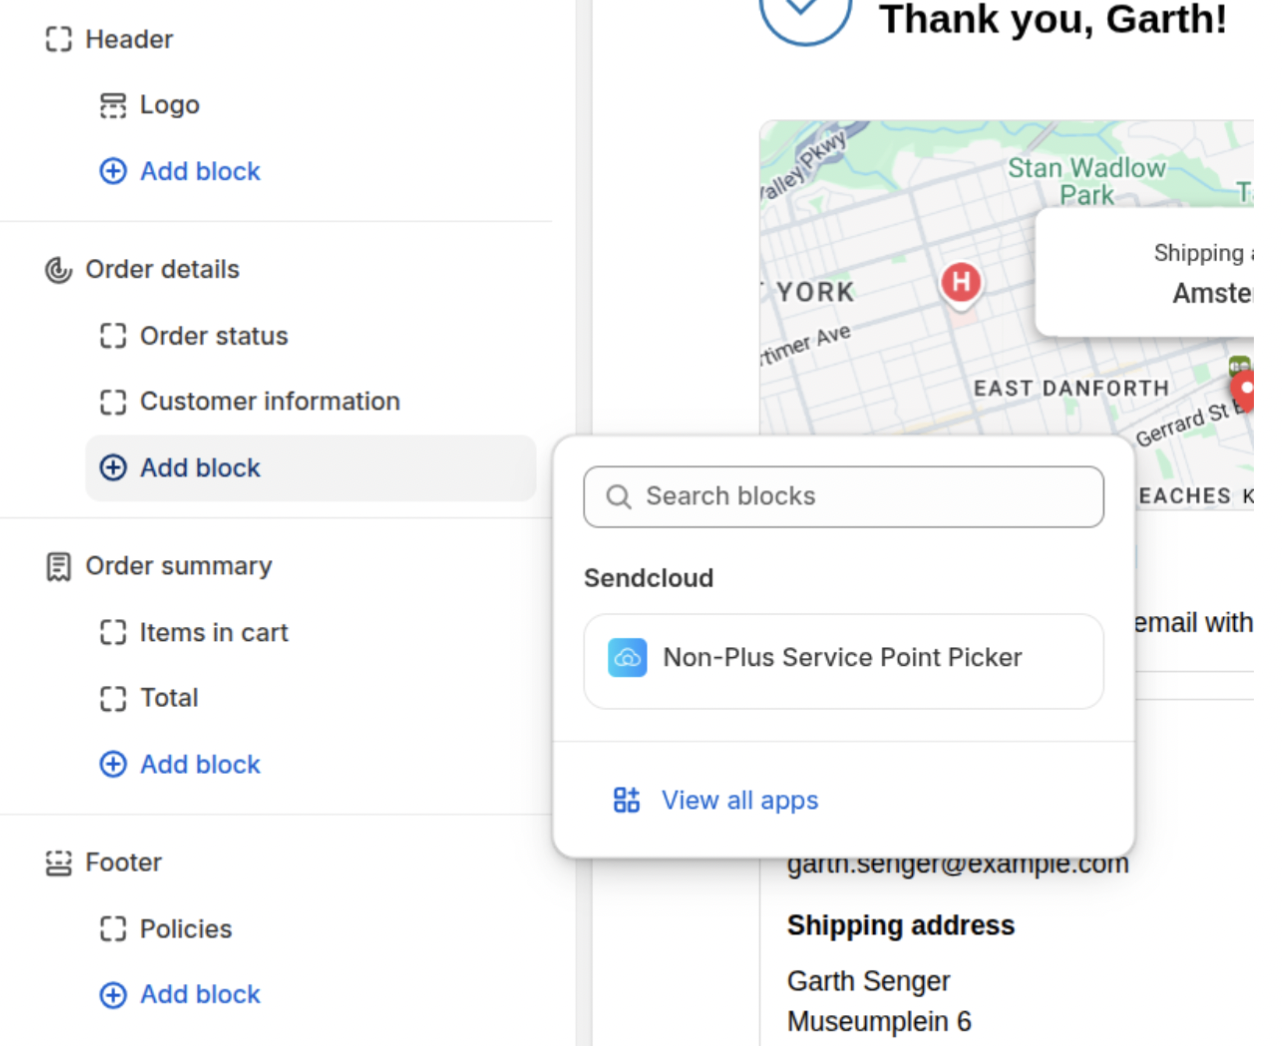
- Click Save (top-right).
Your customers can now choose a pick-up point at checkout!
Step 4 (Optional): Show pick-up Point on Order Status Page (applies to all Shopify plans)
Let customers view their selected point (with map + opening hours) after placing their order.
To enable:
- Go to Settings > Checkout > Customize.
- From the dropdown, select Order Status.
- Add the app block: Service Point Confirmation.
- Drag it into position.
- Click Save.
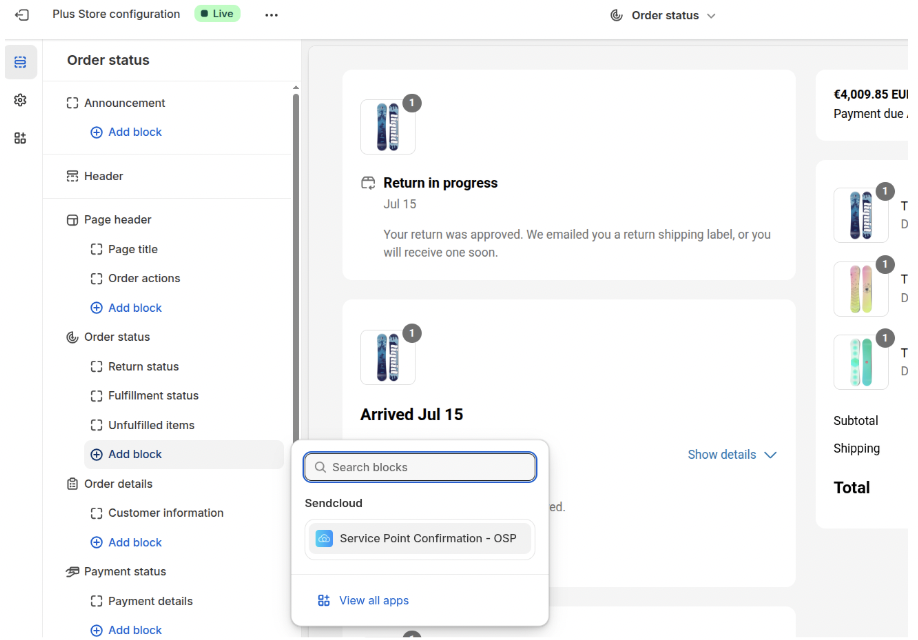
How customers access it:
They’ll get an order confirmation email with a “View my order” button. That link takes them to the Order Status page with map + opening hours.