
Purpose: Find out how to easily connect your Shopware shop with Sendcloud.
Note: Shopware works with three different statuses: Order status, Payment status, and Delivery status. Keep in mind that Sendcloud updates the delivery status. We don't update the other statuses in Shopware.
Get the Sendcloud plugin
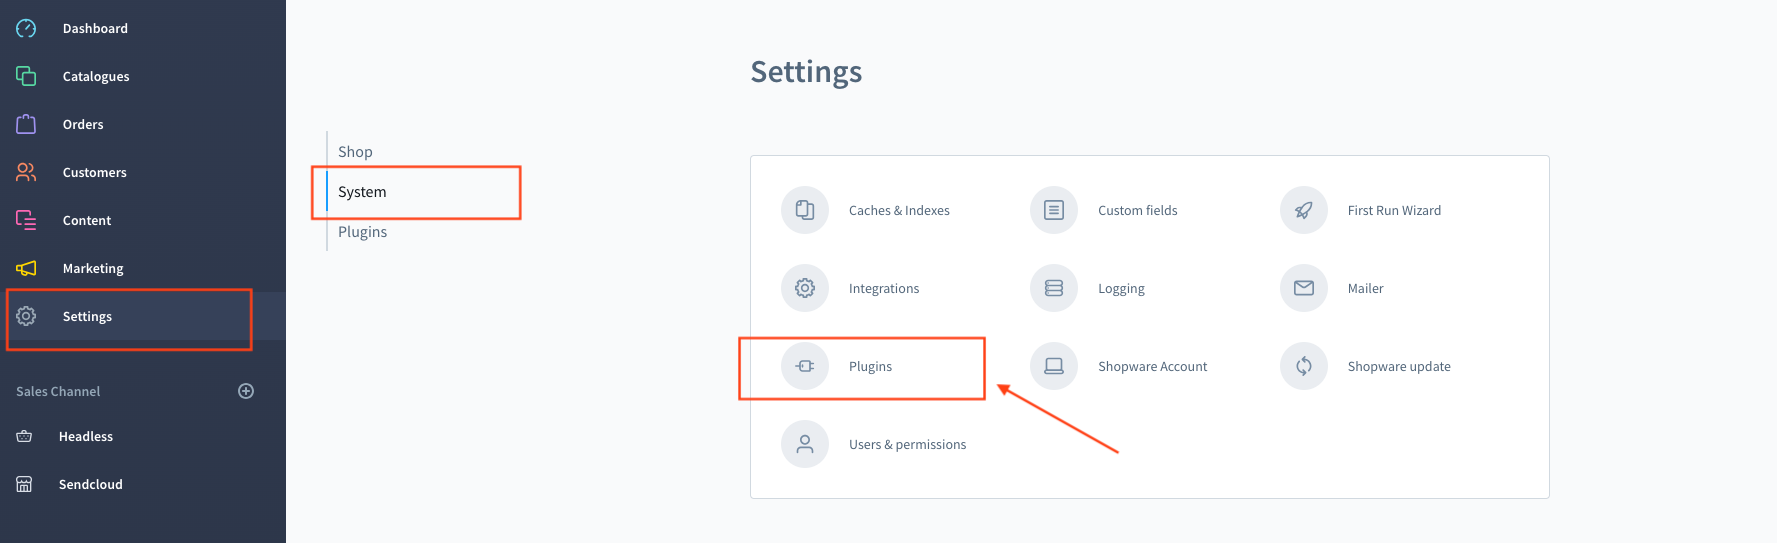
- In your Shopware backend, go to Settings > System > Plugin
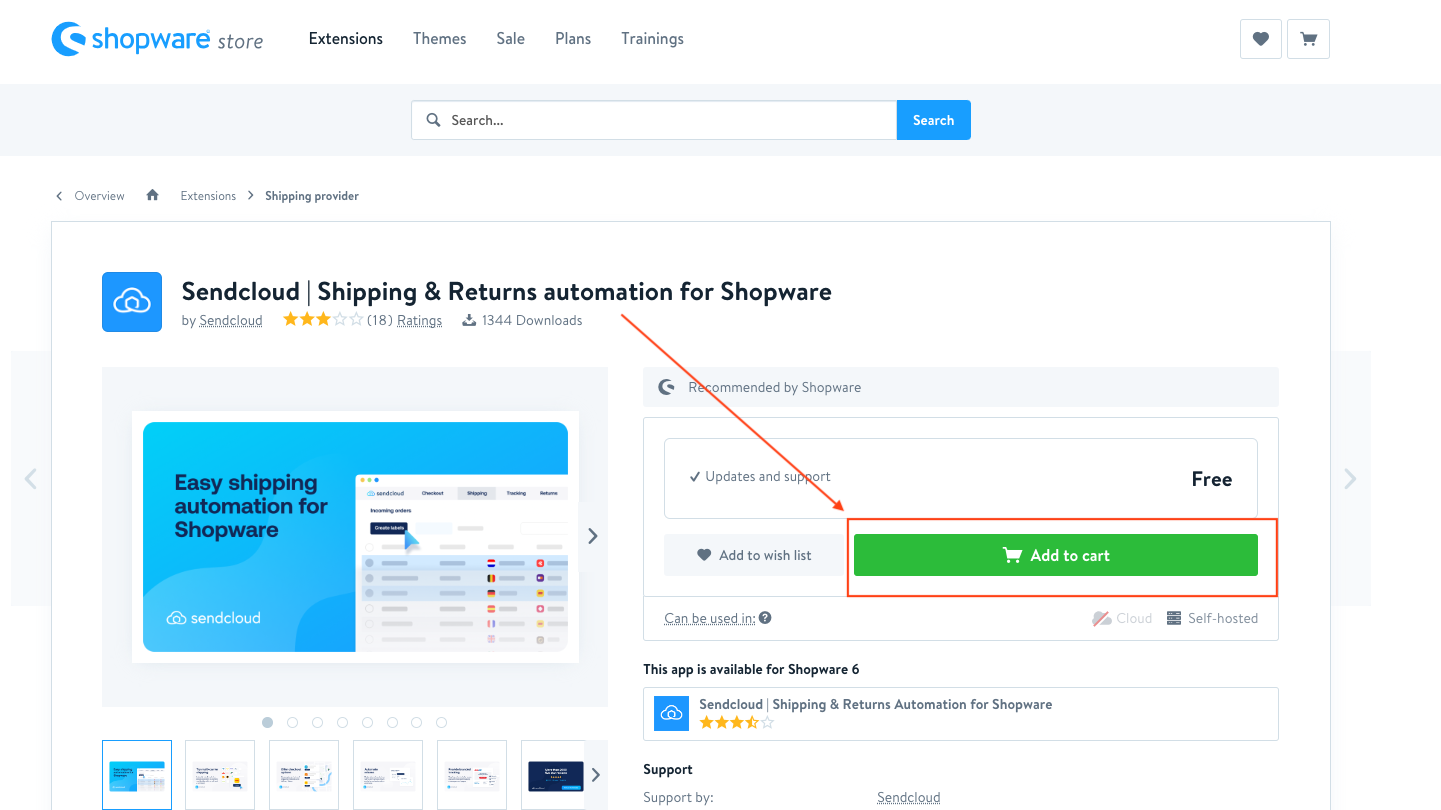
- In the Plugin settings, go to the Shopware store

- Search for Sendcloud and you will find it as part of the Product Suggestions

- Click Add to cart
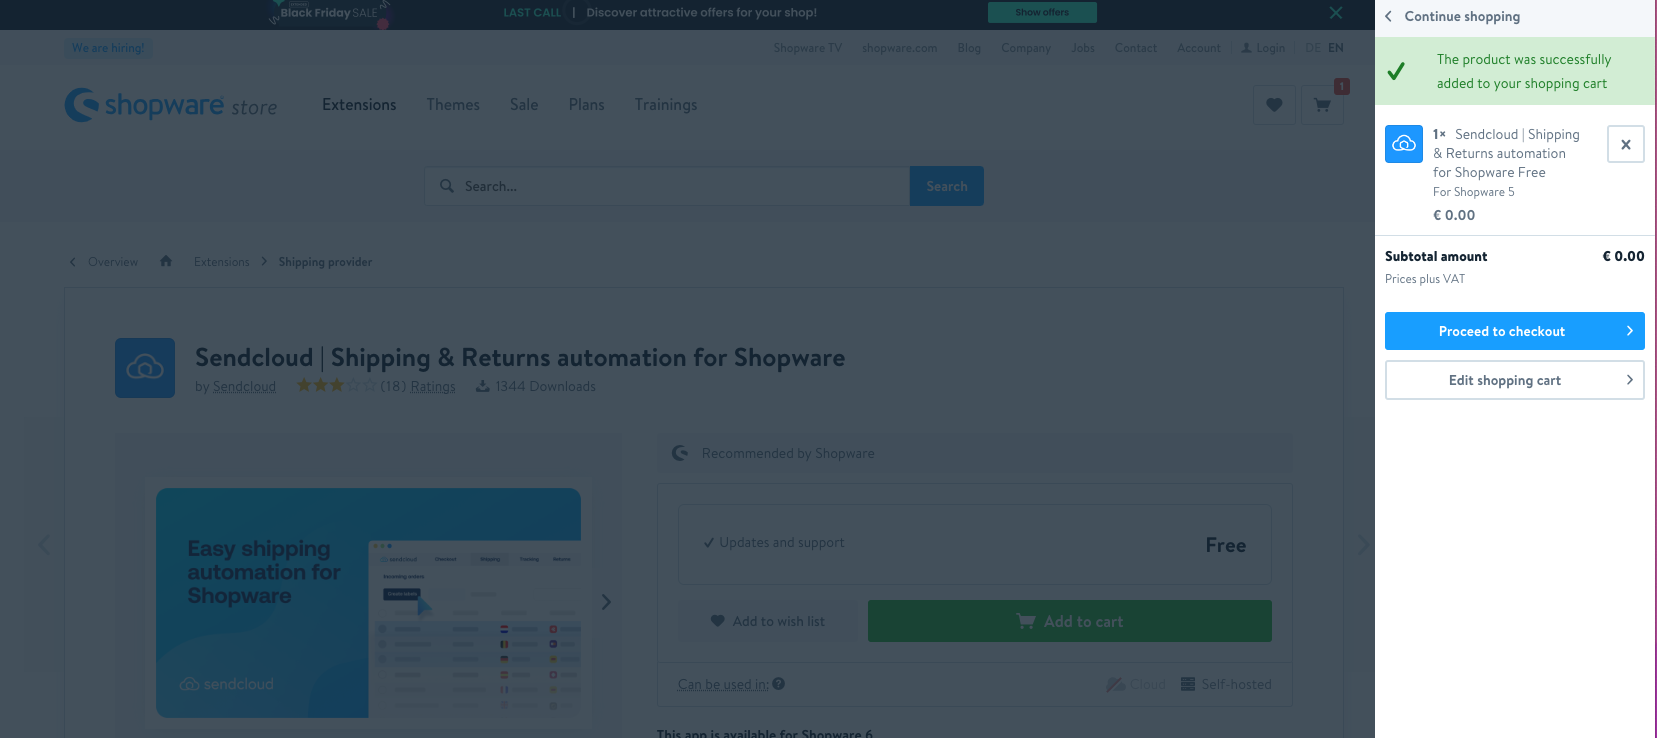
- Once the Sendcloud plugin is in your shopping cart, click Proceed to checkout
- In the Validate and order page, select your shop and license domain, and agree to the terms and conditions and click Complete payment.

Install the Sendcloud plugin
- In your Shopware backend, navigate to the plugins page and go to the Licenses tab. You will find our Sendcloud plugin there. Click Download.
- Once you have downloaded the plugin, go to My plugins. Find the Sendcloud plugin > Click the three dots ("...") > Click Install. After the installation, toggle to activate the plugin.
Please note: You need to follow the next step to activate the app before you can use it.
Connect your Sendcloud account
- Please navigate to orders on the left navigation bar and click the Sendcloud button. If this item is not listed separately, you can find Sendcloud under "Orders". It will show a screen with the Sendcloud logo. Click the button Login or create your free Sendcloud account.
- Enter your Sendcloud credentials and click Connect. After the account is connected, you will see the dashboard screen. Please note that the message will be shown if Service Point is not enabled in your Sendcloud account. Click Go to Sendcloud to be redirected to your Sendcloud panel.
Configure customs information
- To configure customs info synchronization, please click on Sendcloud in the Orders menu.
- Open the Customs info tab.
-
To send international shipment data to Sendcloud, select a default value for Shipment type, HS Code and Origin country. If you have mapped the value for HS code and origin country in the Data mapping section, and the value was not found on the product, the defined value below will be used.
-
Map product HS-codes and origin countries to Shopware custom product attributes. Mapped attribute values will be used when a plugin sends order data to Sendcloud. For more information, read the instructions on how to set up custom fields in SW6.