Purpose: Offer service point delivery to your customers at your WooCommerce checkout by following the steps in this guide.
Service point delivery
How to activate it
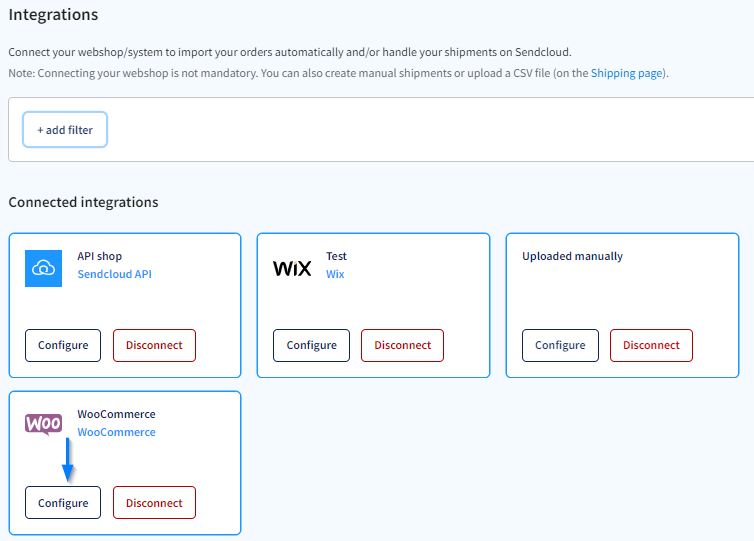
Step 1: Activate service points in your Sendcloud panel
- In your Sendcloud account, go to Settings > Integrations > Find your WooCommerce integration and click Configure.
- Tick the box 'Service Points' and the carrier for which you want to activate this delivery option (for instance, a standard and an express delivery option).
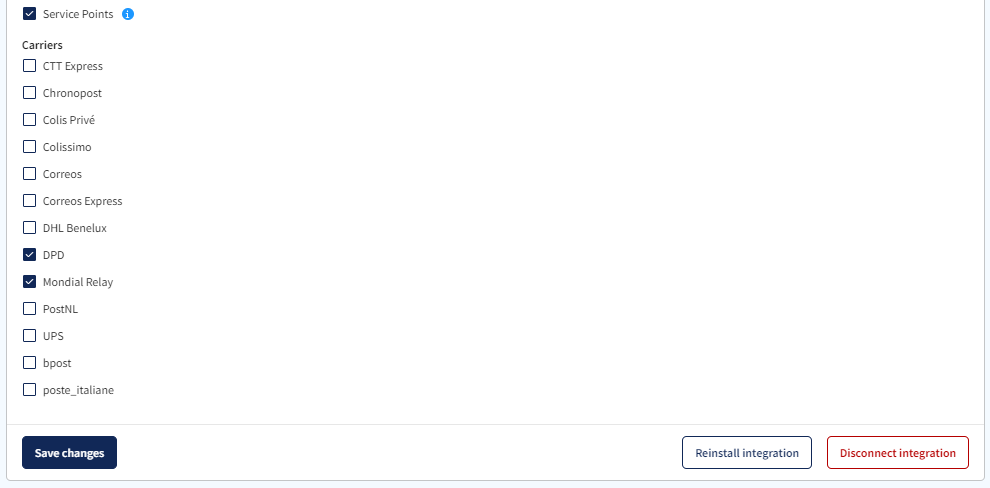
- Click Save Changes
Step 2: Configure service point delivery in WooCommerce
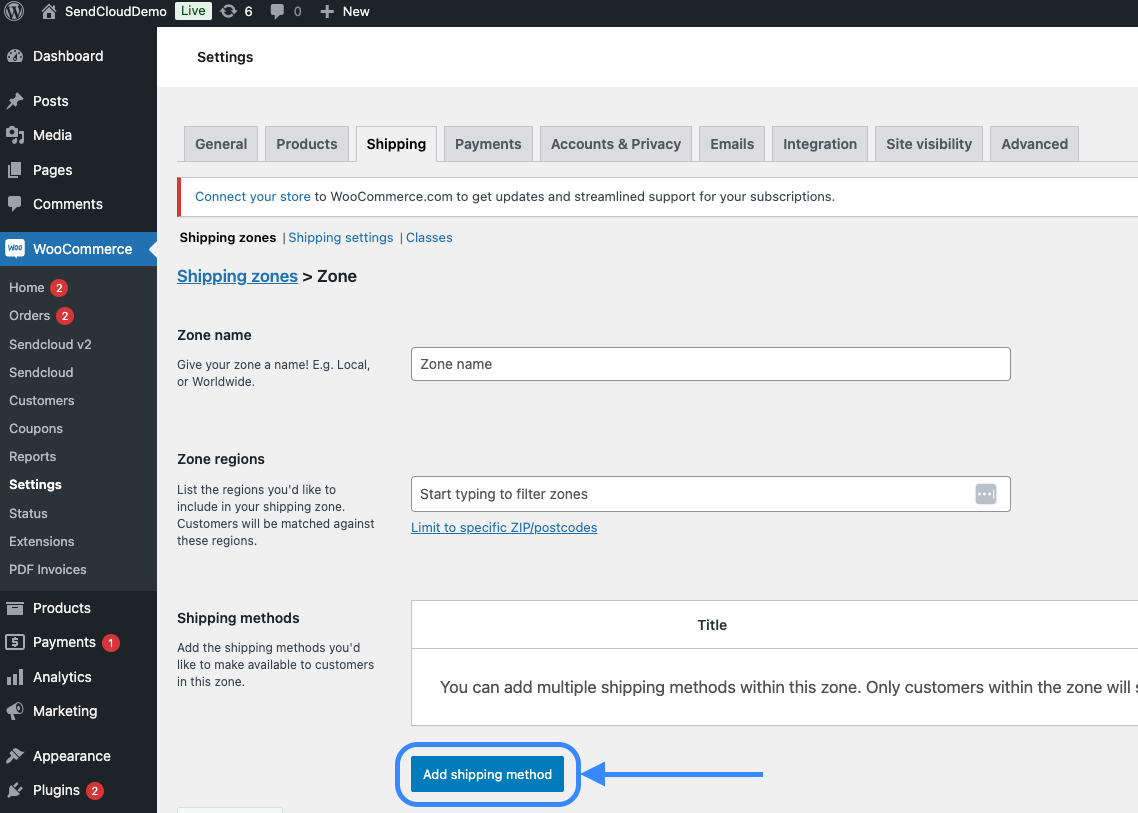
- Return to your WooCommerce back-end and navigate to WooCommerce > Settings > Shipping > Add shipping zone

- Click Add shipping method
-
If you are using the WooCommerce V2 integration, select the "Service Point Delivery" method that explicitly includes "[Sendcloud]" in its description.
If you are using the WooCommerce V1 integration, select the standard "Service Point Delivery" method (the one without "[Sendcloud]" in the description).
Then, click Continue.

- Enter a Method name for your shipping method to be displayed on your checkout page (such as "Delivery to service point") and add a shipping cost.
-
In the field Carrier Selection, type the name of the carrier in lowercase letters. If the carrier has a space between the name, such as in the case of Mondial Relay, type the name using an underscore (e.g. mondial_relay). When you want to display multiple carriers in the service point picker, you can add them by including a comma (,) (e.g. DHL, DPD,).
Note: If the name is not correctly typed as per these specifications, the map will fail to load correctly.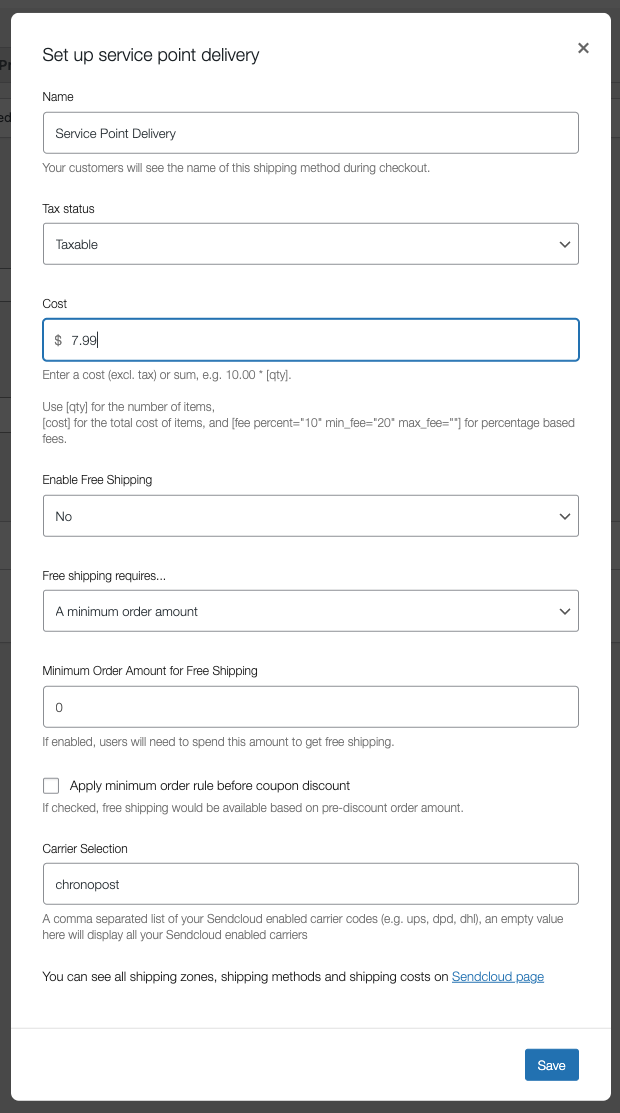
Dimension checking in the service point picker
If you are using carriers PostNL or DHL, you can automatically prevent the possibility of having your parcels rejected at a service point due to their size/dimensions.
Follow the steps below to enable:
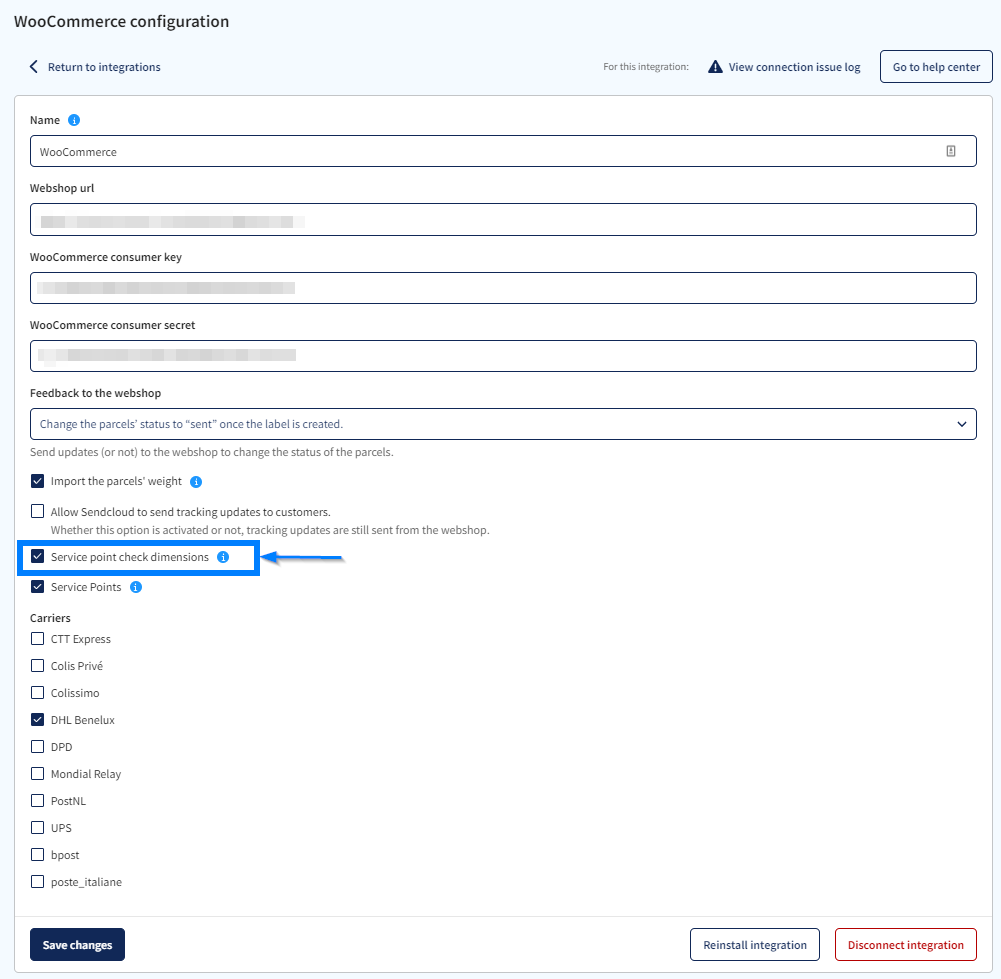
- In Settings > Integrations in your Sendcloud platform, find your WooCommerce integration and select Configure to enter the integration settings
- Tick the box as shown below: "Service point check dimensions". We recommend only selecting this box if you are shipping with DHL and/or PostNL.
- This feature is dependent on you having entered the correct dimensions for all of your products in your WooCommerce admin environment. The example below shows how to set up maximum dimensions in your WooCommerce product settings:

The service point picker will filter out carriers that cannot handle products of that given size.
Please bear in mind that there is no advance packing logic behind this - we simply check if all the given products in an order are within the maximum dimensions of the carrier.
Congratulations! Service point delivery is available to your customers.
