
Purpose: Find out how to add and manage custom return reasons to better fit your business.
Related articles:
➝ How do I set up my return portal?
What are custom return reasons
Custom return reasons allow you to create your own return reasons for in your Return Portal. This feature gives you the flexibility to define reasons that are specific to your products, processes, and customer needs. Instead of using only the predefined list, you can tailor the return options to better reflect your business, helping you manage returns more effectively and provide a clearer return experience for your customers.
How to create a custom return reason
- In your Sendcloud account, navigate to Returns > Return portal
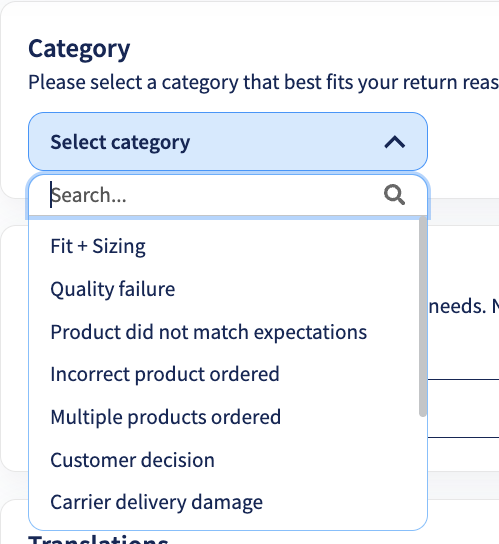
- Scroll down to 2. Return Reasons and click Add Reason.

- A window will appear. Select the category that best fits the new custom return reason. By default, you will be prompted to enter the reason in English.
- You can either use the Auto Translate feature to translate the reason into other languages, and you can adjust translations after as needed, or manually translate the reason yourself.
We recommend adding translations for all available languages, even if you don’t operate in that market. This ensures your customers always have a clear and consistent experience.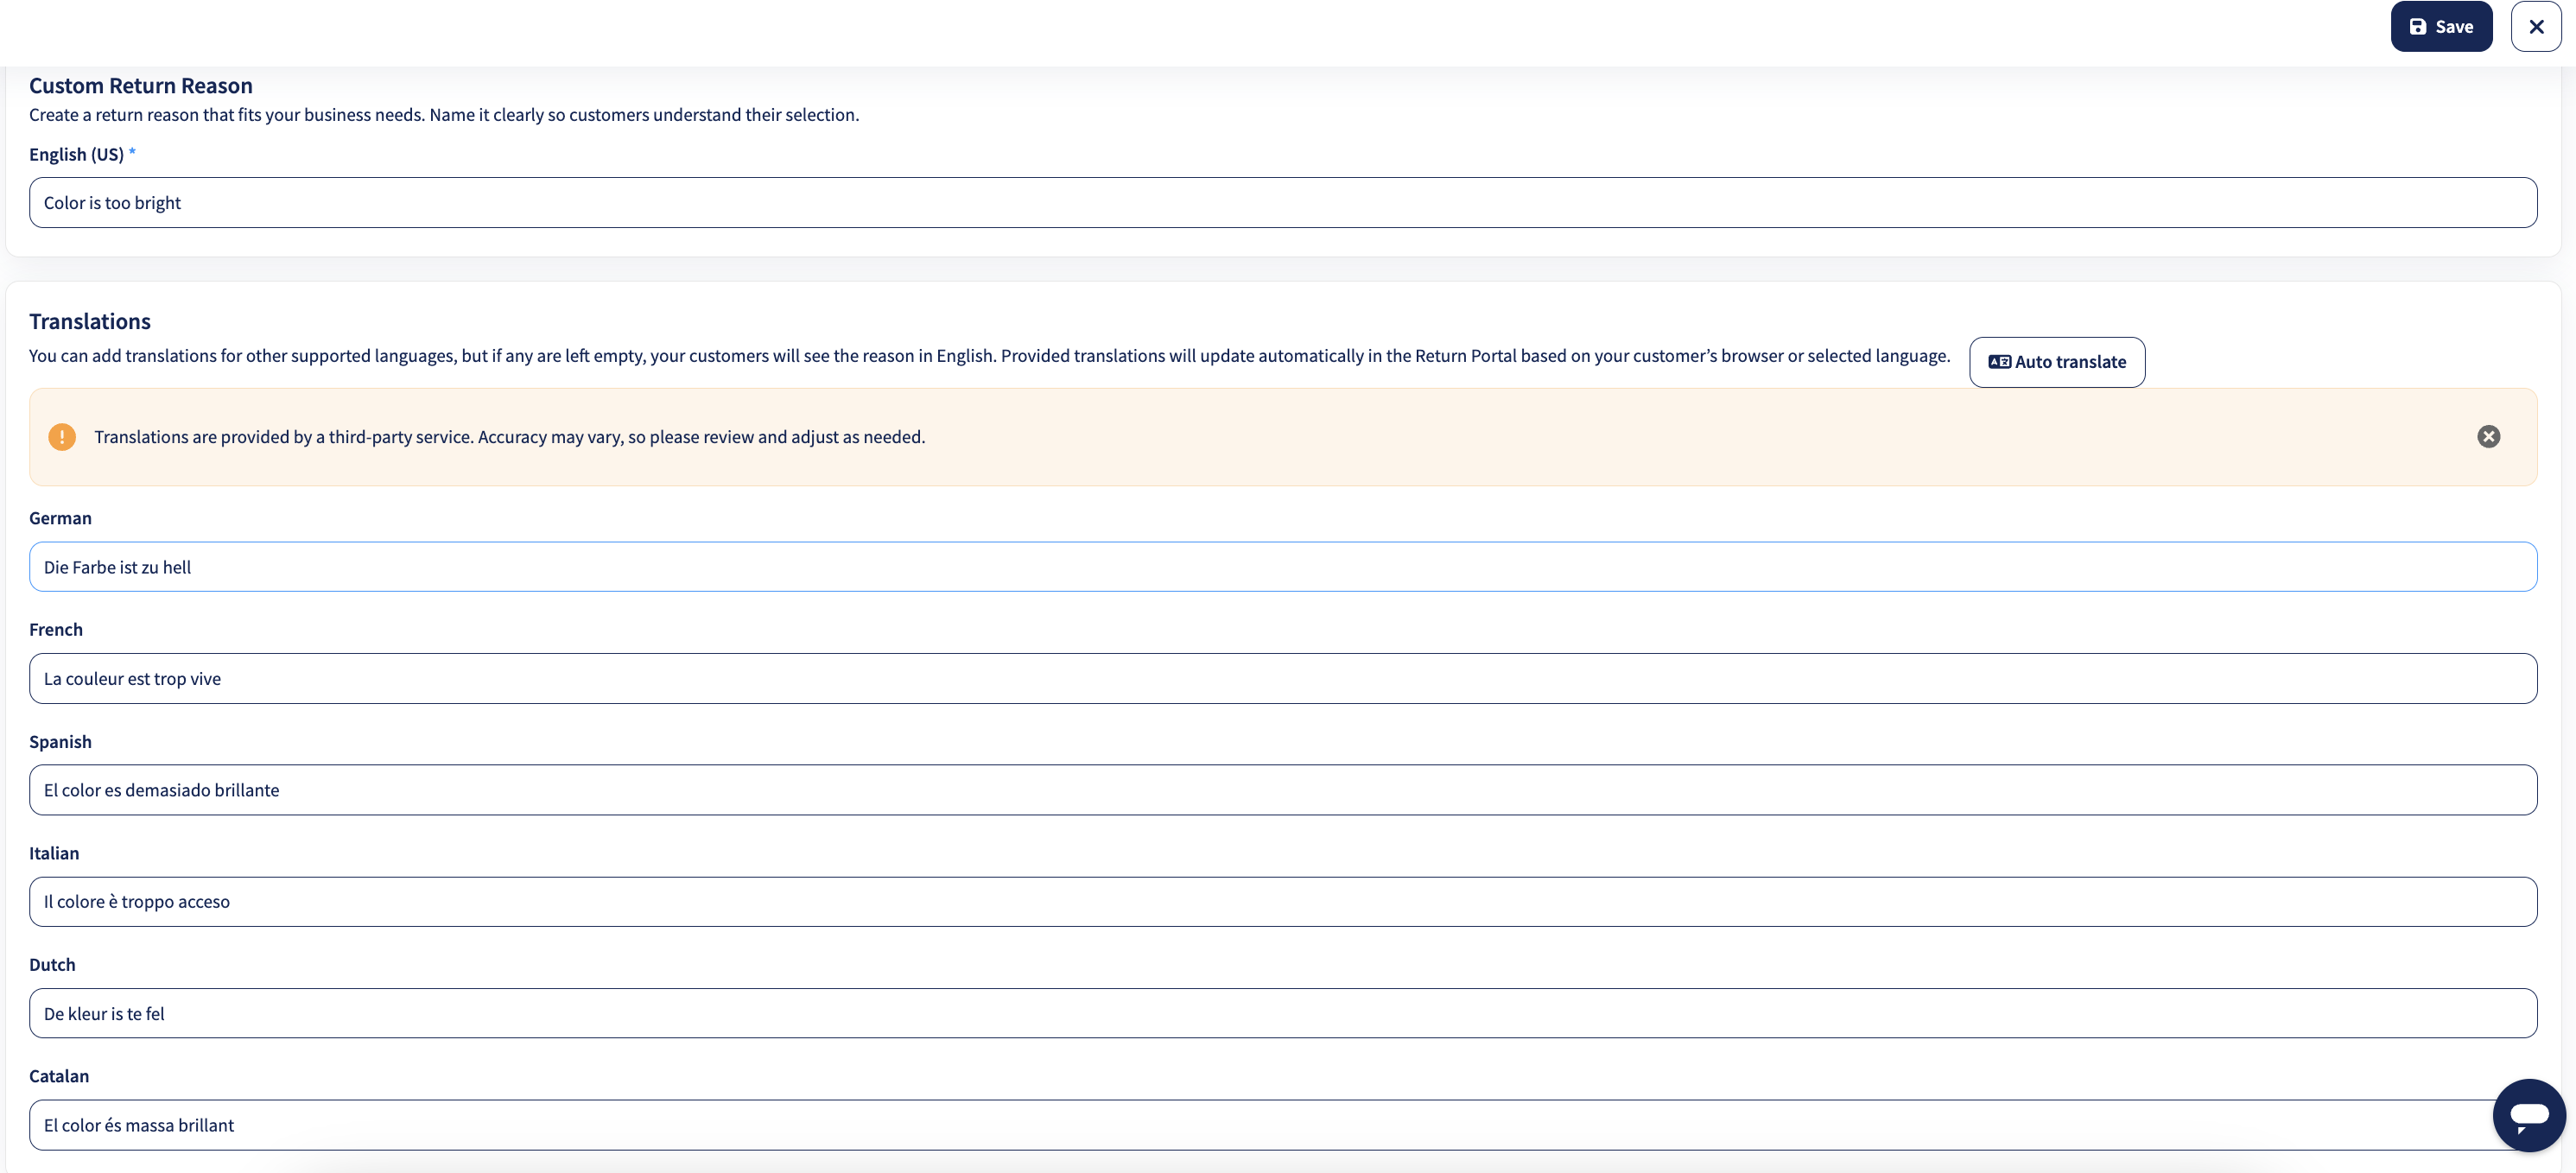
- Click Save. Your custom return reason will appear in the return reason list within the Return Portal settings. Select the reason and click Save your return portal settings at the bottom of the page.

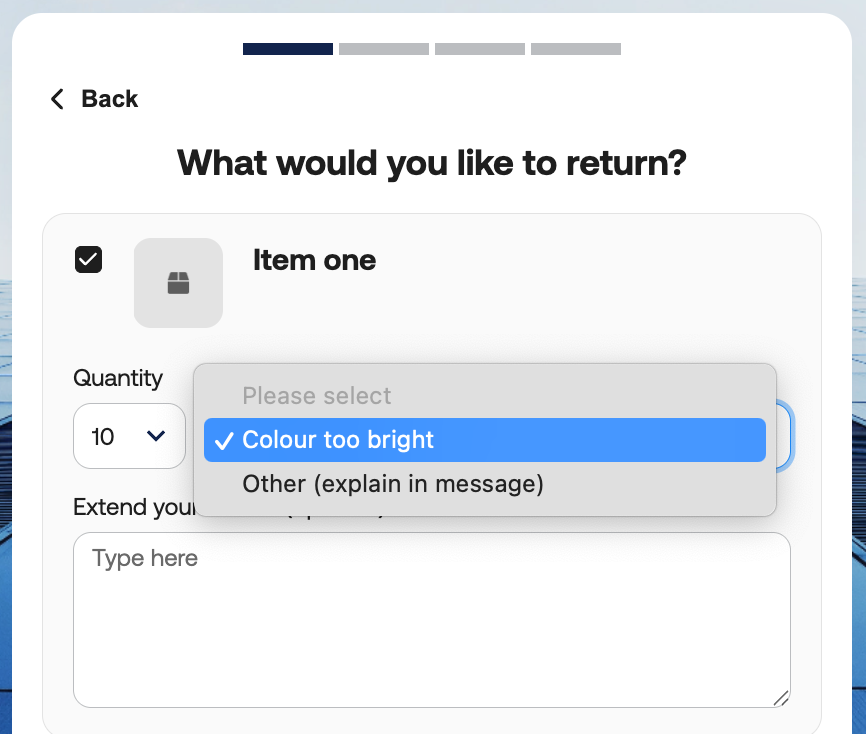
- Your customers will now be able to choose this reason in your Return Portal.
Where are custom return reasons used
Once you've created and added your custom return reasons in the Return Reason overview, they will automatically appear in your Return Portal for customers to choose from, just like the predefined reasons. You can also use them in your Return Rules to automate actions based on your own return logic, giving you more control over how returns are handled.