Purpose: This article guides you through setting up Service Point Delivery in Sendcloud’s Dynamic Checkout. With Service Point Delivery, customers choose a pickup location (service point) instead of home delivery.
Service Point Delivery through Dynamic Checkout
Service point delivery allows your customers to pick up their parcels from a convenient location of their choice. This delivery method is a popular alternative to home delivery, often offering a more cost-effective option and higher delivery success rates.
By using Dynamic Checkout, you can easily configure service point delivery and offer it through various carriers.
When customers select this delivery option at checkout, they will be able to choose their preferred service point. This selection will sync with your order system, making the fulfillment process smoother and more efficient for your team.
Step 1 Create or open a Dynamic Checkout configuration
To offer Service point Delivery, first create a new Dynamic Checkout configuration or open an existing one.
- Go to Settings > Dynamic Checkout.
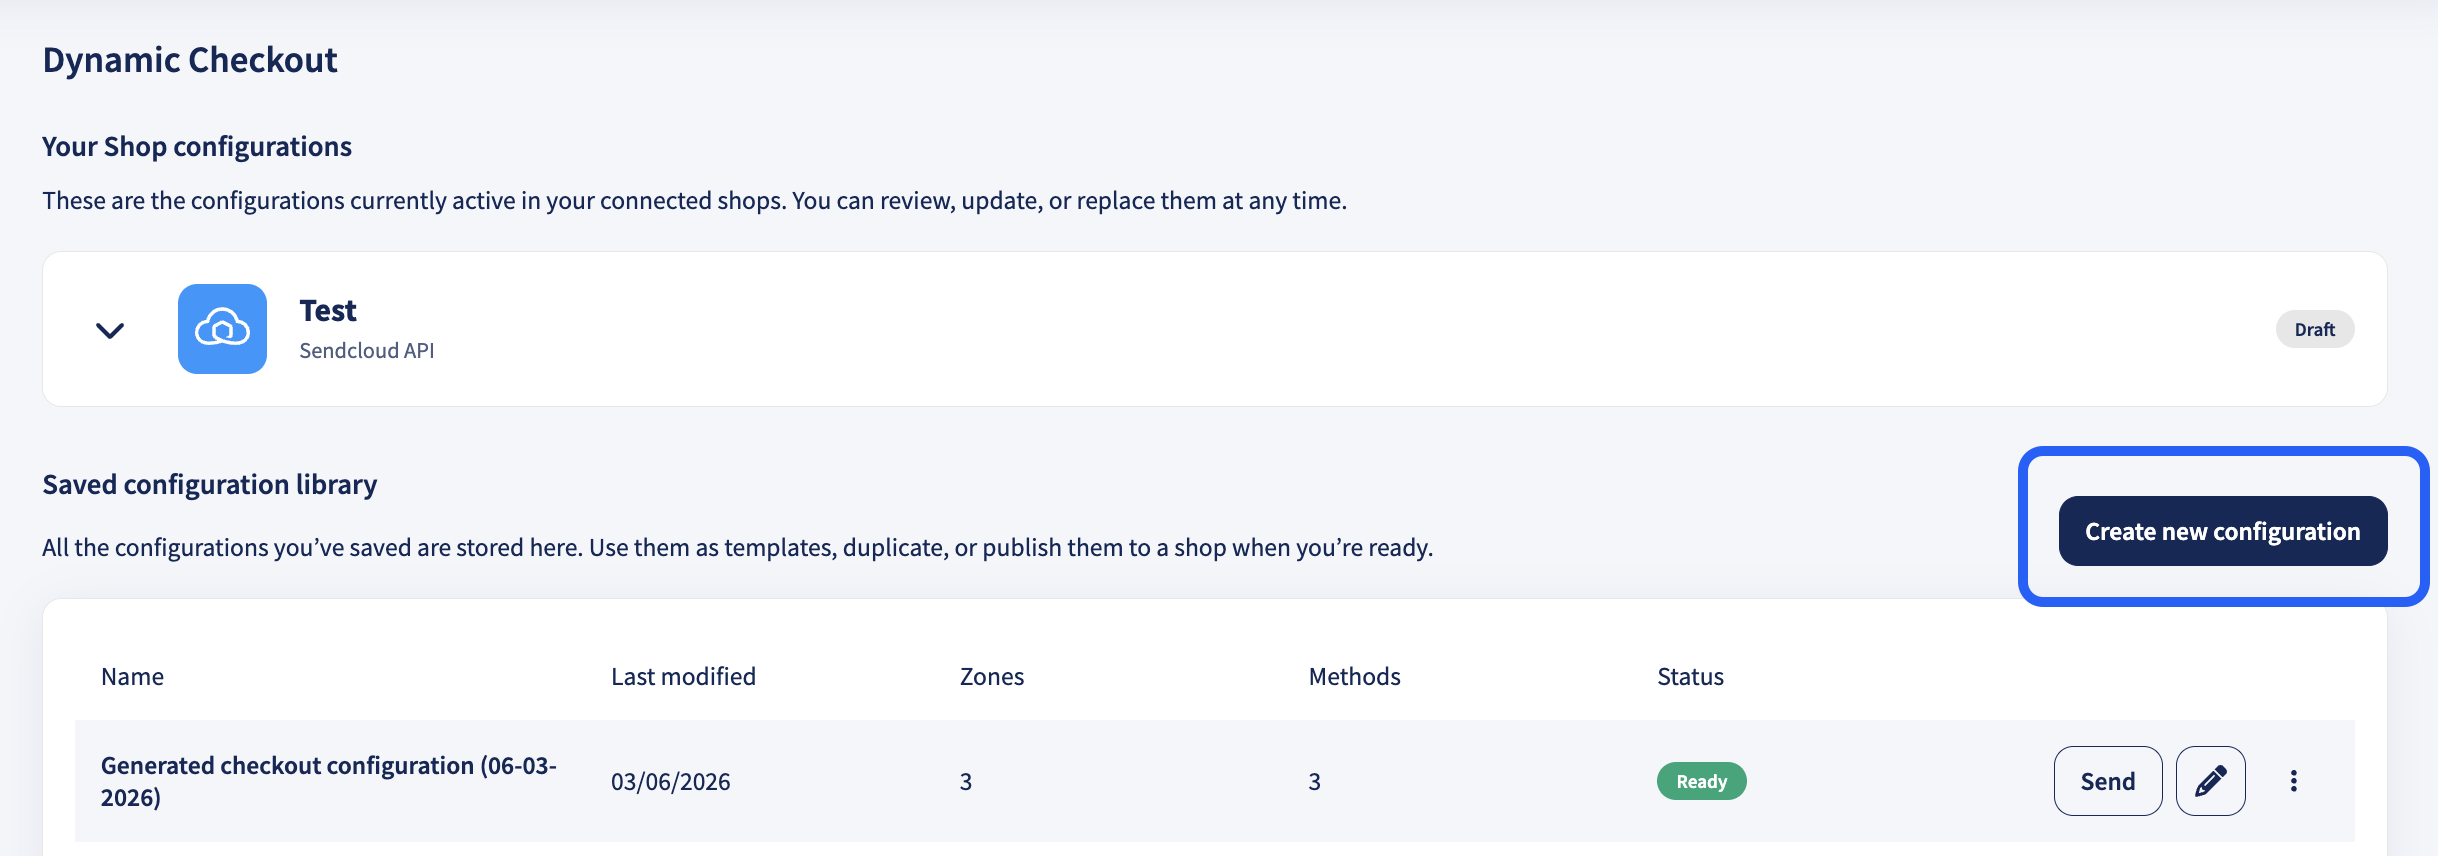
- If this is your first time setting up Dynamic Checkout, click Get started. Otherwise, click Create new configuration.
- During the setup, you will complete: Shipping destination → Delivery methods → Carriers → Configuration.
Step 2 Select shipping destination (sender address, time zone, destination)
In Shipping destination, select:
-
Sender address (the warehouse/location you ship from).
Make sure the correct sender address is selected in your configuration. You can change it using the dropdown menu.
The sender address determines which carriers and shipping services are available for Service point Delivery. Selecting the correct warehouse location ensures accurate delivery options and transit times. -
Time zone (should match the sender address location so cut-off and handover times behave as expected).
The time zone is based on your account settings by default. Make sure it matches the location of the sender address you use to fulfill these orders.
For example, if you ship from the UK, set the time zone to UTC+00:00 GMT. If you ship from the Netherlands, set the time zone to UTC+01:00. -
Destination country or countries you want to offer this configuration for.
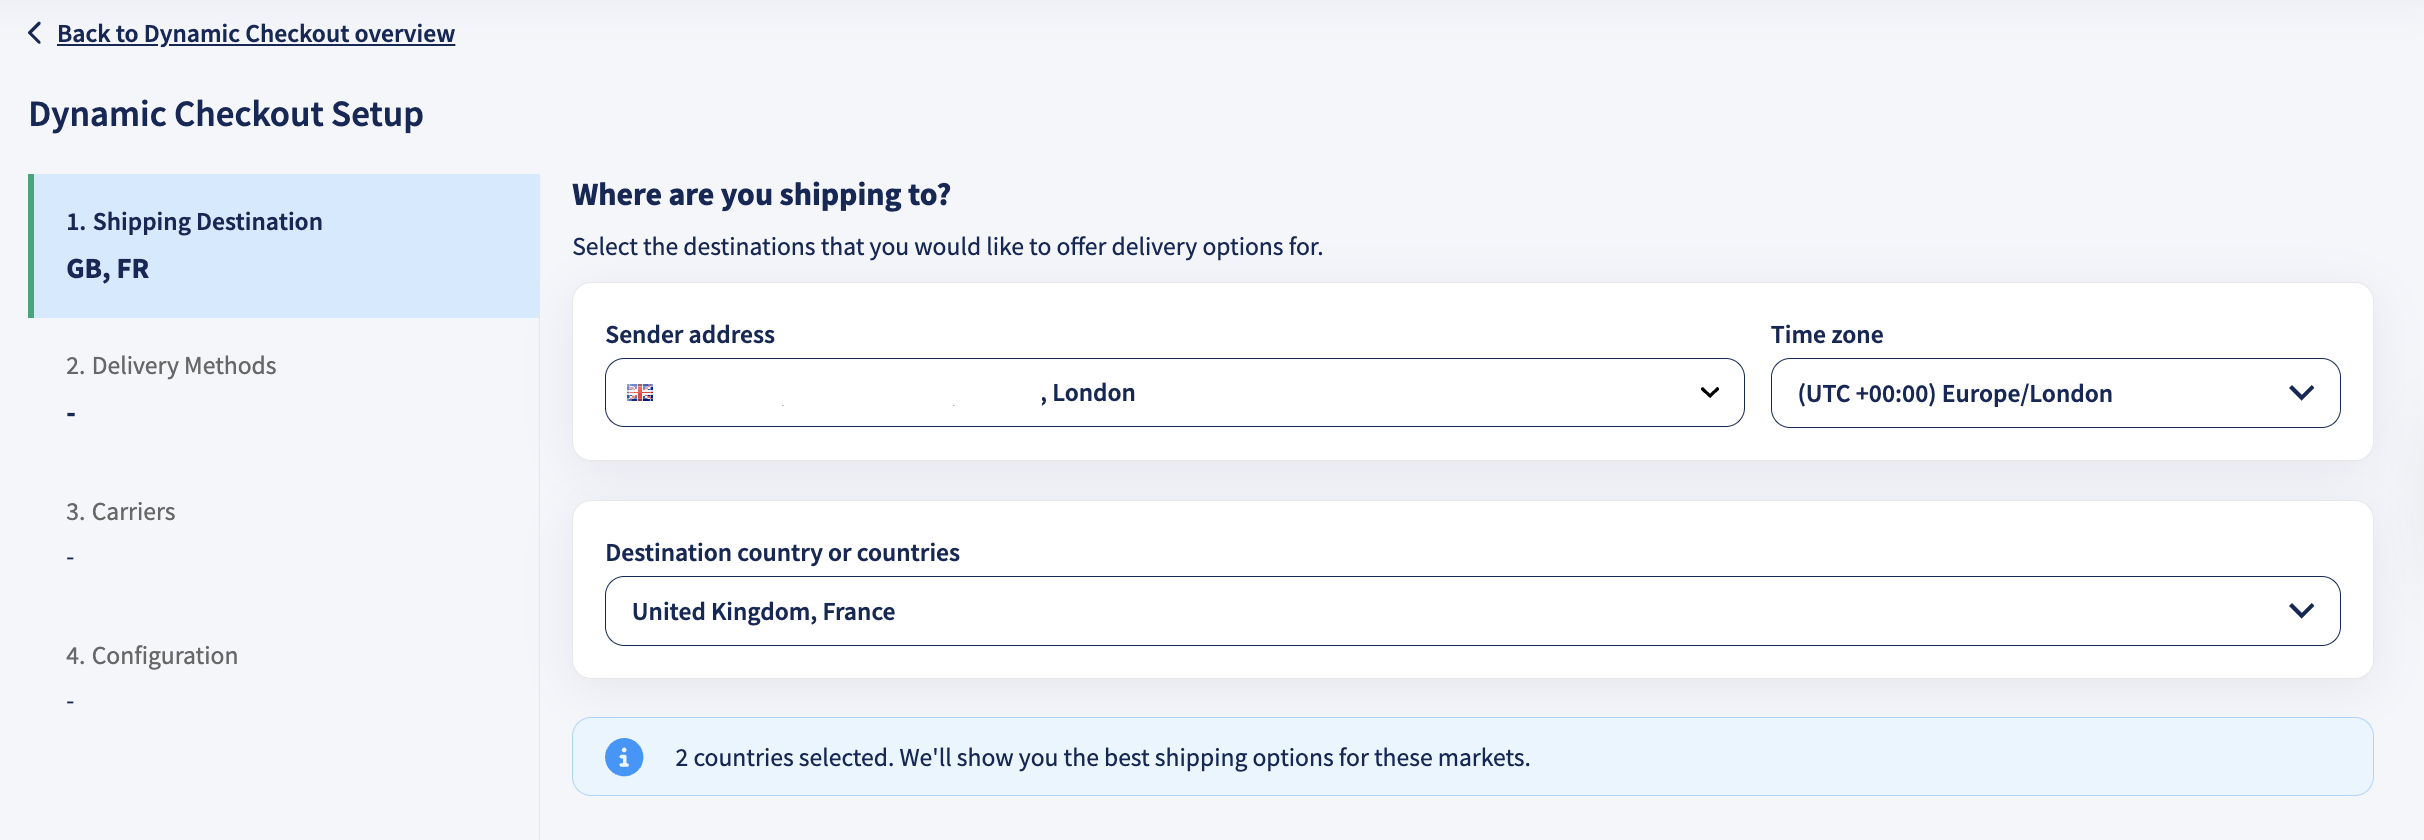
When you’re done, continue to Delivery methods.
Step 3 Choose delivery methods (enable Service point delivery)
In Delivery methods, select which delivery methods you want to offer. Enable Service point delivery.
You can enable additional methods (for example, Standard, Nominated day, or Same day) now or add them later from the configuration overview.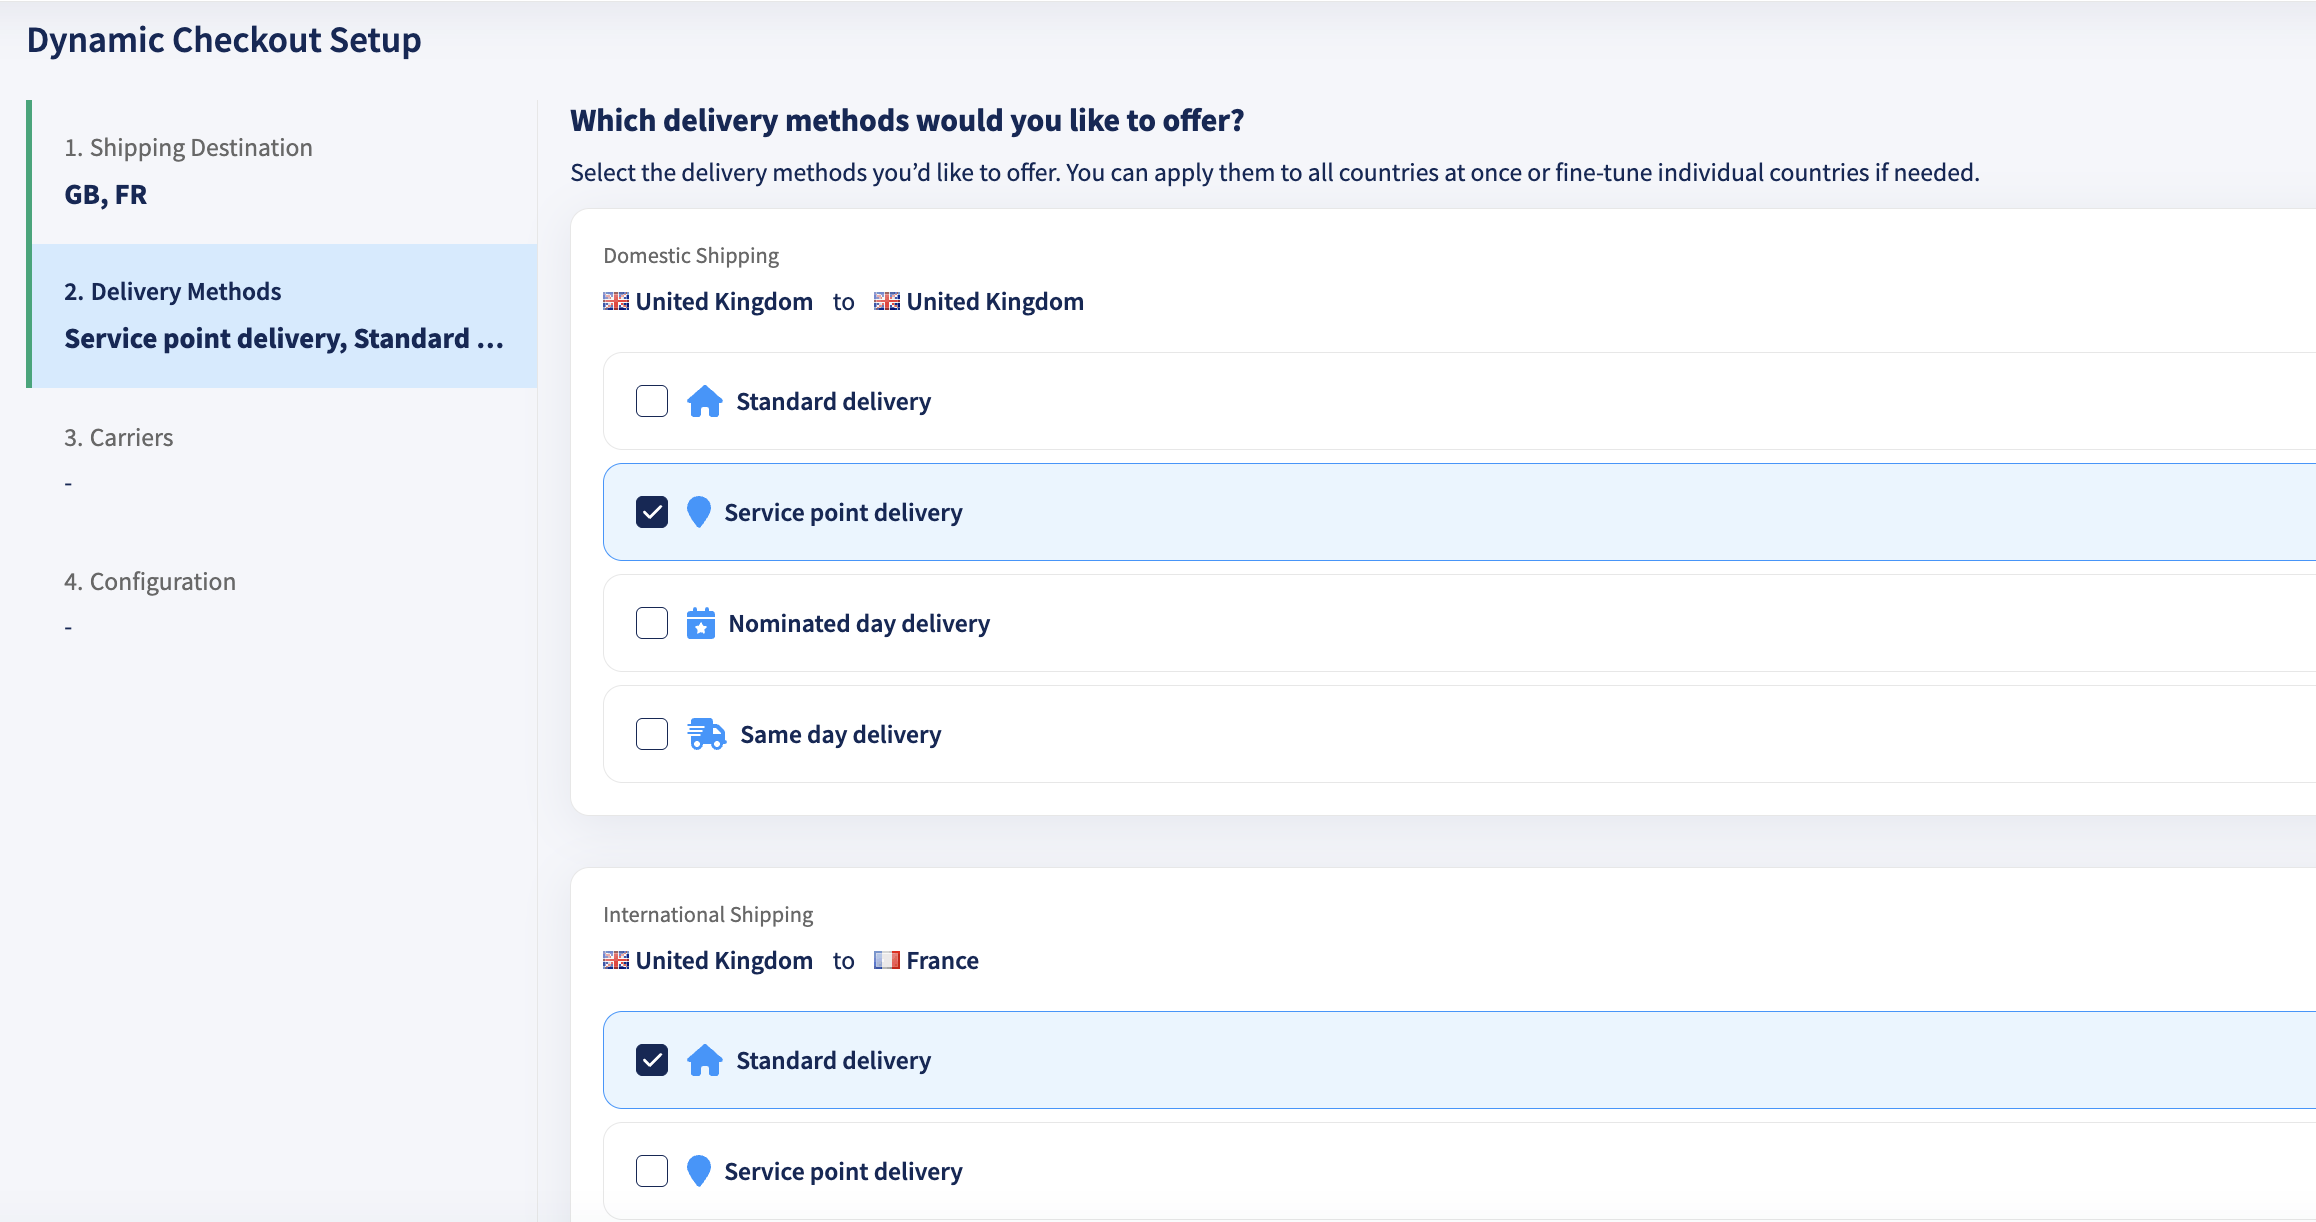
Step 4 Select your carrier(s)
After enabling Service point Delivery, in Carriers, choose the carrier(s) you want to offer at checkout for the selected destination(s).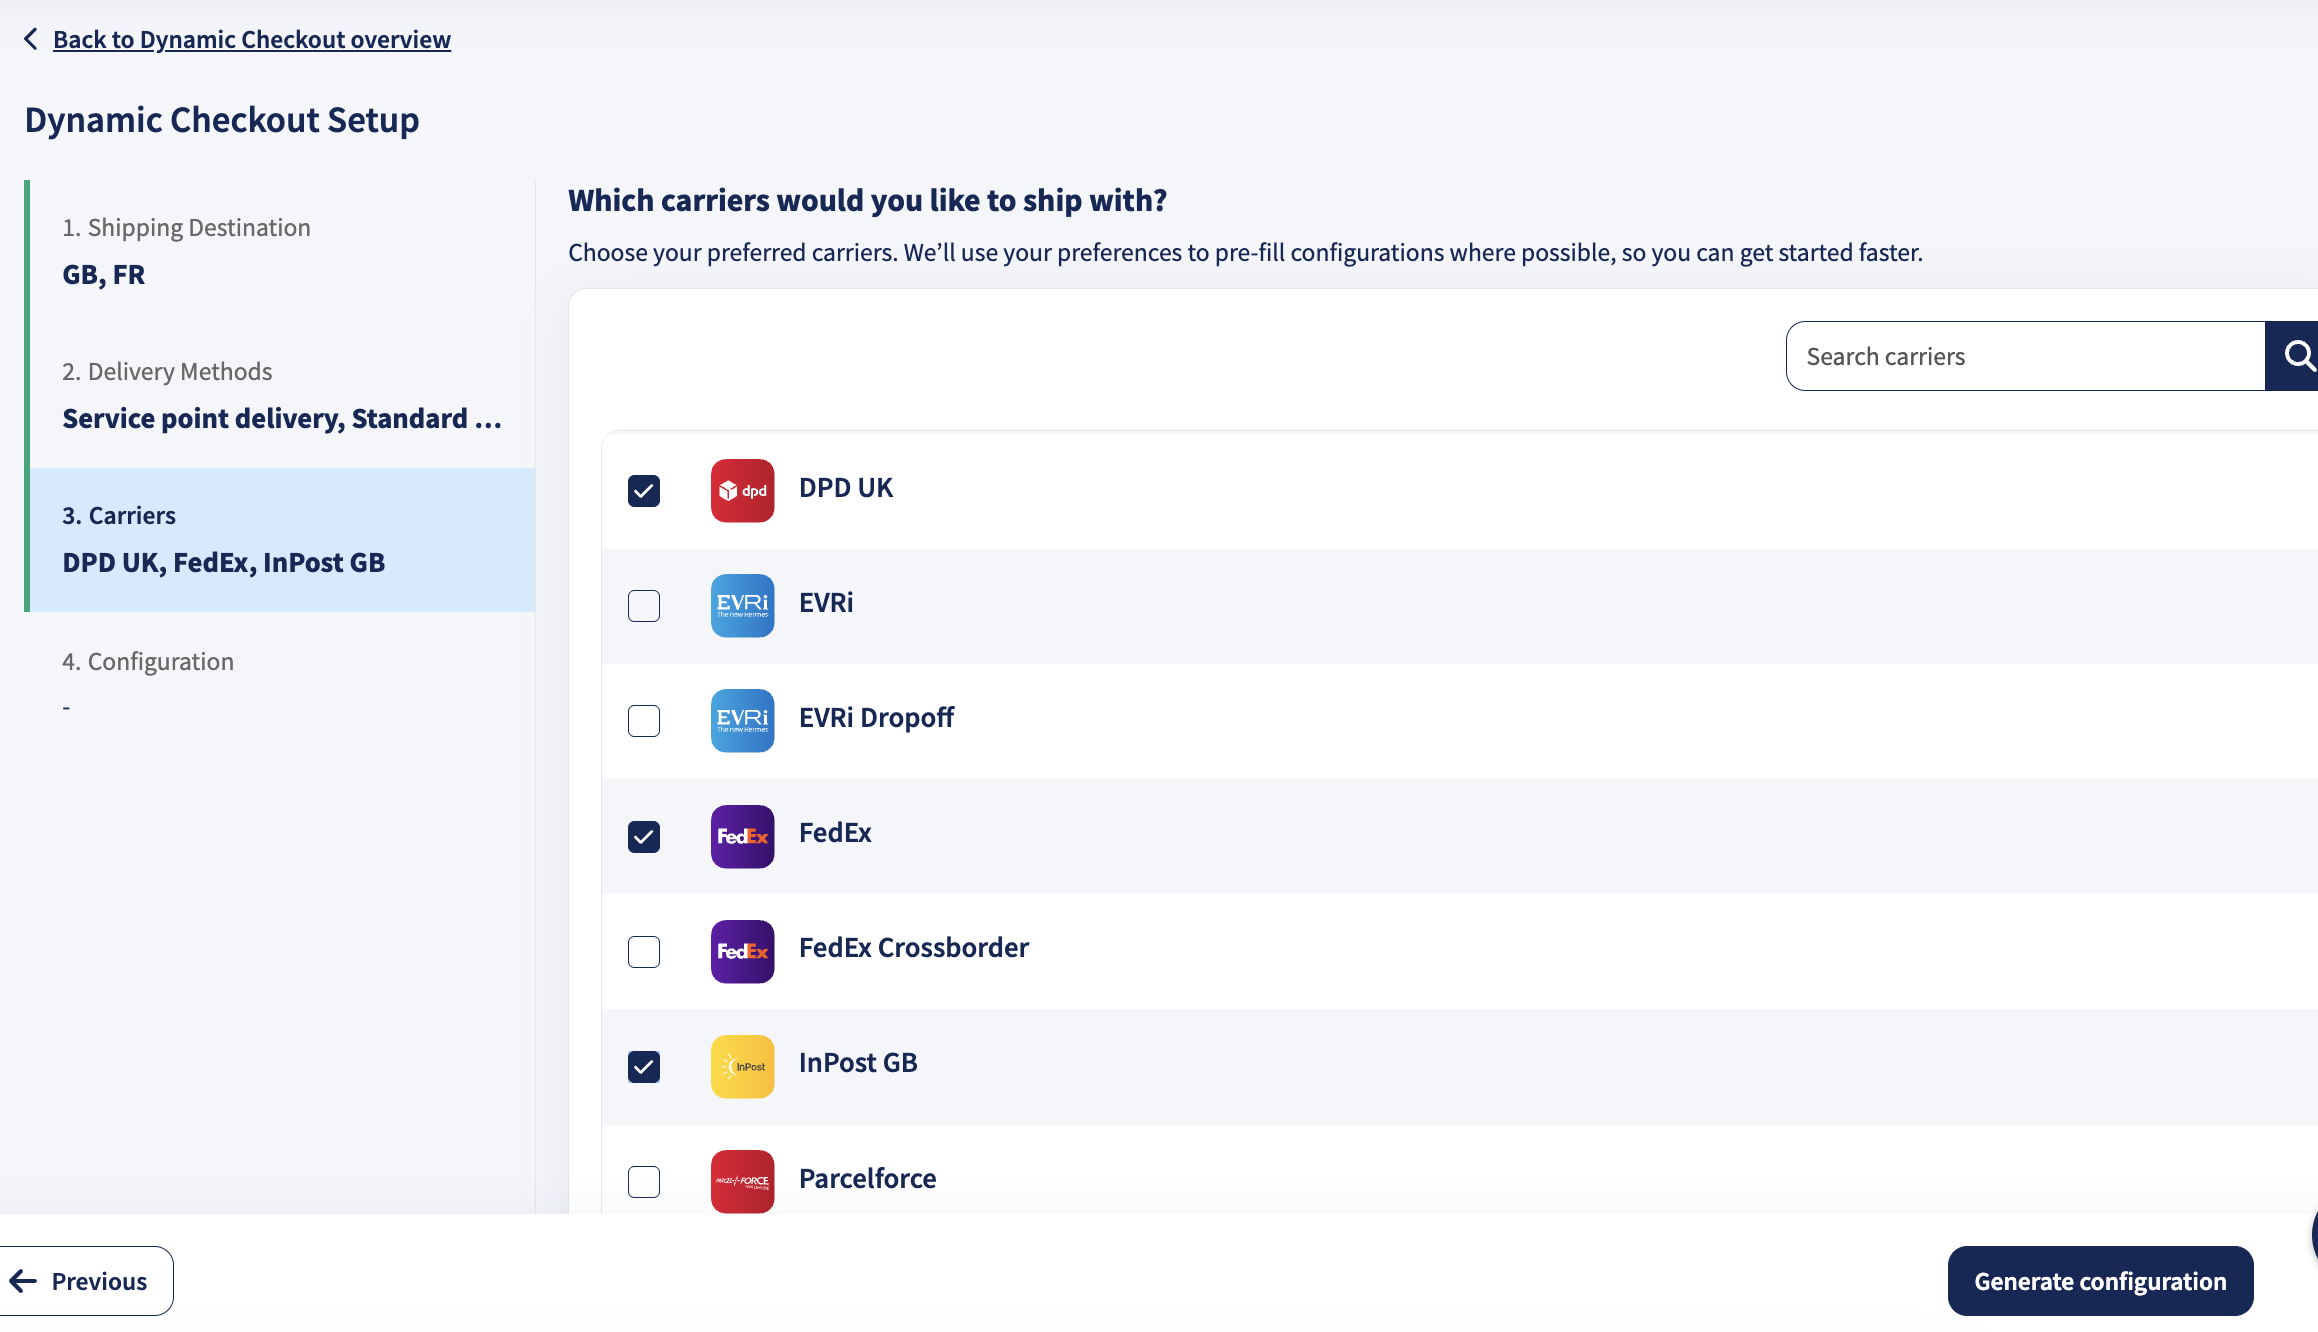
Use the carrier search if needed, then continue to Configuration.
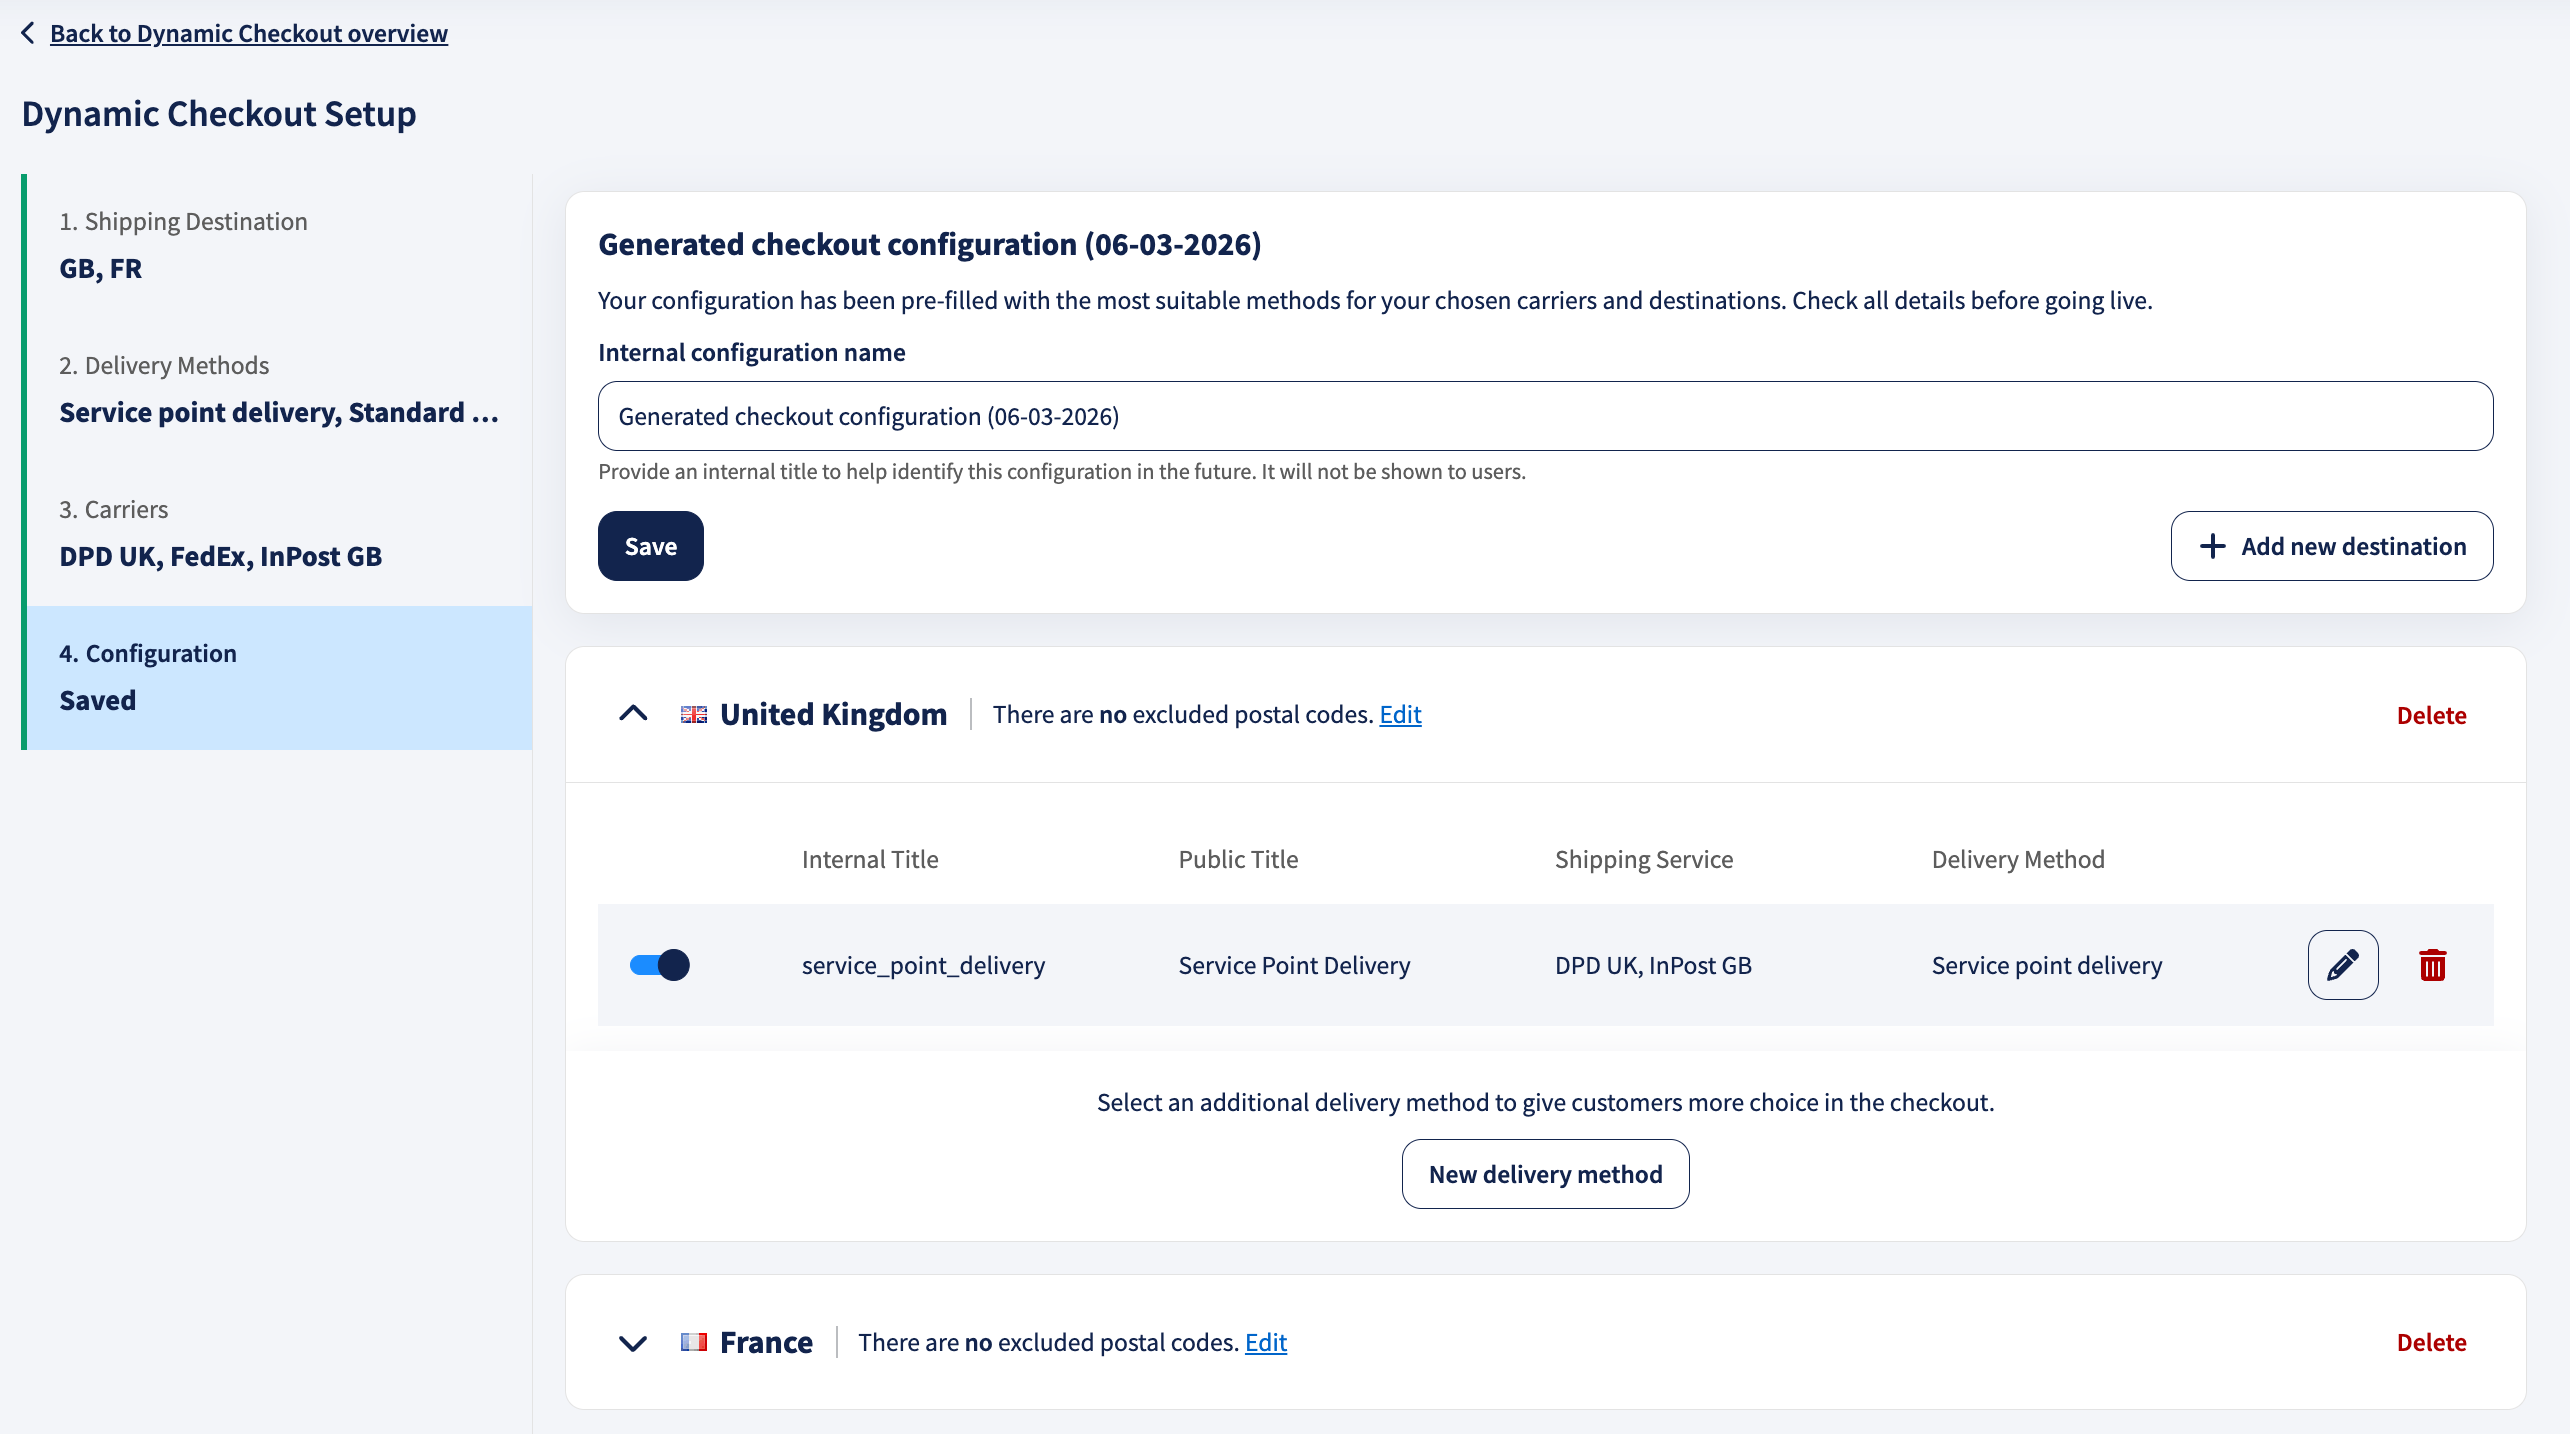
Step 5 Review the generated configuration
In Configuration, Dynamic Checkout generates a configuration based on your selections. From here you can:
- Edit excluded postal codes for a destination.
- Add a new destination to extend the configuration.
- Add a new delivery method.
- Use the pen icon to open the delivery method editor and fine-tune the method.
Step 6 Edit Service Point Delivery in the delivery method editor
Click the pen icon to open the editor. Inside the editor, you’ll see these sections:
6.1 Shipping service
In Shipping service selection, choose the service point carrier(s) you want to use by selecting them from the list.
Exceeding weight limits
Under Exceeding weight limits, you can optionally enable: Display the delivery method even for orders exceeding the maximum weight limit. Use this carefully; if an order exceeds the service point limit, it may need to be split into multiple parcels with separate labels.
6.2 Shipping rates
In Shipping rates, enable Set shipping rates in Sendcloud to configure pricing for this delivery method.
- Choose default weight classes (predefined by the shipping service), or custom weight classes (create your own ranges).
- Make sure you enable at least one weight class and enter a rate, otherwise the method will show as incomplete.
Optional: Enable "Offer free shipping from a specific order amount" if you want free Service Point delivery above a threshold.
6.3 Handover & cut-off times (handover schedule)
If you enable Handover & Cutoff Times, you can define when this Service point Delivery option is available at checkout and until what time customers can select it.
It allows you to control when customers can place orders based on your fulfillment schedule.
- Handover days: the days you can hand parcels over to the carrier. Select every day or choose specific weekdays.
- Start time: the earliest time this delivery method is visible in checkout.
- Cut-off time: the latest time customers can still select this method. After this time, it won’t appear.
For example, if you stop processing parcels at 15:00, set your cut-off time to 15:00. After that time, this delivery option will no longer appear at checkout.
Tip: Set these based on your fulfillment capacity and the carrier’s collection schedule.
Properly configuring order placement days and cut-off times helps ensure customers only see delivery options that you can operationally support.
6.4 Checkout rules
In Checkout rules, enable Use checkout rules if you want to automatically show or hide this method based on conditions such as destination area, basket value, or parcel characteristics.
For more details about Checkout Rules, see this article.
6.5 General details
In General details, set how the method appears:
- Public title (what the shopper sees at checkout)
- Public description (optional helper text under the title)
- Internal title (for internal identification in Sendcloud)
Click Save in the editor when finished. Optional: use Copy method ID if you need the identifier for API or debugging flows.
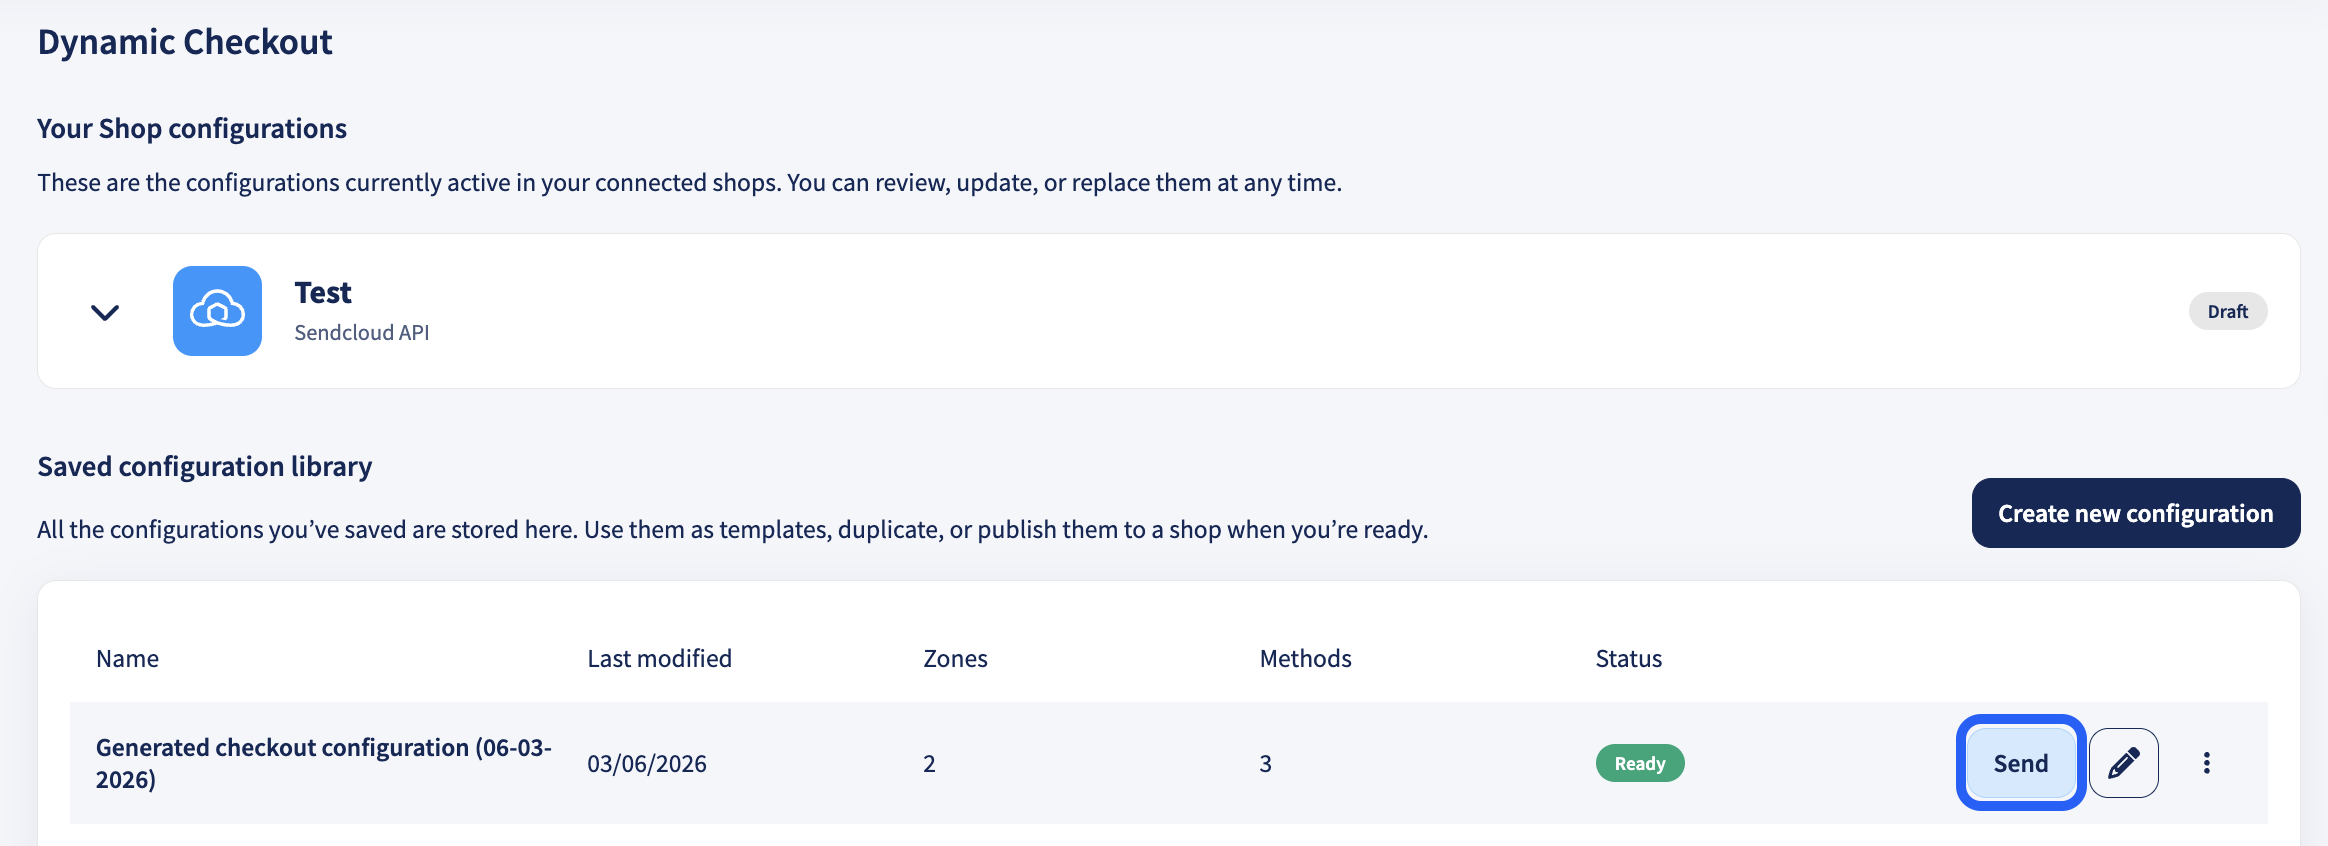
Step 7 Save the configuration and send it to your shop
Once you complete the setup, click Save, then Complete setup, and your configuration will be available in your Saved configuration library.
From there, you can set it live in your shop by clicking Send and selecting the integration you want to send this configuration to.
- Select your integration.
- Click Send.
Click the pen icon to edit a configuration, or the 3 dots to rename, duplicate, or delete one.