
Topic: Learn how to connect your Linnworks e-commerce platform to Sendcloud, configure shipping methods, create shipping labels, and migrate from the legacy Linnworks integration to the new version (V2).
The new integration replaces the previous Linnworks integration.
However, you don't need to remove your existing integration before installing V2. Both versions can run alongside each other during the migration.
Once you've successfully configured and tested the new integration, you can remove the old one.
See how to migrate to the new Linnworks integration.
Important: Activating shipping methods in your Sendcloud account does not automatically make them available in Linnworks. Each time you activate a new shipping method in Sendcloud, you must manually add it to your Linnworks Sendcloud integration.
How to connect Linnworks to Sendcloud
Step 1: Install the Sendcloud app in Linnworks
To begin the integration process, install the new Sendcloud app from the Linnworks Apps menu.
- Log in to your Linnworks account.
- Navigate to the Apps menu.
- Search for Sendcloud Shipping V2 and select the app.
- Install the latest version of the Sendcloud app.
Step 2: Connect Sendcloud with Linnworks
Once you've installed the app, connect your Linnworks account to Sendcloud.
- In your Linnworks account, navigate to Integrations in the main menu.
- Click + Add integration.
- Search for Sendcloud and click Integrate.
- Enter your Linnworks Account ID in the account name field for the integration you want to connect to Sendcloud.
- Click Connect in the integration window. This will open your Sendcloud account.
- Log in to Sendcloud to authenticate the connection.
- Return to the Linnworks installation wizard and click Next.
- Select the Brand and Sender Address you want to associate with parcels shipped through this integration.
- Enable Create Return Label if you want to generate return labels together with outgoing shipping labels.
- Choose which Linnworks order field should be used as the Order Number in Sendcloud.
Step 3: Add Sendcloud shipping methods in Linnworks
After connecting your accounts, you need to add the Sendcloud shipping methods you want to use in Linnworks.
To add a shipping method:
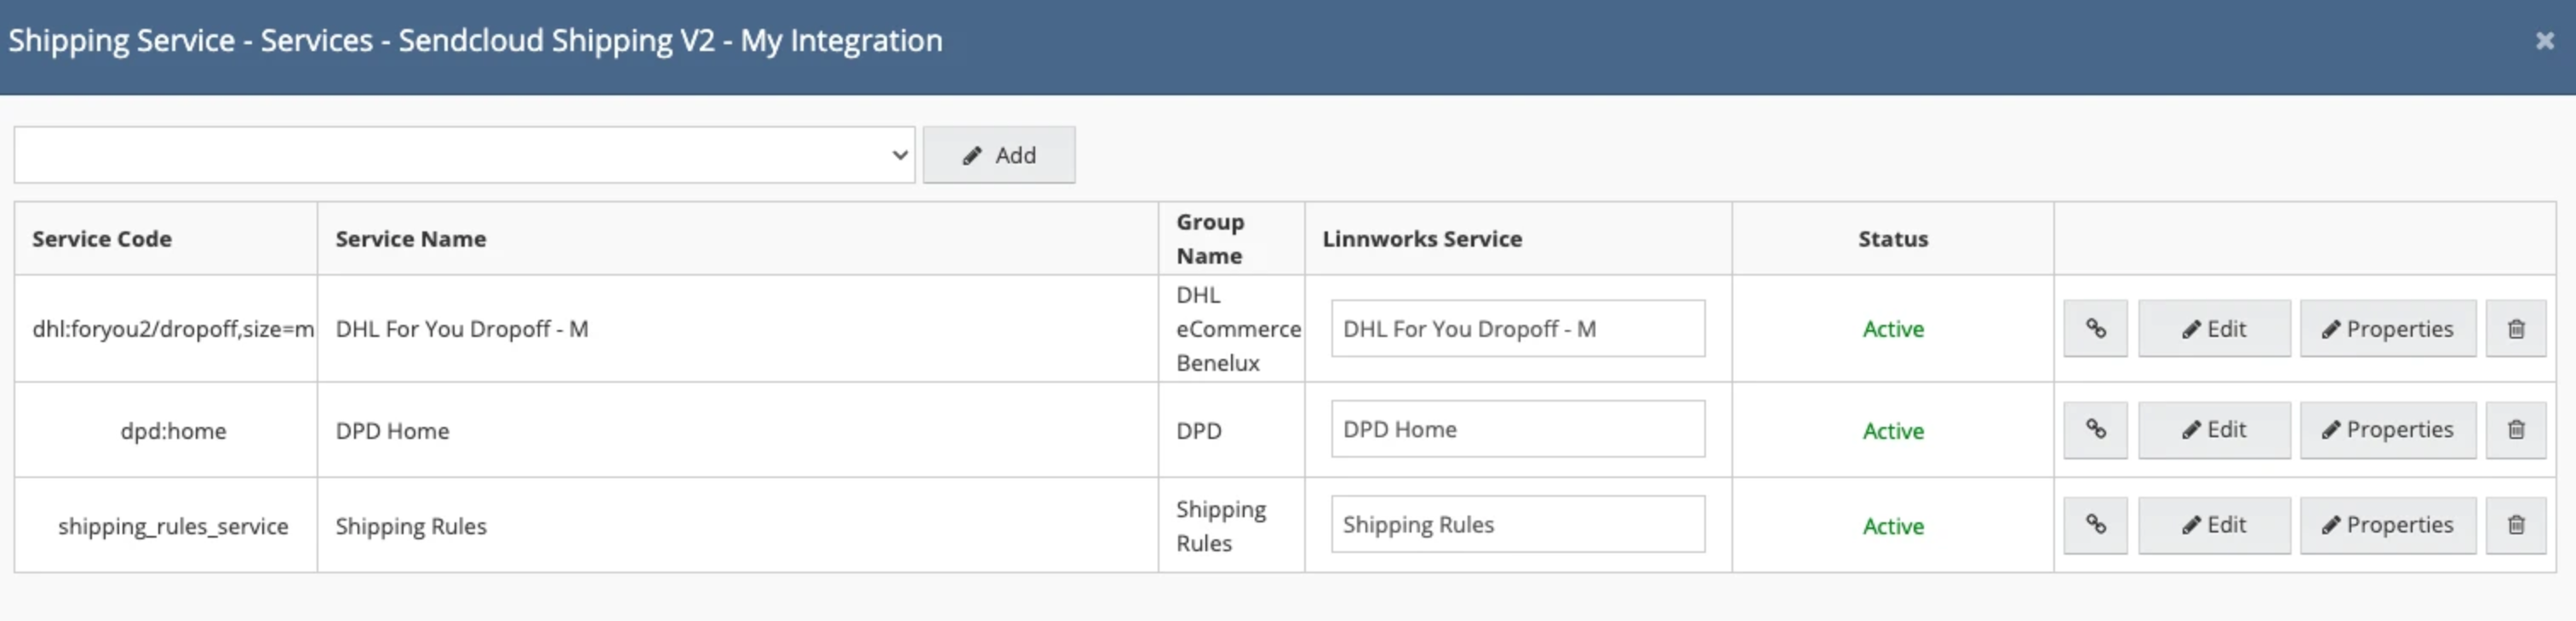
- In Linnworks, navigate to Shipping > Shipping integrations.
- Locate your Sendcloud integration and click Services.
- Click Add to create a new shipping service.
- Select the Sendcloud shipping method you want to add.
- Save your changes.
Step 4: Map extended properties to Sendcloud fields
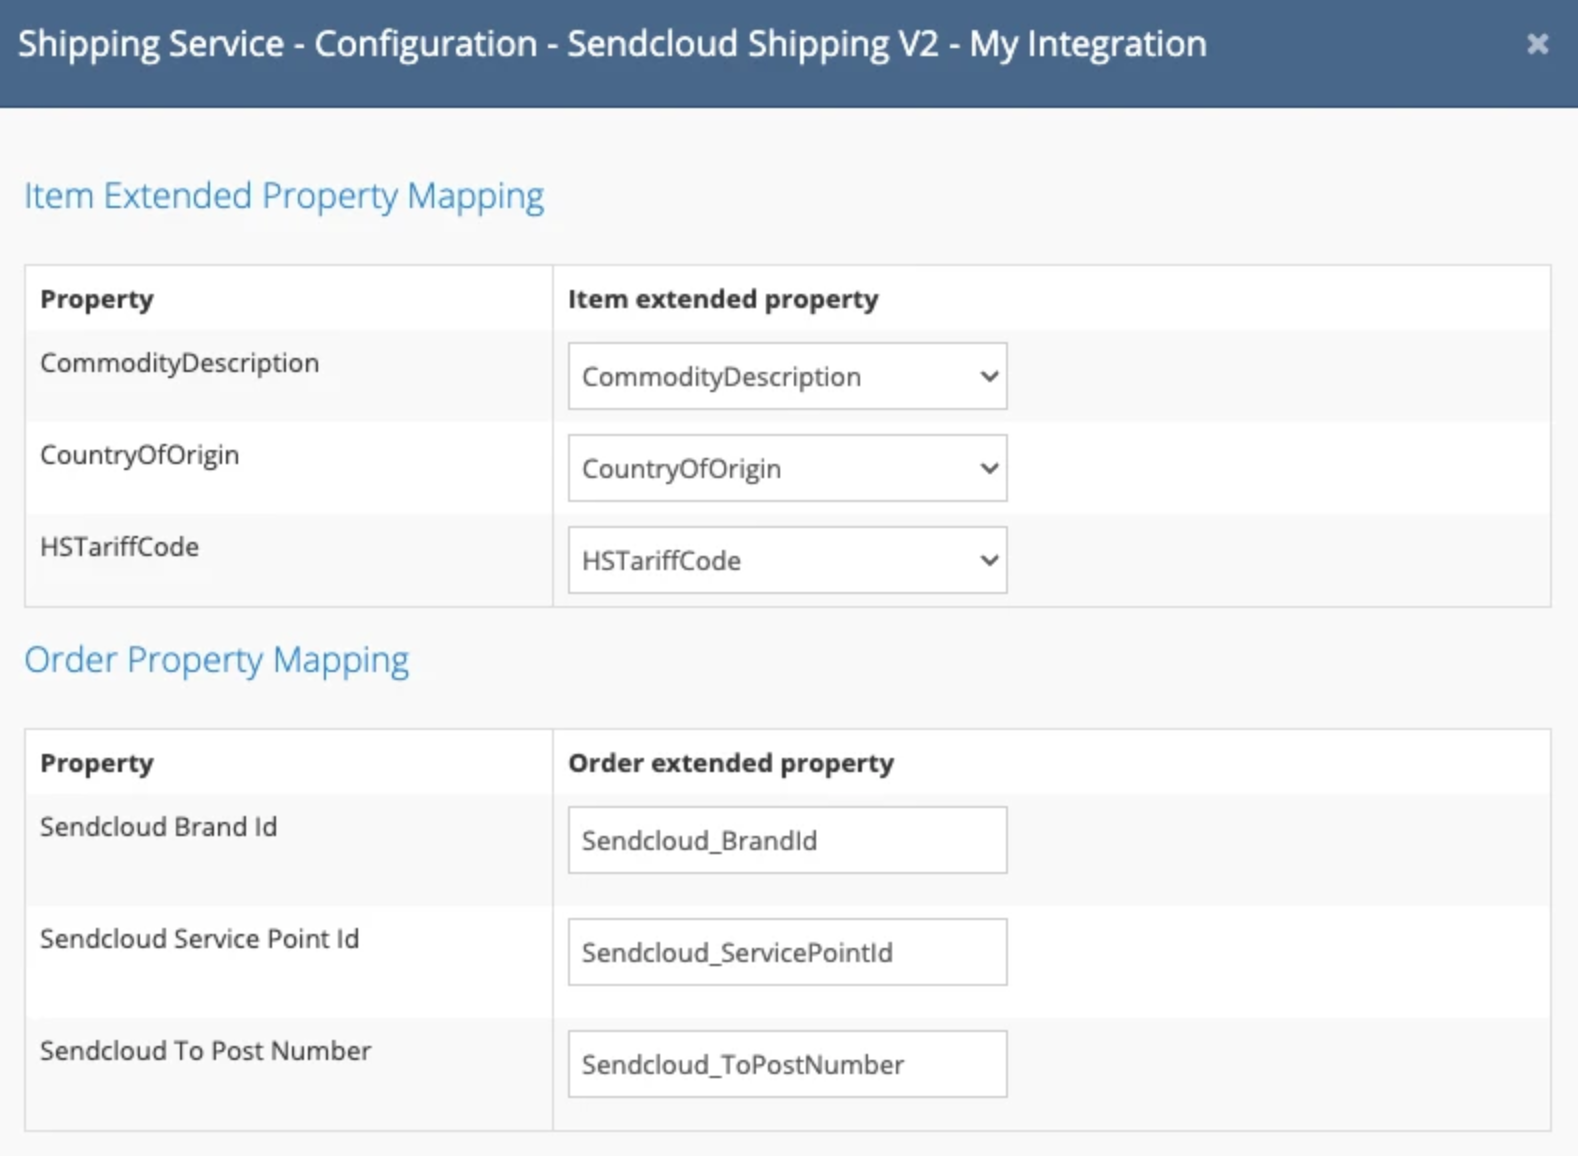
You can map Linnworks item and order properties to the corresponding Sendcloud fields to transfer additional information when processing shipments.
Configure the mapping of the relevant Item Properties and Order Properties in your integration settings.
You can also configure the Sendcloud Brand ID field.
Step 5: Finalize the integration and test
Once you've completed the configuration, test the integration to make sure everything works as expected.
- Check that your Sendcloud account is successfully connected to Linnworks.
- Verify that you've added the shipping methods you want to use.
- Process a few test orders.
- Confirm that the shipping labels are generated correctly and that the relevant shipment information is transferred to Sendcloud.
If you encounter any issues or have questions, please contact our Support team.
How to create and manage shipping labels
Once your integration is configured, you can create shipping labels for your Linnworks orders using Sendcloud shipping services.
Step 1: Select a shipping service
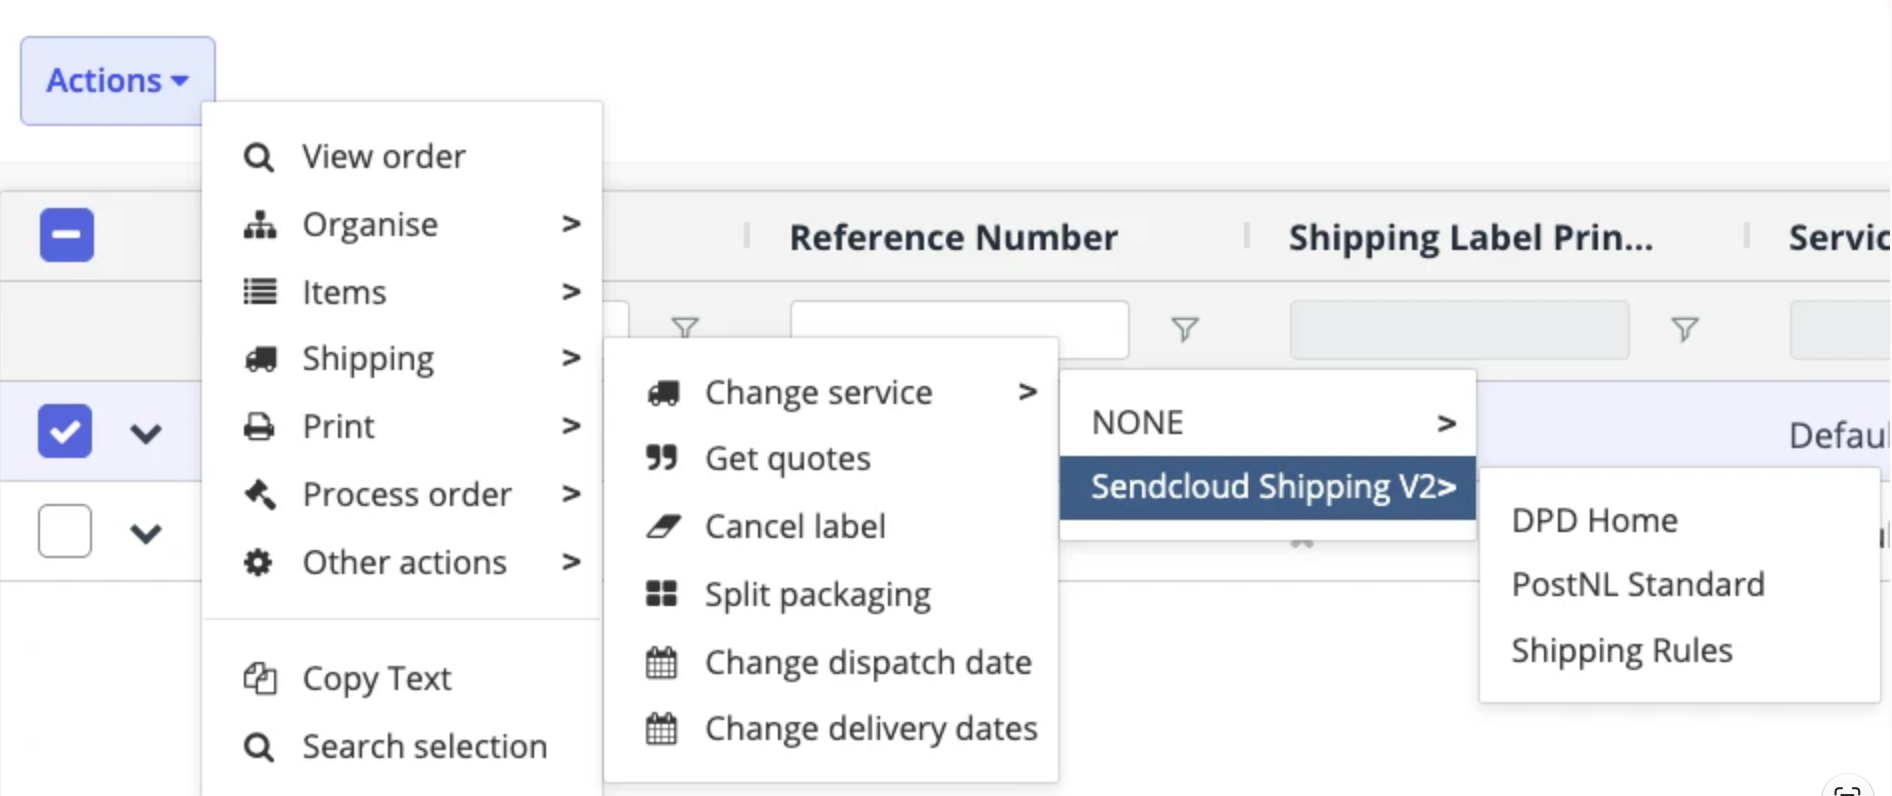
Open the order you want to ship in Linnworks.
Select one of the shipping services provided by Sendcloud, or use the Shipping Rules option if you've configured shipping rules in your Sendcloud account.
Step 2: Print shipping labels
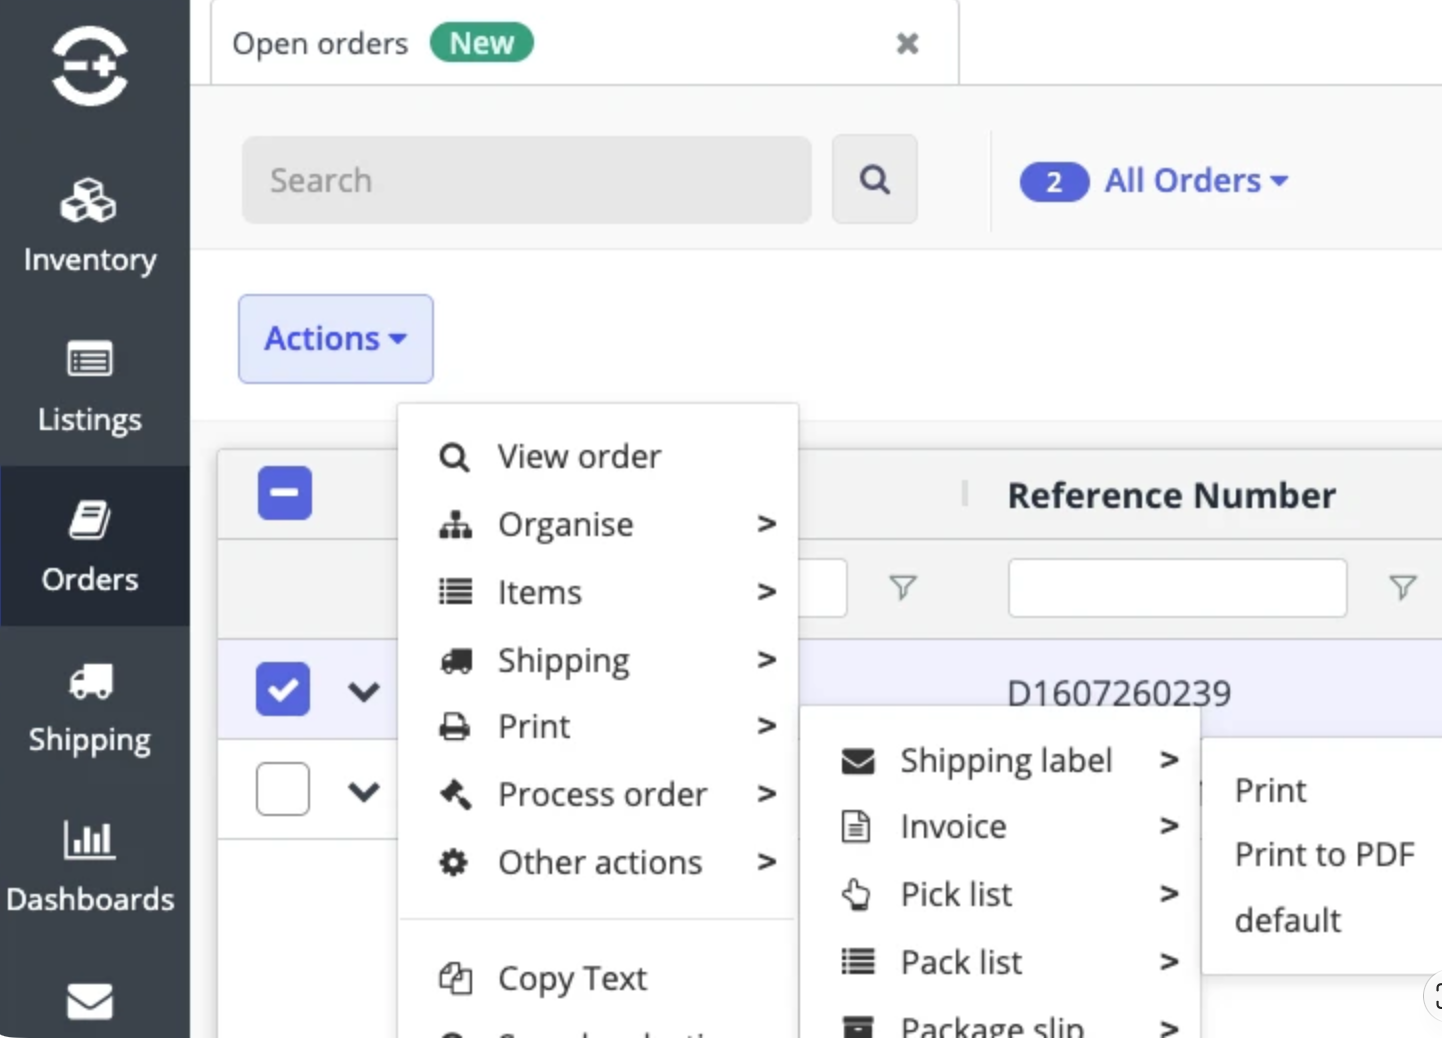
Print a shipping label for each package in your order.
The way shipments are created in Sendcloud depends on whether the selected shipping service supports multicollo (multi-parcel shipments):
- Shipping services supporting multicollo: A single shipment containing multiple parcels will be created in Sendcloud.
- Shipping services not supporting multicollo: A separate shipment will be created in Sendcloud for each package.
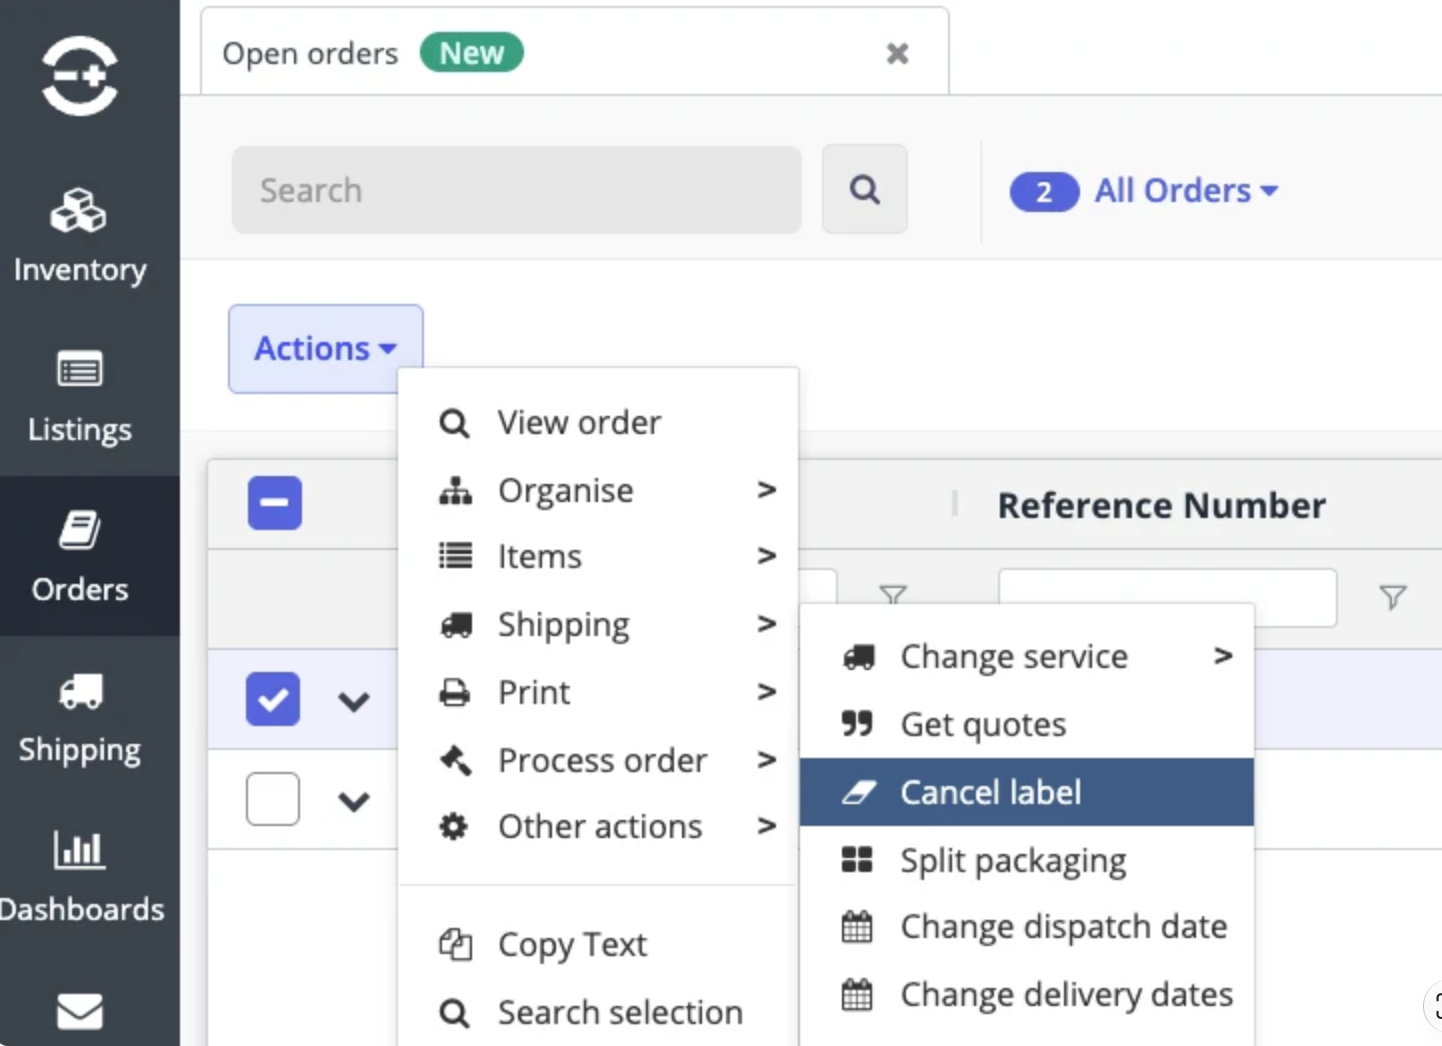
Step 3: Cancel a shipping label
If you need to cancel a shipping label:
- In Linnworks, navigate to Shipping.
- Locate the shipment whose label you want to cancel.
- Click Cancel label.
Migrate from the legacy Linnworks integration to V2
If you're currently using the previous Linnworks integration, you'll need to install and configure the new version (V2).
The legacy integration was developed by a third-party provider and cannot be upgraded directly to V2. Instead, you must install the new integration separately.
How to migrate to the new integration
-
Install the new integration.
Follow the installation instructions to install Sendcloud Shipping V2 in Linnworks. -
Connect your Sendcloud account.
Authenticate the connection and configure your brand, sender address, and other integration preferences. -
Add your shipping methods.
Add the Sendcloud shipping services you want to use in Linnworks. -
Configure additional properties.
If needed, map your Linnworks item and order properties to the corresponding Sendcloud fields. -
Test the new integration.
Process a few orders and verify that the shipping labels are generated correctly. -
Remove the legacy integration.
Once you've confirmed that the new integration works correctly, you can remove the previous Linnworks integration.
If you need assistance with the migration, please contact our Support team.